• Skip to primary navigation
  • Skip to main content
  • Skip to primary sidebar
  • Skip to footer

Crafty For Home

a little bit of everything we do to make a home

  • Home
  • Recipes
    • Appetizer
    • Beef And Lamb
    • Chicken, Turkey, Duck
    • Cookie, Cake, Bread
    • Rice, Noodle, Pasta
    • Salad
    • Seafood
    • Smoothies, Beverages, Ice Cream, Popsicle
    • Vegetarian
    • Kitchen Picks
  • CRAFT
    • Fabric Craft
    • Paper Craft
  • GARDENING
    • Plant Propagation
    • Simple Garden Project
    • Vegetable Garden
  • TRAVEL
    • Camping Trip
    • Road Trip
    • Indonesia
  • Blogging
    • RESOURCES
      • Blogging Tips
  • ABOUT
    • Contact Me

Plastic Pumpkins Falls Planters

September 18, 2019 by Crafty For Home

588 shares
  • Share
  • Tweet

Turn the plastic pumpkin buckets into pumpkin planter for an inexpensive fall season decor ideas for your front door or tabletop centerpiece in just ten minutes.

Quick and easy plastic pumpkin planter for mums flower

The summer garden is finished here officially because the weather is just too cold with occasional frost since early September. Time to decorate the front door for the fall season with something warm looking color while waiting for the pumpkin bread baked in the oven.

As an Amazon Associate I earn from qualifying purchases. This post may contain affiliate links. Please see the Disclosure Policy for details.

Plastic Pumpkin Fall Planter

I love the idea to turn a pumpkin into something else instead of carving it. But also using real pumpkin will still require work to maintain its freshness so it will last for a long time.

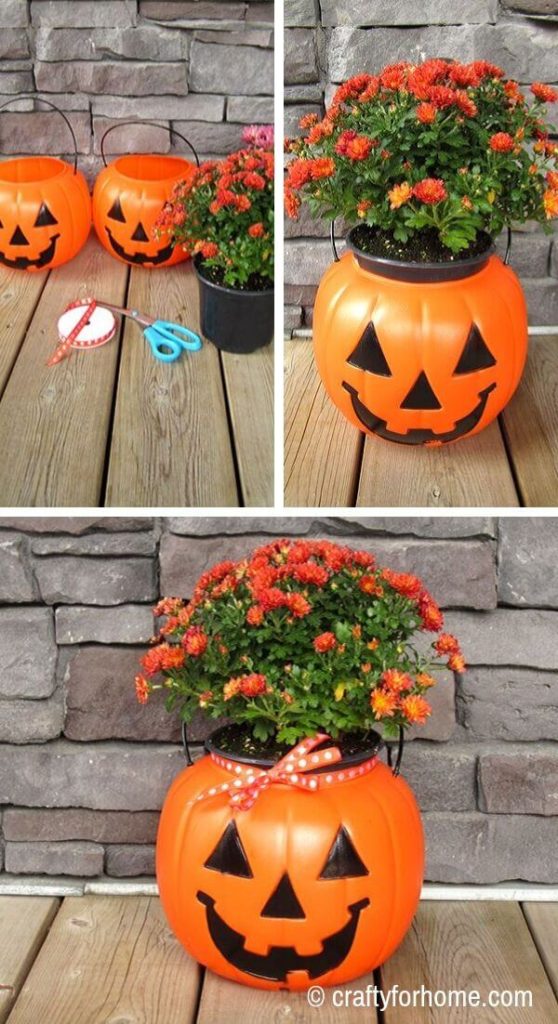
DIY Plastic Pumpkin Planters

Here I use the plastic pumpkin bucket that you can find it in store as well as online. The bucket will last a very long time, and you can use it over and over again for years. Also, kids can use the bucket for trick and treat.

All you have to do is insert the plant with the original container into the bucket. Position your new pumpkin planter by the front door or the side of the steps to welcome trick and treaters.

Make sure you drill the hole on the bottom of the pail for drainage. Water the plant as needed. Probably you won’t need to water it often as the weather is colder in the fall.

The pumpkin pail I use is a medium size, almost as big as the sweet baking pumpkin. It is enough size for the six inches mums container.

Supply For Making Plastic Pumpkin Planters

If you have a long fall season, you probably want to put more dirt into the pail. Then remove the nursery’s container before transplant the plant into the pumpkin bucket.

I also use 1-meter or 39 inches ribbon that is leftover from the Halloween treat bags. Wrap around the chrysanthemum’s nursery planter then make a double bow.

Plastic Pumpkin Planters

Plants For Fall Season Planters

For the mild fall season areas, there are lots of plants you can use for fall season planter. Here is a list of plants for the perfect fall season that withstands cooler weather in the night and possibility of light frost.

  • Falls Mums / Chrysanthemum
  • Ornamental Cabbage
  • Pansies
  • Calendula
  • Kale
  • Succulent
  • Ornamental Grass

Try using shrub that is still small size, like the burning bush or Japanese maple. The leaves color will add interest to the planter display.

Alternatively, add branches or decorative twig to the planter. You can also use several flower types to mix and match for dramatic looks.

Pumpkin Planters With Mums
This fall planter is so easy and no carving pumpkin needed! #pumpkinplanter #autumndecor Click To Tweet

If you are going to use the pumpkin planter for indoor fall decor, then you can use any plant, from a house plant, cut flowers, herb or flowers. Just make sure you check the plant first for bugs or any pest before you bring it inside.

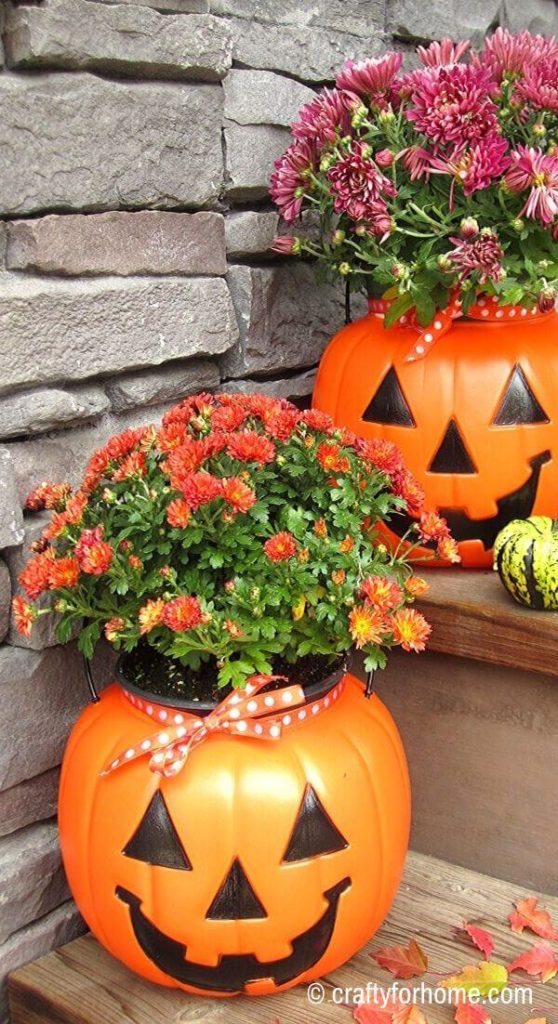
Pumpkin Mums Fall Planter

Here I use chrysanthemum flower for the planter. The fall weather in the area where I live is cold and snow occasionally.

And most garden centers here are selling mums flower since late summer. So, it is the easiest decision I can make to choose the plant for fall planter.

Plastic Pumpkin Fall Planters

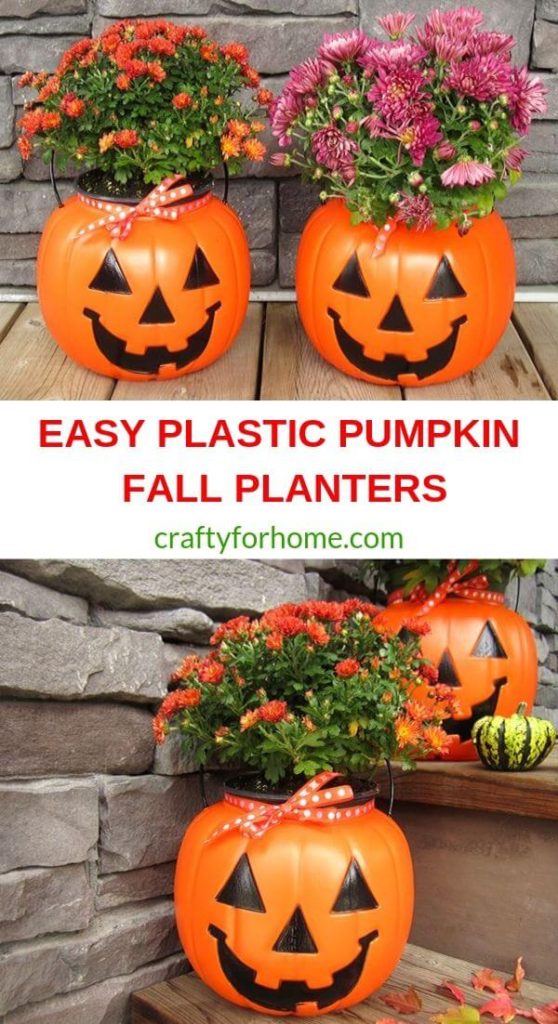
The best part of this DIY fall planter is inexpensive and no carving pumpkin involved. Also, you can use the plastic pumpkin bucket again for the next season over and over again. Just change the plant for the new look each year.

Use plastic pumpkins planter to decorate your front porch in the fall season.

You May Also Like

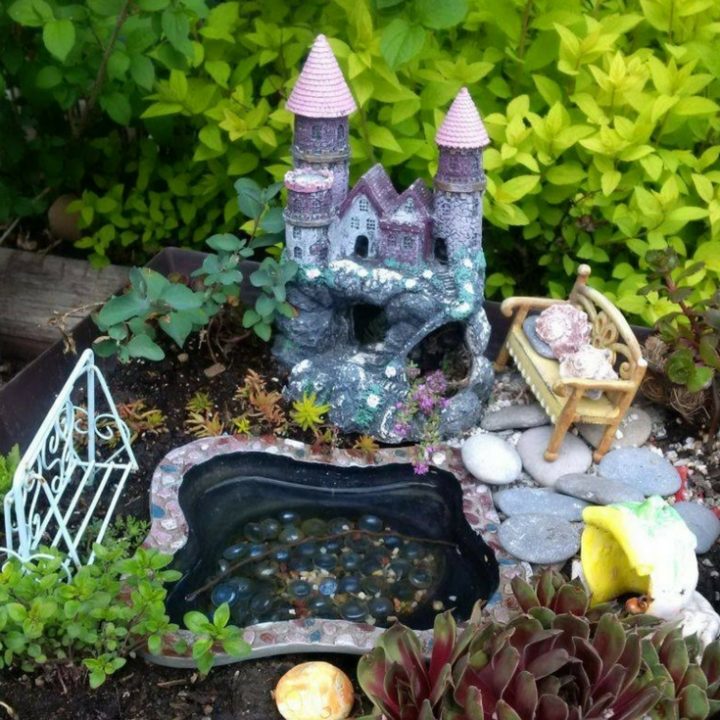
Miniature Garden Ideas

A simple miniature garden you can build by using found things and easy to grow plants.

Planting Coleus In A Container

How to plant coleus in a container for the shaded area and pair it with other plants for a different look.

588 shares
  • Share
  • Tweet

Filed Under: Simple Garden Project

Corner bookmark from orange fabric.

Easy Fabric Corner Bookmark

Making a DIY corner bookmark from fabric with this sewing bookmark tutorial is easy, and it is a great upcycle project from scrap fabric. It is also great for gift ideas. Sewing Corner Bookmarks From Fabric If you make the easy bookmarks from a fabric strip, make the corner style one. It is easier to…

Read More

Casserole carrier from fabric.

Easy Insulated Casserole Carrier

The sewing tutorial to make an insulated casserole carrier sleeve style makes it easy to transport your favourite dish to any gathering and keep the food warm. DIY Casserole Carrier  Carrying your favourite casserole for a potluck party or family gathering will be much easier, especially during the holiday season, using this insulated casserole carrier…

Read More

Green and brown pouch for earbud storage.

DIY Earbud Pouch Keychain Tutorial

Turn a couple of charm pack fabric square pieces into a DIY earbud pouch keychain to keep the earbud, phone charger, flash disc or any small items organized and easy to find. No-zipper Earbud Pouch This earbud holder doesn’t require to sew the zipper on. A pair of snap buttons will keep the pouch closed. …

Read More

Library tote bag with green fabric pocket.

Easy Library Tote Bag Tutorial With Pocket

Sewing tutorial to make a reversible library tote bag with lining and pocket fit for several books and has extra space for pens, phones, or snacks. DIY Book Bag This library tote bag has a boxed corner on the bottom, but you can skip the process to box it. It would be a similar process…

Read More

Colourful fabric strap from cotton.

DIY Fabric Strap Tutorial

Turn the long fabric rectangle into a fabric strap for a bag or make it into a shorter strap for a keyfob holder. It is a perfect upcycle fabric scrap project. Sewing Fabric Strap  When you have too much stash of fabric scraps, it is better to use it for a different sewing project. Especially…

Read More

Pink cell phone bag from fabric.

DIY Crossbody Cell Phone Bag Tutorial

This sewing tutorial is for making a phone pouch out of fabric as a mini crossbody cell phone bag with a flap, a pocket, and a removable strap. Mini Crossbody Phone Bag Sometimes you want to bring only necessary things when visiting a specific event like a carnival or live concert. This little phone pouch…

Read More

Previous Post: « Candy Corn Felt Treat Bag
Next Post: Teal Halloween Felt Treat Bag »

Reader Interactions

Leave a Reply Cancel reply

Your email address will not be published. Required fields are marked *

Recipe Rating


Primary Sidebar

WELCOME TO CRAFTY FOR HOME!

Hi, my name is Ina, and I am so thrilled you stopping by. Here I share you dairy free recipes, backyard gardening, and simple craft for the kids and the house. Read More…

  • Email
  • Facebook
  • Instagram
  • Pinterest
  • Twitter
  • YouTube

Get the PDF Format of 10 Different Style Cloth Napkins

10 Different Style Cloth Napkins Book Cover

Trending Post On Crafty For Home

Corner bookmark from orange fabric.

Easy Fabric Corner Bookmark

Casserole carrier from fabric.

Easy Insulated Casserole Carrier

Green and brown pouch for earbud storage.

DIY Earbud Pouch Keychain Tutorial

Library tote bag with green fabric pocket.

Easy Library Tote Bag Tutorial With Pocket

Colourful fabric strap from cotton.

DIY Fabric Strap Tutorial

Pink cell phone bag from fabric.

DIY Crossbody Cell Phone Bag Tutorial

Crafty For Home is a participant in the Amazon Associates Program, an affiliate advertising program designed to provide a means for us to earn fees by linking to Amazon and affiliated sites. As an Amazon Associate I earn from qualifying purchases.

© Crafty For Home

All images and contents are copyright protected. If you would like to re-publish the content from this site, please re-write it with your own images and words, and/or provide link back to this site.  It is NOT ok to copy paste the whole post including the picture and instructions.

Please contact me for any question at [email protected]

Footer

  • Copyright / Privacy Policy
  • Disclosure Policy
  • Work With Me

Copyright © 2023 · Foodie Pro & The Genesis Framework

588 shares