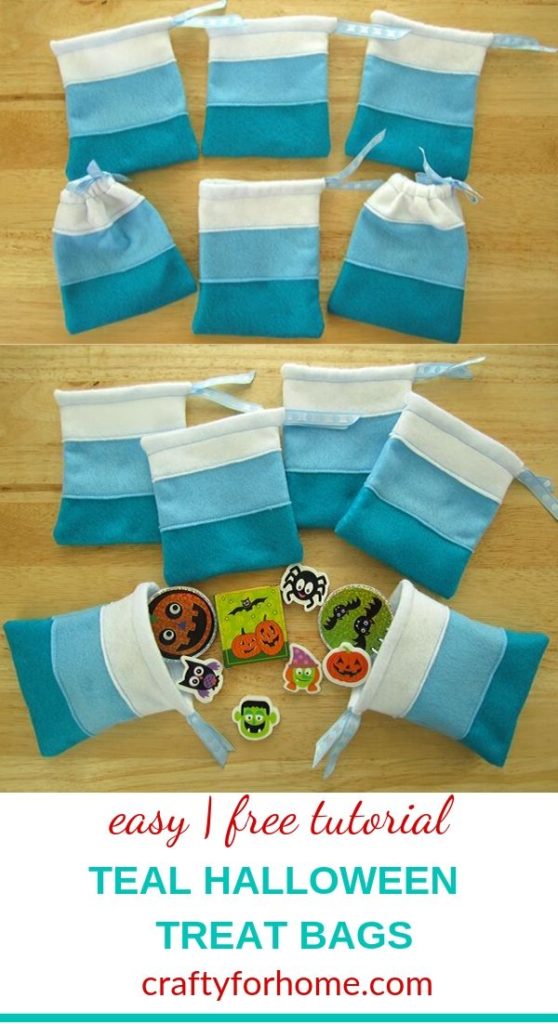
This simple sewing tutorial makes a teal pumpkin project bag for non-candy alternatives that you can make in one afternoon for a quick Halloween craft.
Use This Guide To make Teal Halloween Treat Bag
As a mom to a kid with severe dairy and nut allergy, it always makes me extra cautious during Halloween. I go with my kids for trick or treating around the block to make sure she doesn’t unwrap or touch anything that may cause allergic reactions.
As an Amazon Associate I earn from qualifying purchases. This post may contain affiliate links. Please see the Disclosure Policy for details.
Once she finishes, and we are back home, then I usually sort it out for what she can have. I basically can work it out that way, so both my kids can enjoy Halloween like her friends who don’t have an allergy.
It is also essential for me to have treats that are safe for kids with an allergy who comes to my house. A friend told me about the teal pumpkin project a few years ago, so I like to make this teal Halloween treat bag.
I use the same material as the candy corn treat bag. You only need felt fabric sheets and ribbon. The good thing working with felt fabric is you don’t need serger or overlock stitch. A simple straight stitch is perfectly fine.
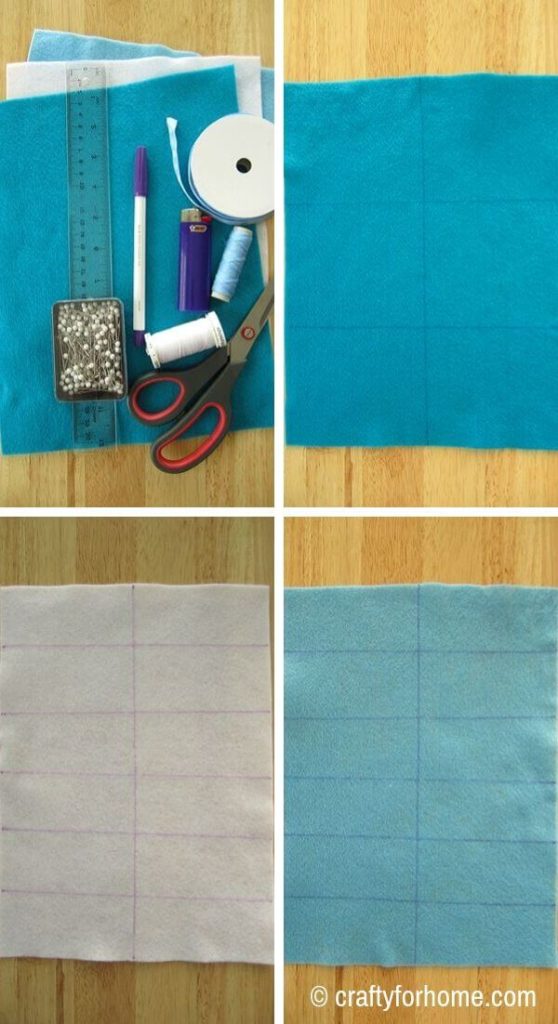
What You Need To Make Teal Felt Treat Bag
- 1 sheet of white felt fabric size 22 cm x 29.5 cm or 8.5 inches x 11.5 inches
- 1 sheet of light blue/aquamarine felt size 22 cm x 29.5 cm or 8.5 inches x 11.5 inches
- 1 sheet of teal felt size 22 cm x 29.5 cm or 8.5 inches x 11.5 inches
- Ribbon
- Disappeared ink fabric marker
- Pin
- Safety pin
- Ruler
- Thread
- Scissors
- Lighter
- Sewing machine or hand stitch needle
How To Make Teal Felt Treat Bag
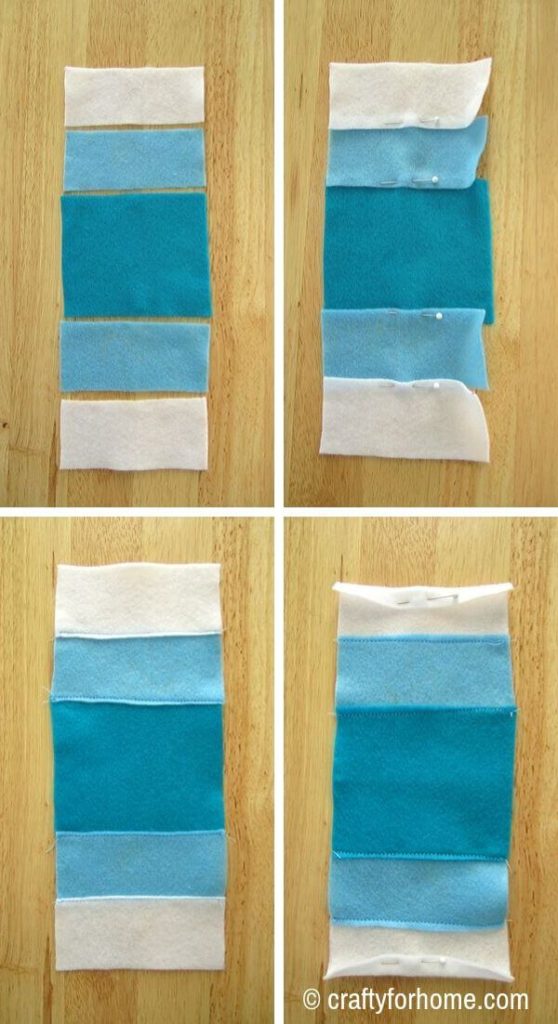
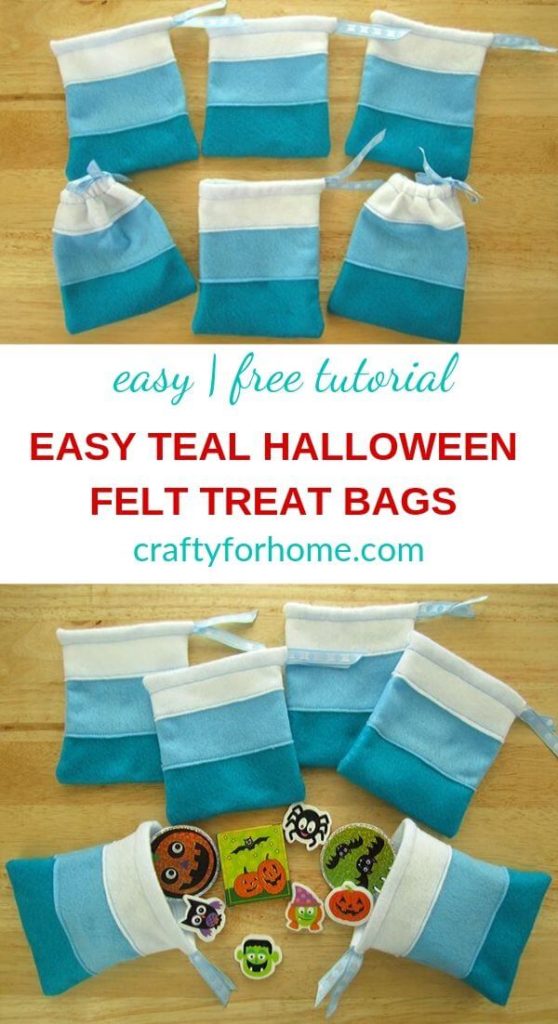
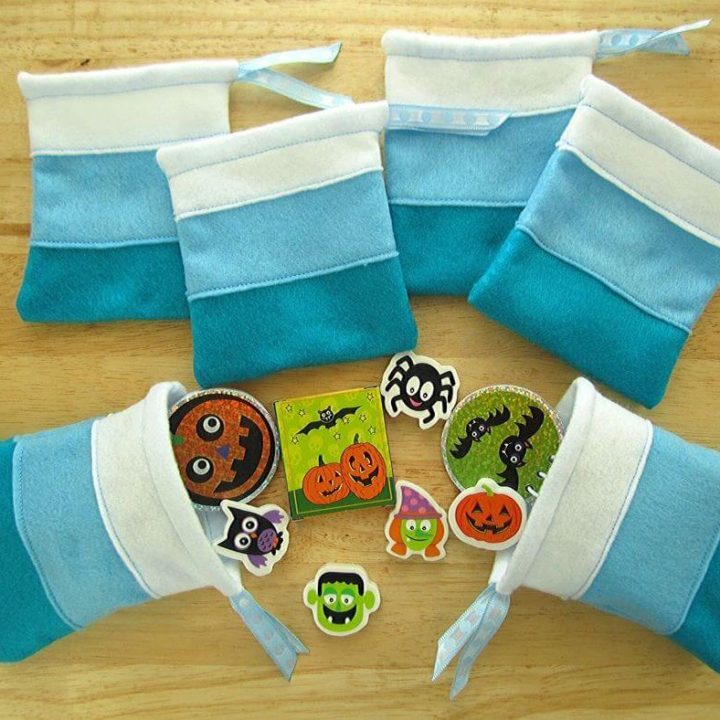
From three felt fabric, you will get six Halloween teal favor bags. It will be enough room for 3-6 items as the filler. The final size of the loot bag is about 4 inches x 4.5 inches or 10 cm x 12 cm.
- Cut the teal felt into 6 rectangles. Each piece size 11.5 cm x 10 cm or 4.5 inches x 3.9 inches
- Cut the light blue/aquamarine felt into 12 rectangles. Each piece size 11.5 cm x 5 cm or 4.5 inches x 1.9 inches
- Cut the white felt into 12 rectangles. Each piece size 11.5 cm x 5 cm or 4.5 inches x 1.9 inches
- Cut the ribbon into 12 inches or 30 cm long and seal the cut by using lighter to prevent fraying
- Arrange the felt, white-light blue-teal-light blue-white, pin it by overlapping each piece
- Sew the felt on the overlapping side, and now you will have one long rectangle
- Fold the white felt about half an inch, pin it then sew straight, this is for the ribbon
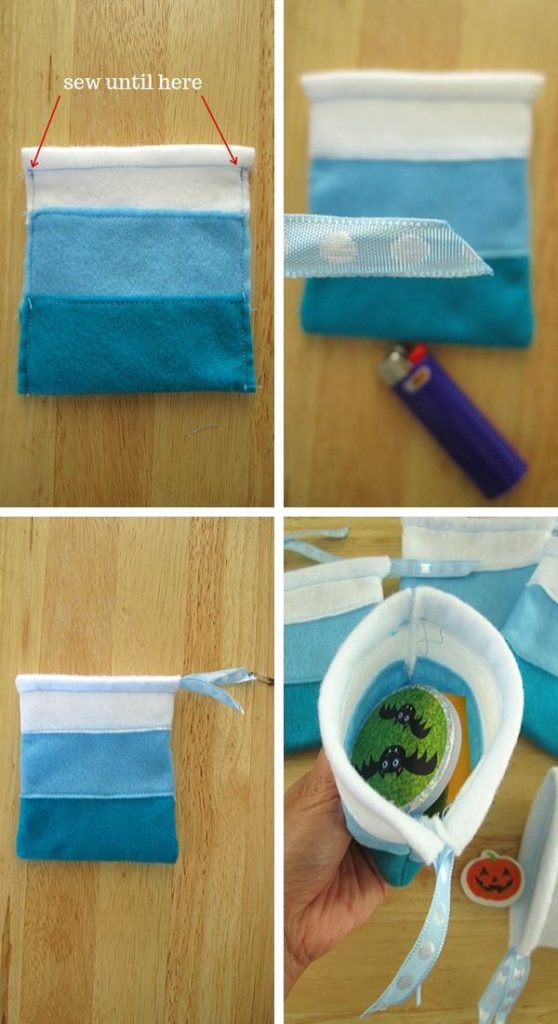
- Fold the rectangle in half that the teal felt will be the bottom of the bag
- Sew the edge to the stitched line for the ribbon (it shows on the image with arrows) and turn it inside out
- Thread the ribbon through the hole. (The little safety pin make it easier for threading the ribbon)
- Done, now put the alternative candy treats in the bag then pull the ribbon and make a little bow
Here I show you how many items I can fit in a bag. Anyone who receives this treat bag will be surprised as it is not visible, unlike a plastic bag.
And they will use the bag over and over again. Maybe they have eraser collections or little rock collections that they want to keep it in a bag.
Allergy-friendly Halloween Loot Bag Fillers
There are lots of loot bag fillers you can use for treats. The idea with the teal pumpkin project is to provides a safe alternative for anyone, especially kids with allergy.
If you are giving food for treats, you have to make sure it is free of common allergens such as free of dairy, nuts, egg, wheat for celiac, soy, and particular food listed as ingredients.
There are people allergic with honey, tomato, green bean, mango, green peas (I know my daughter had this one when she was a baby). So always make sure you read the label first before you decide to include the item for the loot bag.
Candy Alternatives For Halloween
If you choose the non-food Halloween treats, there are lots of items sold at any Dollar store, Walmart, and even Amazon. Kids love the candy alternative Halloween treats such as stickers, erasers, pencils, mini-notebooks, mini figurines, those mini animal figurines or handmade hair accessories.
Bonus with these non-food items is they will play with it and last a very long time. I still have those things that my daughter got from Halloween each year, and she still plays with those figurines.
It is also very inexpensive for the price per package. It is not much any different with those candy treats per box. Plus, it feels good that we can provide a safe alternative for the Halloween treat bag fillers.
Easy DIY Teal Halloween Treat Bags
Teal Halloween Felt Treat Bag
This simple sewing tutorial makes a teal pumpkin project bag for non-candy alternatives that you can make in one afternoon for a quick Halloween craft.
Materials
- 1 sheet of white felt fabric size 22 cm x 29.5 cm or 8.5 inches x 11.5 inches
- 1 sheet of light blue/aquamarine felt size 22 cm x 29.5 cm or 8.5 inches x 11.5 inches
- 1 sheet of teal felt size 22 cm x 29.5 cm or 8.5 inches x 11.5 inches
- Ribbon
Tools
- Disappeared ink fabric marker
- Pin
- Safety pin
- Ruler
- Thread
- Scissors
- Lighter
- Sewing machine or hand stitch needle
Instructions
- Cut the teal felt into 6 rectangles. Each piece size 11.5 cm x 10 cm or 4.5 inches x 3.9 inches.
- Cut the light blue/aquamarine felt into 12 rectangles. Each piece size 11.5 cm x 5 cm or 4.5 inches x 1.9 inches.
- Cut the white felt into 12 rectangles. Each piece size 11.5 cm x 5 cm or 4.5 inches x 1.9 inches.
- Cut the ribbon into 12 inches or 30 cm long and seal the cut by using lighter to prevent fraying.
- Arrange the felt, white-light blue-teal-light blue-white, pin it by overlapping each piece.
- Sew the felt on the overlapping side, and now you will have one long rectangle.
- Fold the white felt about half an inch, pin it then sew straight, this is for the ribbon.
- Fold the rectangle in half that the teal felt will be the bottom of the bag.
- Sew the edge to the stitched line for the ribbon (it shows on the image with arrows) and turn it inside out.
- Thread the ribbon through the hole. (The little safety pin make it easier for threading the ribbon).
- Done, now put the alternative candy treats in the bag then pull the ribbon and make a little bow.
Leave a Reply