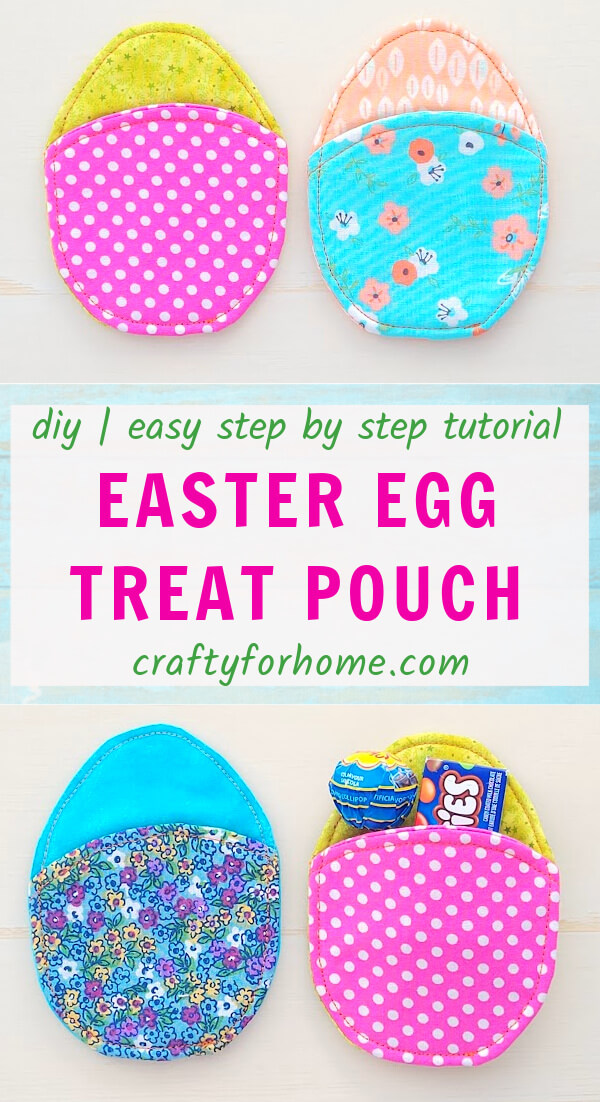
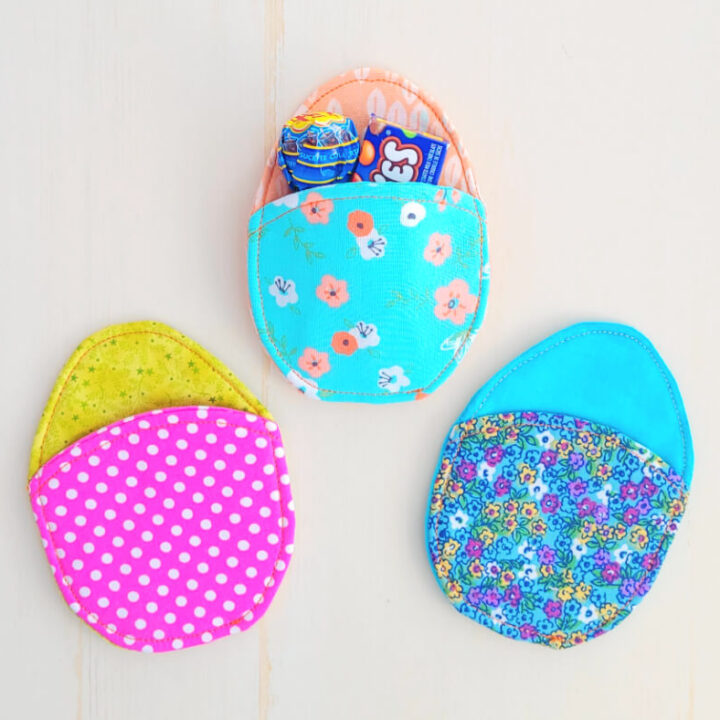
This sewing project is to make an Easter egg treat pouch from charm pack fabrics for an easy and fun Easter sewing craft, and it is also great for gifting ideas.
Easter Egg Treat Holder
This mini Easter treat bag is one of the sewing projects from charm pack fabric. The pouch resembles a pocket that is also washable and reusable.
As an Amazon Associate I earn from qualifying purchases. This post may contain affiliate links. Please see the Disclosure Policy for details.
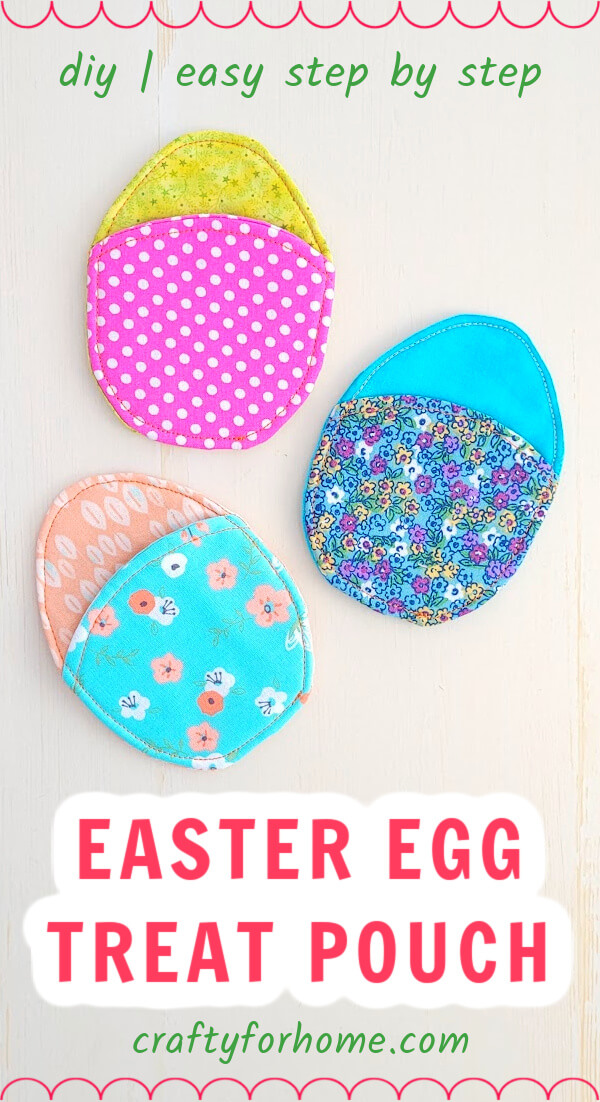
Use two fabric colors or prints to contrast the front and back pouch look. You can pair it with this bunny treat bag using the same prints and colour.
Supply To Make Easter Egg Treat Pouch
Since it uses 5″ square fabric pieces, you can use a charm pack fabric bundle. If using layer cake fabric size, you will have four pieces of 5″ square fabric to make one Easter egg treat holder.
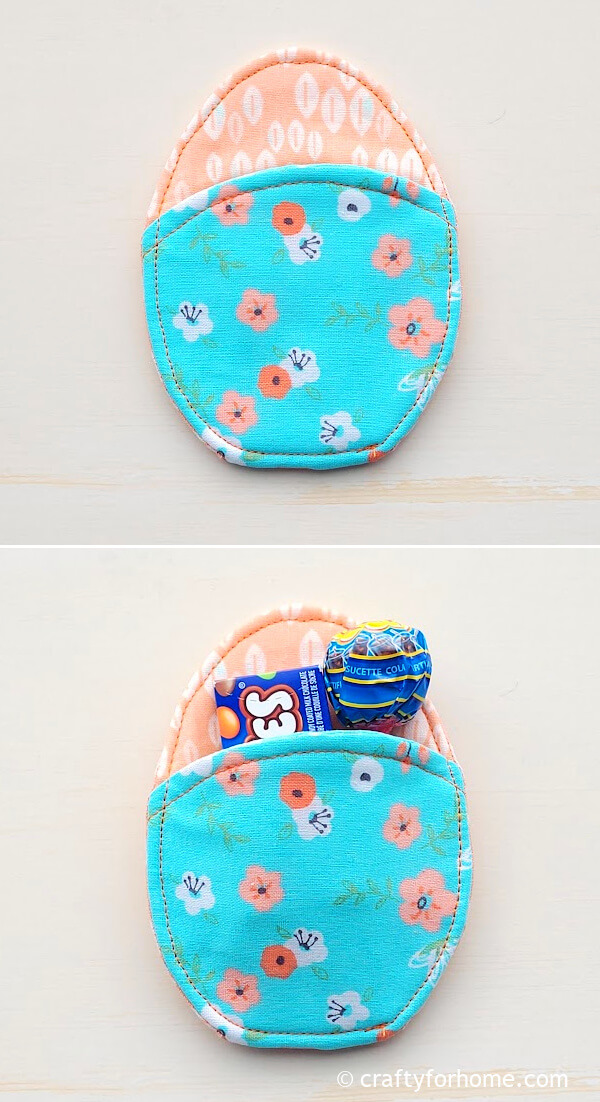
You will get 12 pieces of 5″ square fabrics from a fat quarter fabric to make three pieces of the egg-shaped pouch. Of course, you can use scrap fabric as long as it is enough to make four pieces of 5″ square fabrics.
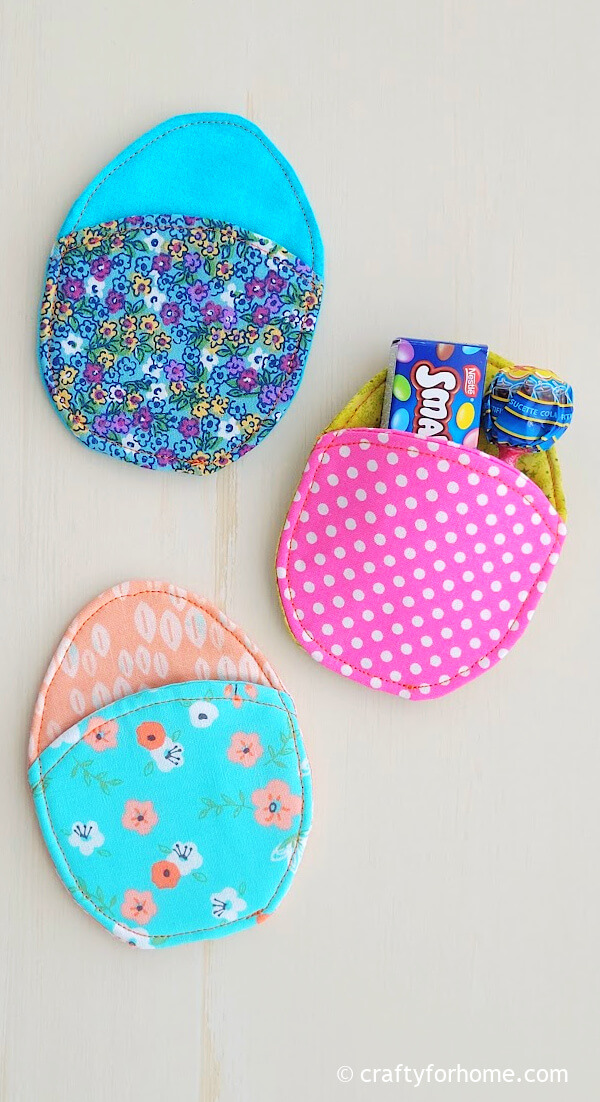
Use fusible fleece or batting for the layer. The egg-shaped template is available to download through the link below, or you can make your own template or use a simple oval shape.
- 2 pieces of 5″ square fabric for the front side
- 2 pieces of 5″ square fabric for the back side
- 2 pieces of 5″ square fusible fleece or batting
- Egg shape template, make your own or print the egg template here
- Disappeared fabric marker. This dual-purpose marker is my favorite.
- Pins or quilting clips
- Small plate, bowl, or any circle object
- Ruler
- Thread
- Chopstick
- Sewing machine
- Ironing machine
Easter Egg Treat Pouch Tutorial
The video tutorial is also available. Click on the link here to watch the Easter Egg Treat Pouch video tutorial on my YouTube channel and subscribe for more videos.
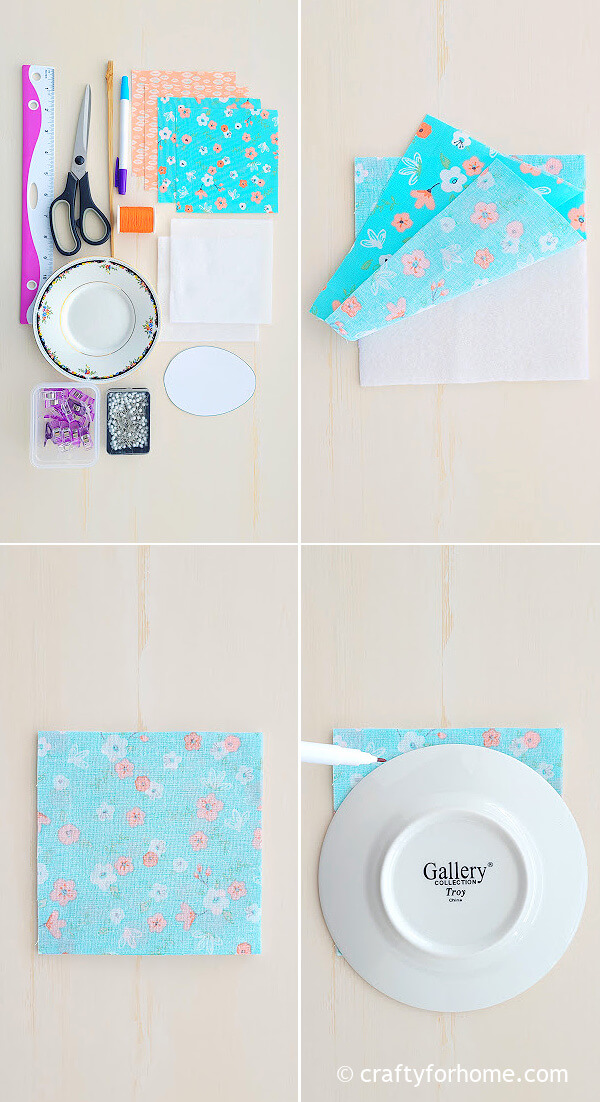
For the front side, pin together fusible fleece on the bottom, then two pieces of square fabric with the right side facing each other on top of it. Use a small plate or a circle object to trace the curve on the fabric.
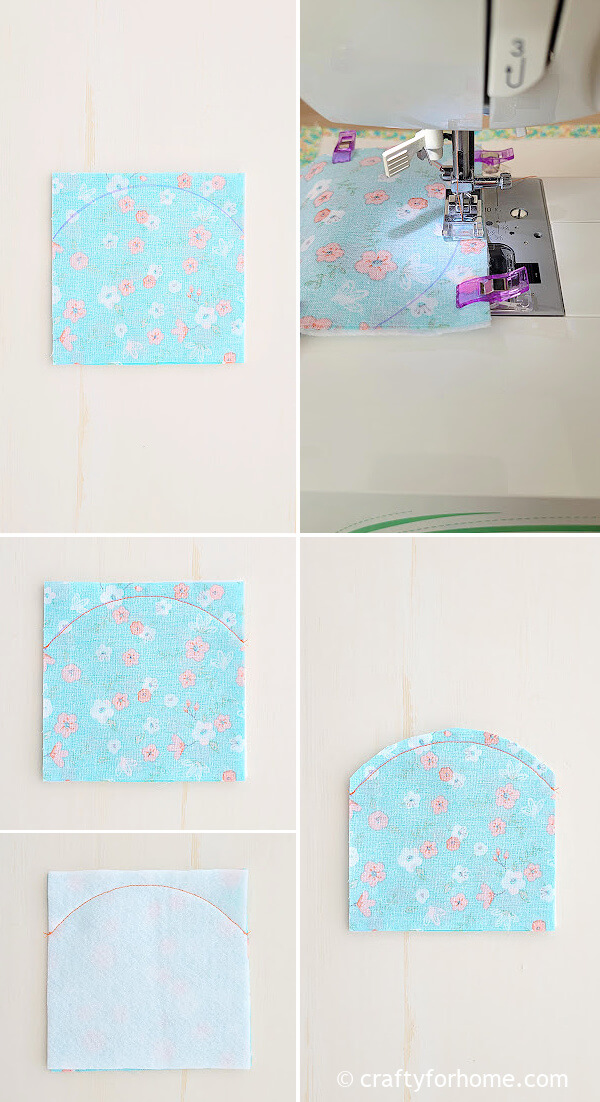
Sew on the curve traced line. Trim the extra fabric 0.25″ from the stitched line.
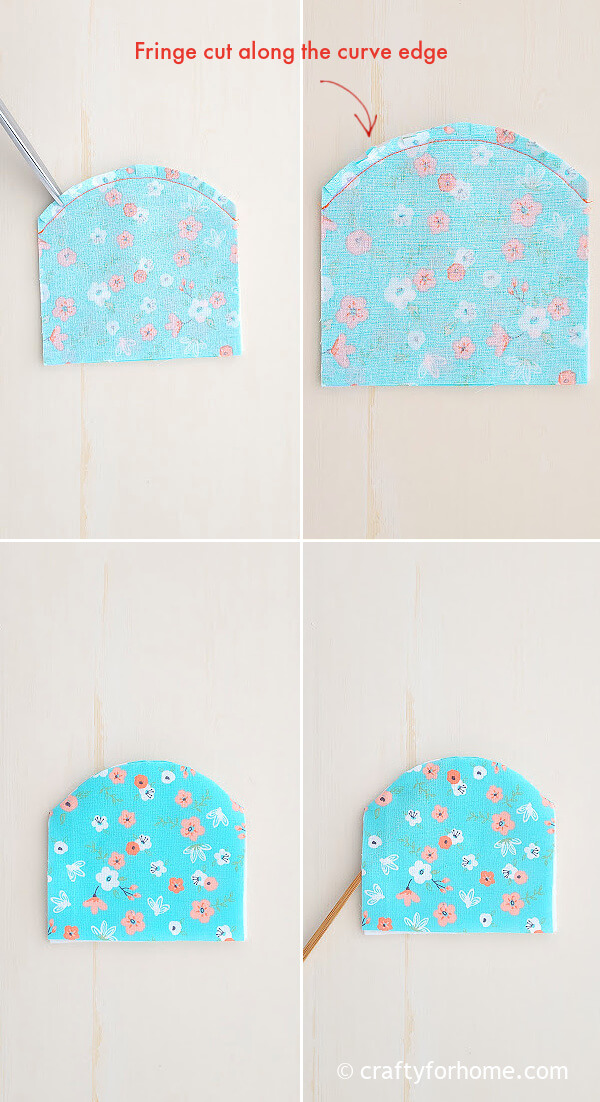
Clip or fringe cut the extra fabric along the curve. Make sure not to cut the stitch off. Turn the fabric right side out. Press it with the ironing machine. Then, topstitch along the curve edge.
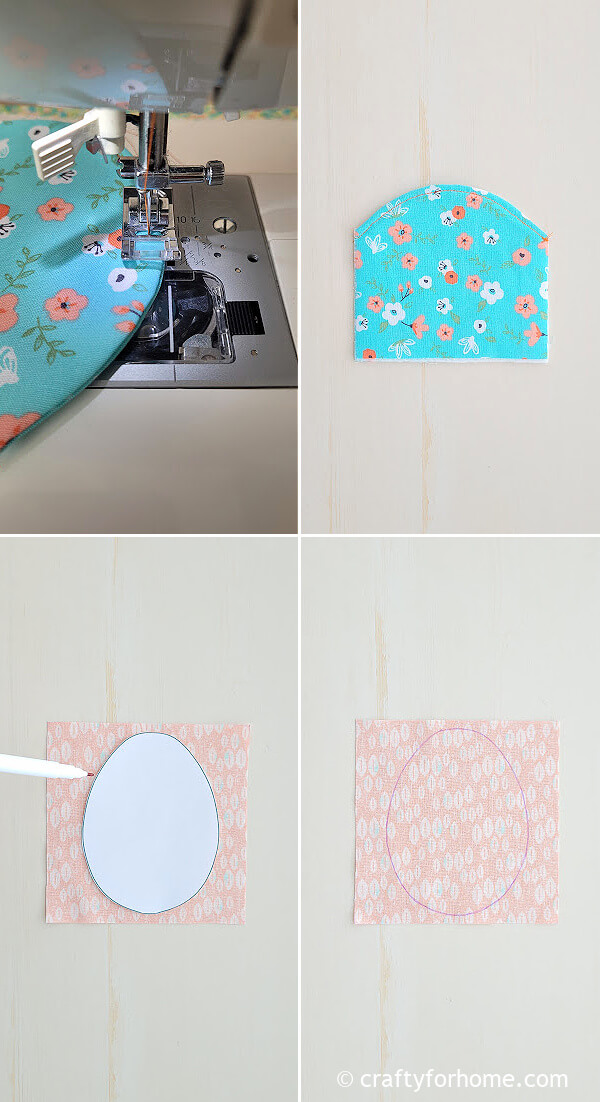
Trace the egg shape template on the wrong side of the fabric of one fabric square for the backside.
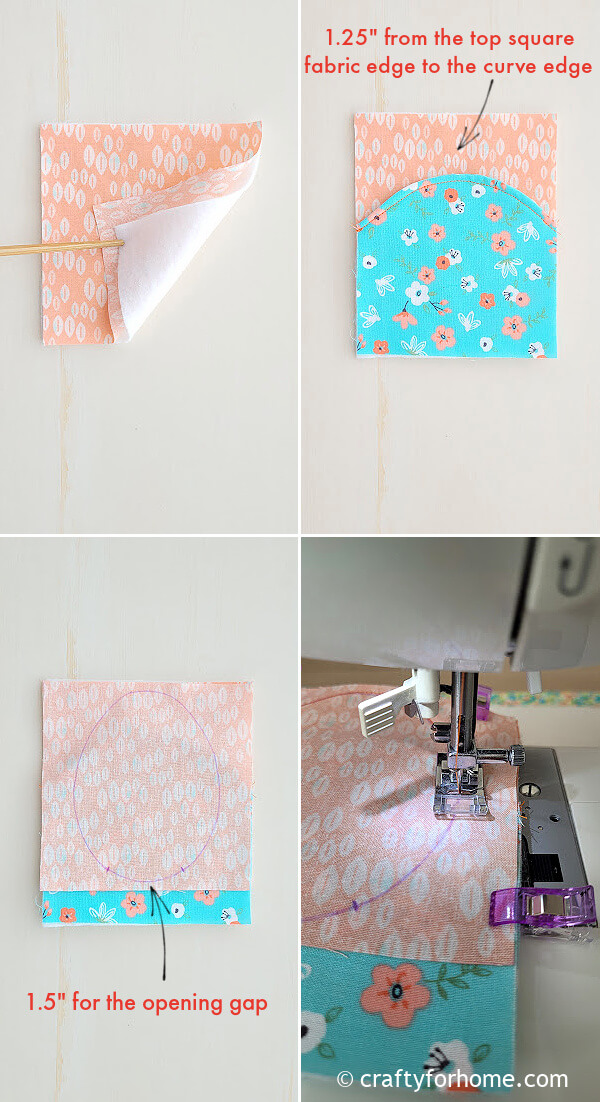
Pin together fusible fleece, the right side of one fabric square for the backside facing up, the front side fabric layer, with the top curve edge 1.25″ from the top square fabric edge, then the right side of the square fabric with the traced egg template facing down align with the other square piece.
Sew along the traced egg line. Skip 1.5″ for the opening gap.
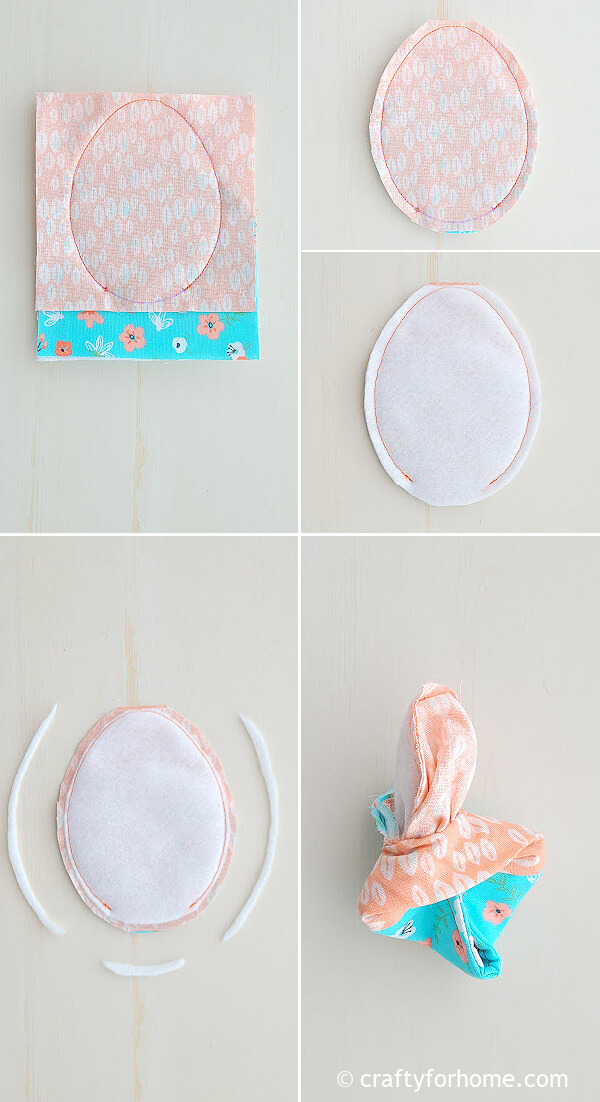
Trim the extra material 0.25″ from the stitched line.
Trim the extra fusible fleece from the stitched line.
Turn the pouch right side out. Use a chopstick to push the edge.
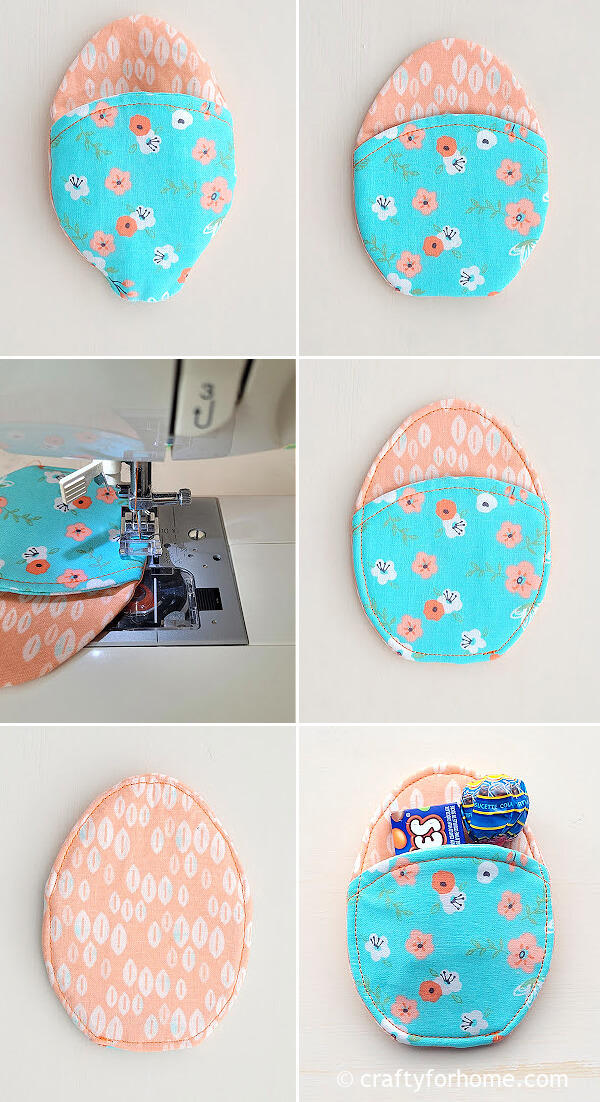
Fold the opening gap inward. Press it with an ironing machine.
Topstitch along the edge and close the opening at the same time.
The Easter egg treat pouch is ready to use now.
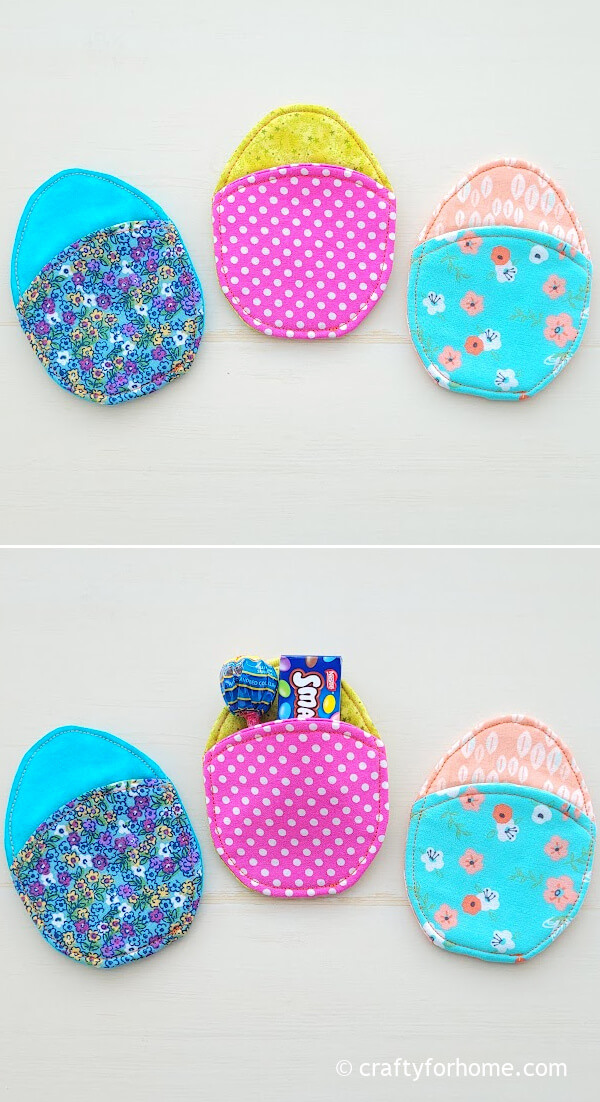
The pouch has enough room for candies or lollipop. You can use one pouch each for a gift or several treat pouches for the Easter basket filler.
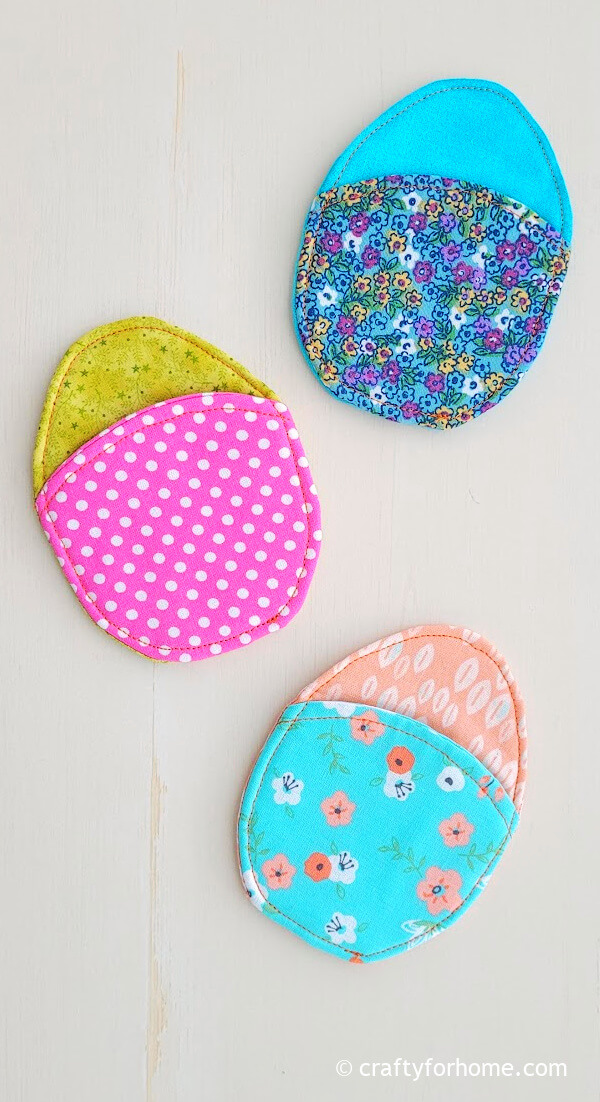
Also, this oval mug rug and egg-shaped placemat are easy to make to decorate the table top during Easter brunch. This Easter bunny mason jar is also fun to make, and then fill it with candies or a bouquet for an easy centrepiece.
Turn several pieces of 5" square fabrics into an Easter egg treat holder. #Easteregg #sewingforEaster #treatbag Share on XMore Of Sewing Projects From Charm Pack Fabrics
DIY Easter Egg Treat Pouch From Fabric Perfect For Gifting Idea Or Basket Filler
Easy Easter Egg Treat Pouch Tutorial
This sewing project is to make an Easter egg treat pouch from charm pack fabrics for an easy and fun Easter sewing craft, and it is also great for gifting ideas or Easter gift basket filler.
Materials
- 2 pieces of 5" square fabric for the front side
- 2 pieces of 5" square fabric for the back side
- 2 pieces of 5" square fusible fleece or batting
- Egg shape template
Tools
- Disappeared fabric marker
- Pins or quilting clips
- Small plate, bowl, or any circle object
- Ruler
- Thread
- Chopstick
- Sewing machine
- Ironing machine
Instructions
- For the front side, pin together fusible fleece on the bottom, then two pieces of square fabric with the right side facing each other on top of it.
- Use a small plate or a circle object to trace the curve on the fabric.
- Sew on the curve traced line. Trim the extra fabric 0.25" from the stitched line.
- Clip or fringe cut the extra fabric along the curve. Make sure not to cut the stitch off.
- Turn the fabric right side out. Press it with the ironing machine. Then, topstitch along the curve edge.
- Trace the egg shape template on the wrong side of the fabric of one fabric square for the backside.
- Pin together fusible fleece, the right side of one fabric square for the backside facing up, the front side fabric layer, with the top curve edge 1.25" from the top square fabric edge, then the right side of the square fabric with the traced egg template facing down align with the other square piece.
- Sew along the traced egg line. Skip 1.5" for the opening gap.
- Trim the extra material 0.25" from the stitched line.
- Trim the extra fusible fleece from the stitched line.
- Turn the pouch right side out. Use a chopstick to push the edge.
- Fold the opening gap inward. Press it with an ironing machine.
- Topstitch along the edge and close the opening at the same time.
- The Easter egg treat pouch is ready to use now.
Notes
For the egg-shape template:
- You can make your own template
- Use a simple oval-shape
- Or print the template here
Leave a Reply