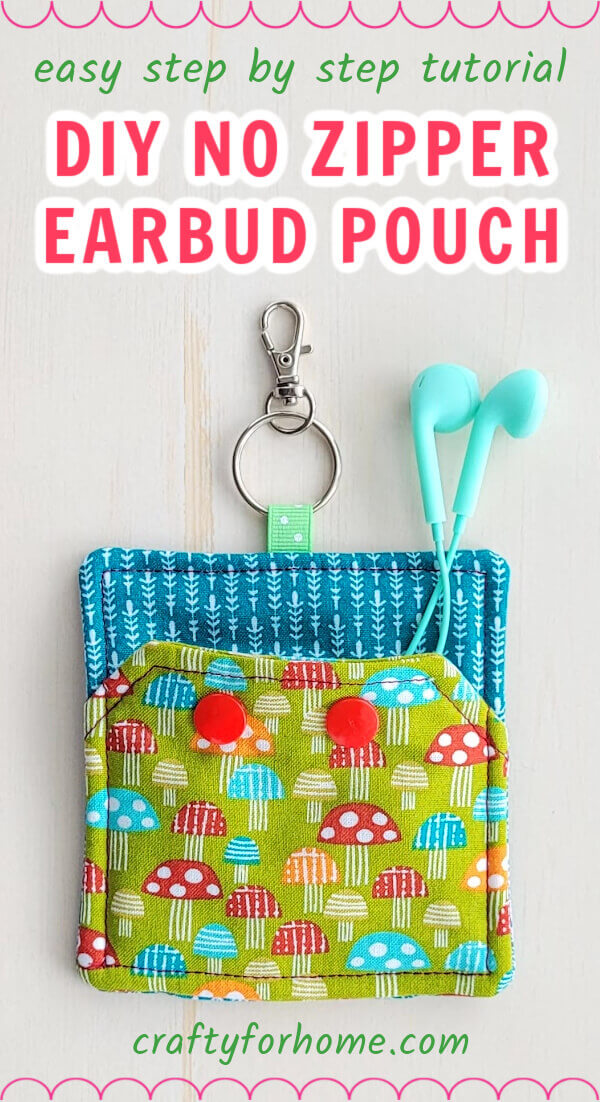
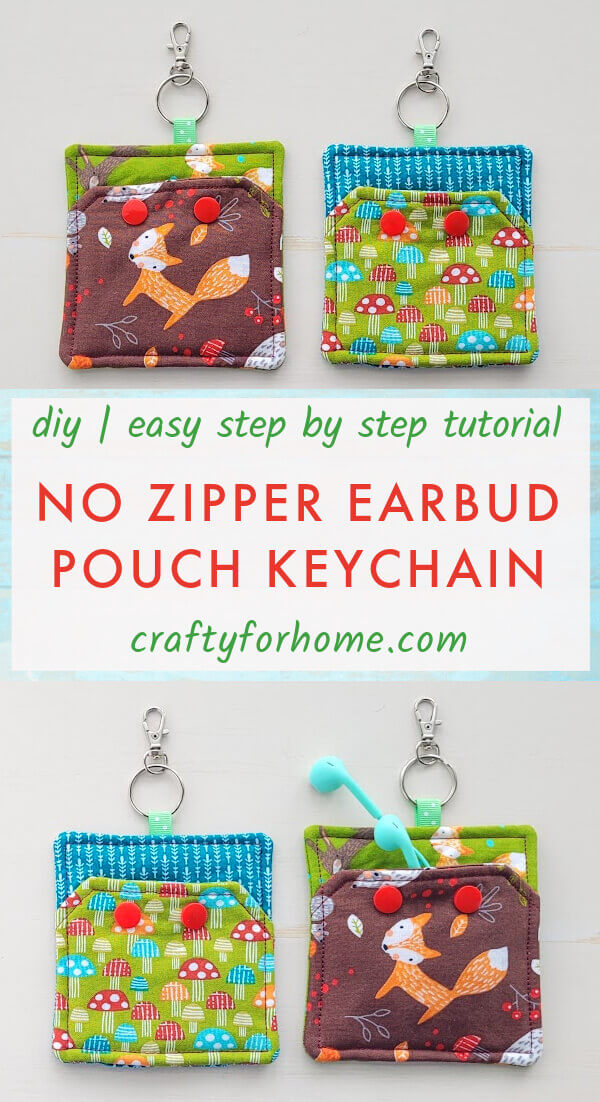
Turn a couple of charm pack fabric square pieces into a DIY earbud pouch keychain to keep the earbud, phone charger, flash disc or any small items organized and easy to find.
No-zipper Earbud Pouch
This earbud holder doesn’t require to sew the zipper on. A pair of snap buttons will keep the pouch closed.
As an Amazon Associate I earn from qualifying purchases. This post may contain affiliate links. Please see the Disclosure Policy for details.
This easy project is also similar to this chapstick holder tutorial. The keyring tab is from a piece of ribbon. If you want to make the tab from fabric, use a fabric strap from this tutorial.
Supply To Make Earbud Pouch
Use one piece of fat-quarter size or charm pack size fabric. The snap button is optional. You can replace it with a hook and loop like the Velcro brand for the fastener.
If batting is unavailable, you can use fusible fleece or felt for the layer.
- 4 pieces of 5″ square or charm pack size fabric, or 1 piece of fat quarter fabric
- 1 piece of 5″ x 9″ batting
- 2 pairs of snap buttons and snap button plier kit
- Disappeared ink fabric marker. This dual-purpose fabric marker is my favourite
- 2″ Grosgrain ribbon
- Keyring and swivel lobster clasp
- Thread
- Lighter
- Ruler
- Scissors
- Sewing machine
- Ironing machine
Earbud Pouch Tutorial
The video tutorial is also available. Go to this link to watch the Earbud Pouch Keychain Video Tutorial on my YouTube channel, and subscribe for more videos.
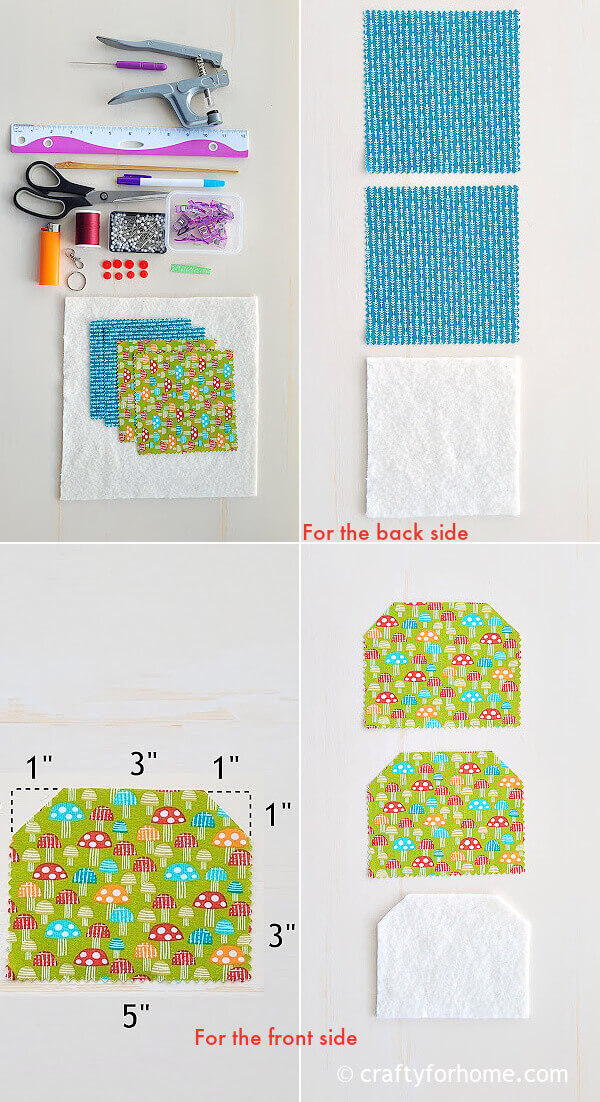
Prepare the fabric with these measurements:
- 2 pieces of 5″ square fabric for the backside
- 1 piece of 5″ square batting for the backside
- 2 pieces of 4″ x 5″ fabric for the front side
- 1 piece of 4″ x 5″ batting for the front side
If you prefer the pattern instead of measuring, the earbud pouch pattern is also available for a few dollars. Click this link to purchase the earbud pouch pattern PDF file.
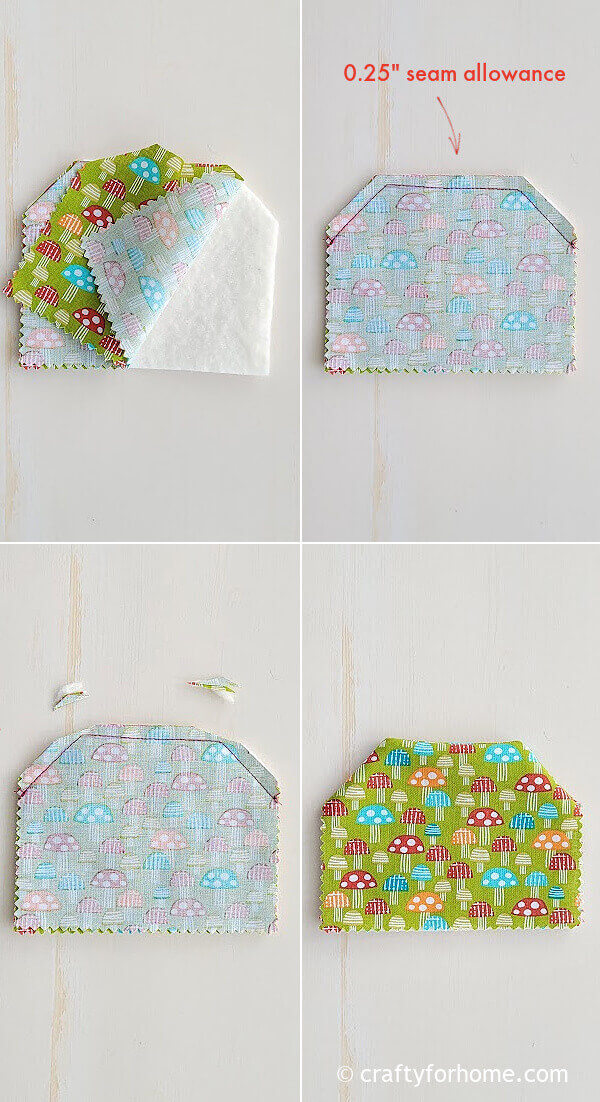
For the front side, pin together the batting, the right side of the fabric facing up, and the right side of the fabric facing down.
Sew along the top edge with a 0.25″ seam allowance. Clip the extra fabric on both top corners.
Turn the material right side out. Press it with the ironing machine. Topstitch along the stitched edge.
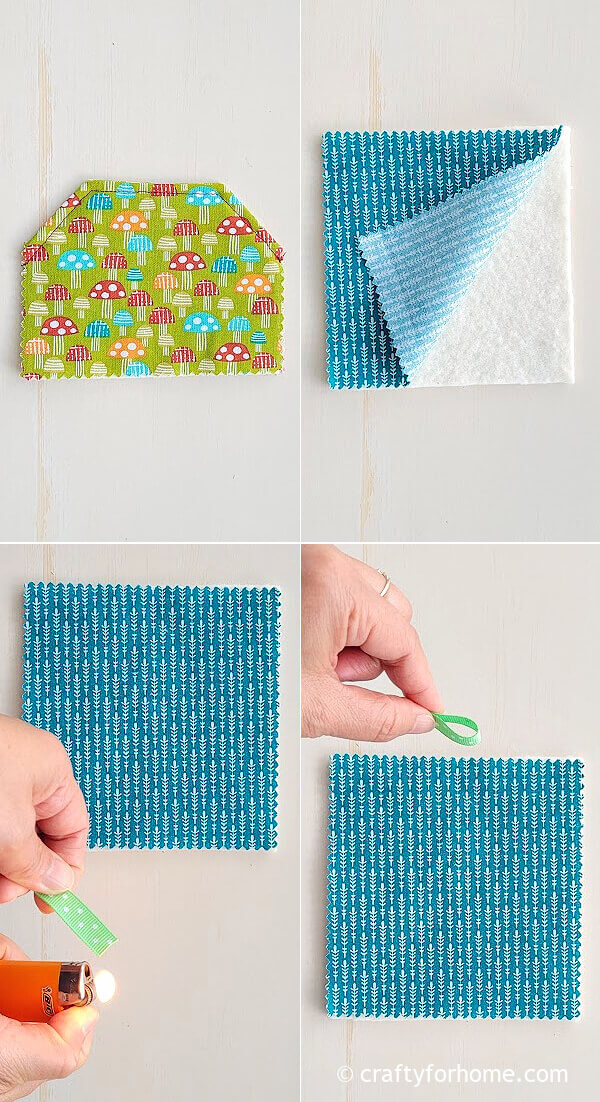
Put the batting under the wrong side of one fabric square for the back side.
Use a lighter to seal the ribbon’s raw edges.
Loop the ribbon, then pin the ribbon with the raw edge aligned with the fabric edge.
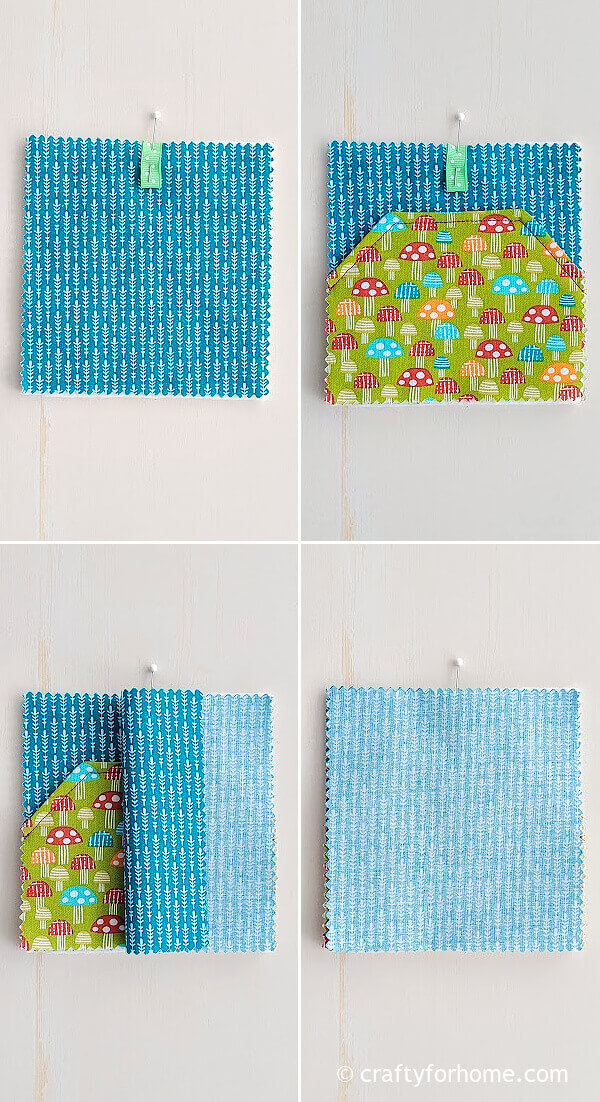
Sandwich all material with this order:
- The right side of the fabric for the back facing up with the pinned ribbon
- Pouch or front side
- The right side of the fabric for the back facing down
Pin all materials or use quilting clips.
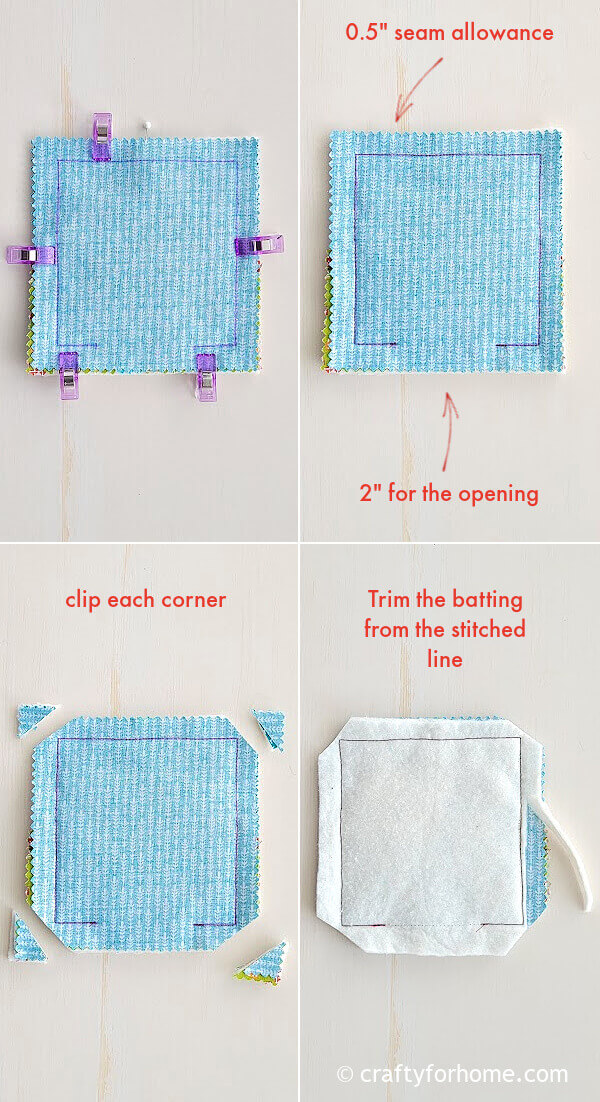
Sew along the edge with a 0.5″ seam allowance and skip 2″ for the opening.
Clip the extra material on all corners to reduce bulk.
Trim the excess batting from the stitching line.
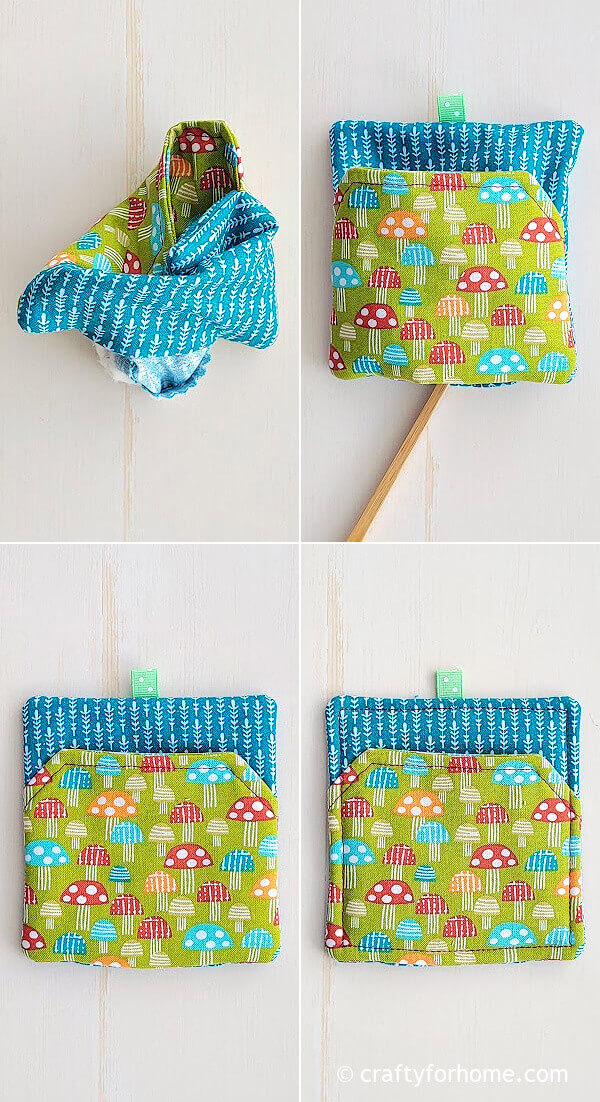
Turn the pouch right side out through the opening.
Push each corner with the chopstick.
Press it with the ironing machine.
Top stitch along the edge and close the opening at the same time.
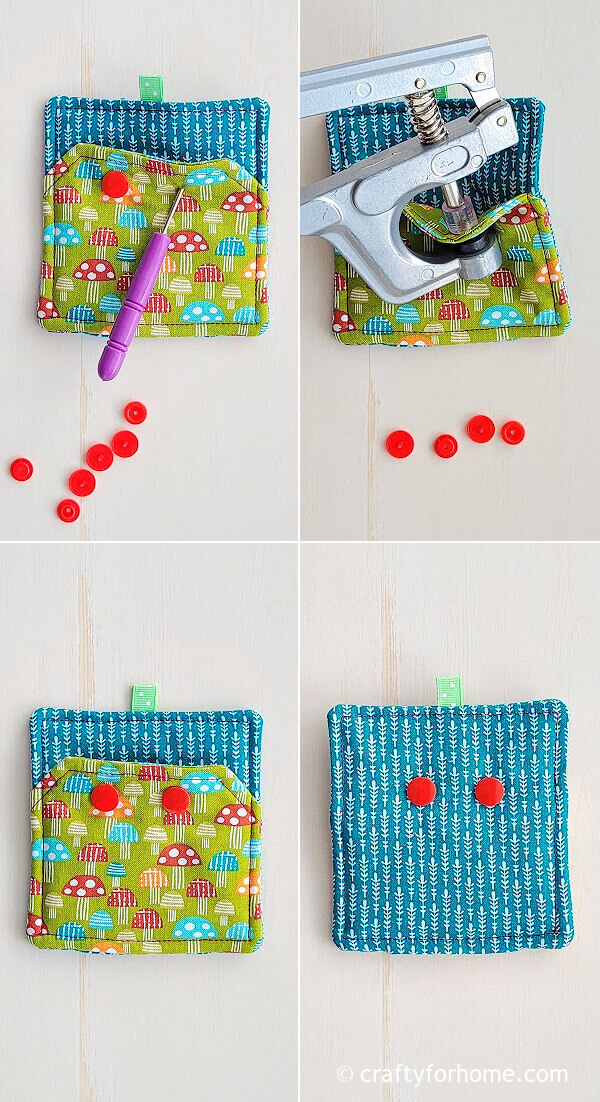
Attach both snap buttons on the top of the pouch edge aligned with the back side of the pouch.
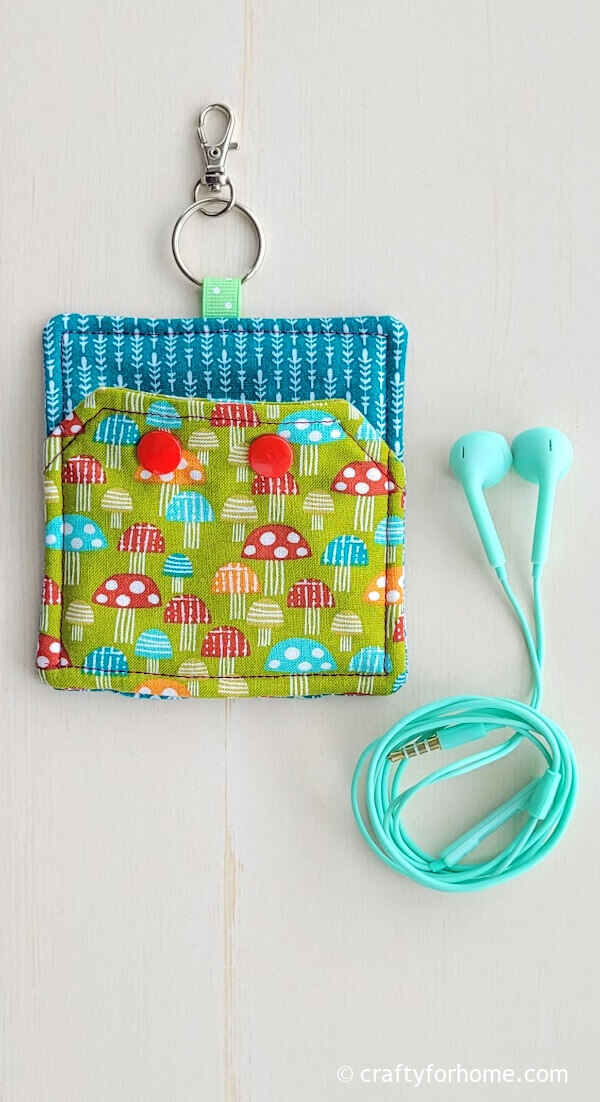
Attach the keyring and swivel lobster clasp on the tab. The earbud pouch is ready to use now.
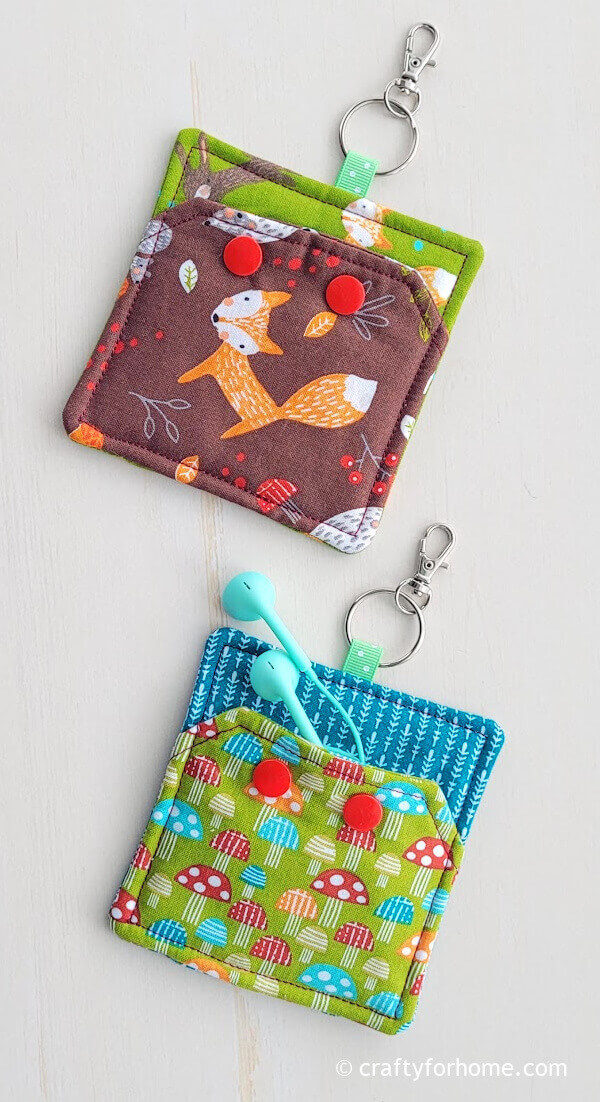
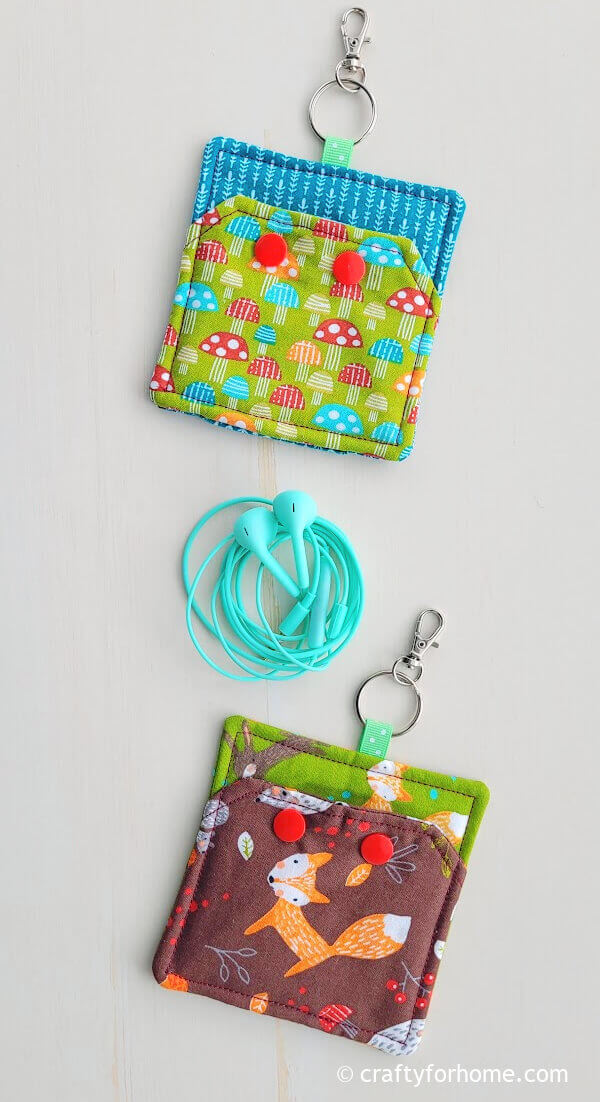
This no-zipper earbud pouch has enough space to store the earbud, phone charger cable, and USB stick.
Get The PDF
If it is more convenient to have the printable version of this tutorial for the project, you can purchase the Printable PDF Format of Earbud Pouch Keychain Template And Sewing Tutorial here. The e-book has the template and complete tutorials with pictures included. There are no ads or video displays on the PDF so that you can print it, and it will be available for you anytime you need the tutorial for your next project. Click on the e-book cover image above to purchase.
Use charm pack square or scrap fabrics to make an earbud pouch with this tutorial. #earbudholder #sewingwithscraps Share on XMore Of Sewing Projects From Charm Pack Square Fabrics
DIY Earbud Holder With Snap Buttons For One Of Easy Gadget Organizers

DIY Earbud Pouch Keychain Tutorial
Turn a couple of charm pack fabric square pieces into a DIY earbud pouch keychain to keep the earbud, phone charger, flash disc or any small items organized and easy to find.
Materials
- 4 pieces of 5" square or charm pack size fabric, or 1 piece of fat quarter fabric
- 1 piece of 5" x 9" batting
- 2 pairs of snap buttons
- Snap button plier kit
- 2" Ribbon
- Keyring and swivel lobster clasp
Tools
- Disappeared ink fabric marker
- Thread
- Ruler
- Lighter
- Scissors
- Sewing machine
- Ironing machine
Instructions
- For the front side, pin together the batting, the right side of the fabric facing up, and the right side of the fabric facing down.
- Sew along the top edge with a 0.25" seam allowance.
- Clip the extra fabric on both top corners.
- Turn the material right side out. Press it with the ironing machine.
- Topstitch along the stitched edge.
- Put the batting under the wrong side of one fabric square for the back side.
- Use a lighter to seal the ribbon's raw edges.
- Loop the ribbon, then pin the ribbon with the raw edge aligned with the fabric edge.
- Sandwich all material with this order, the right side of the fabric for the back facing up with the pinned ribbon, pouch or front side, the right side of the fabric for the back facing down.
- Pin all materials or use quilting clips.
- Sew along the edge with a 0.5" seam allowance and skip 2" for the opening.
- Clip the extra material on all corners to reduce bulk.
- Trim the excess batting from the stitching line.
- Turn the pouch right side out through the opening.
- Push each corner with the chopstick.
- Press it with the ironing machine.
- Top stitch along the edge and close the opening at the same time.
- Attach both snap buttons on the top of the pouch edge aligned with the back side of the pouch.
- Attach the keyring and swivel lobster clasp on the tab.
- The earbud pouch is ready to use now.


Leave a Reply