Easy and quick to sew adorable Easter bunny treat bags and fill them with all your favourite sweet treats for an Easter egg hunt or Easter gift basket filler.
Easter Bunny Treat Bags For Fun Easter Craft
This sewing project is fun for Easter crafts and super easy to make, just like making this Easter egg placemat with bias tape for binding and this no-binding oval mug rug.
As an Amazon Associate I earn from qualifying purchases. This post may contain affiliate links. Please see the Disclosure Policy for details.
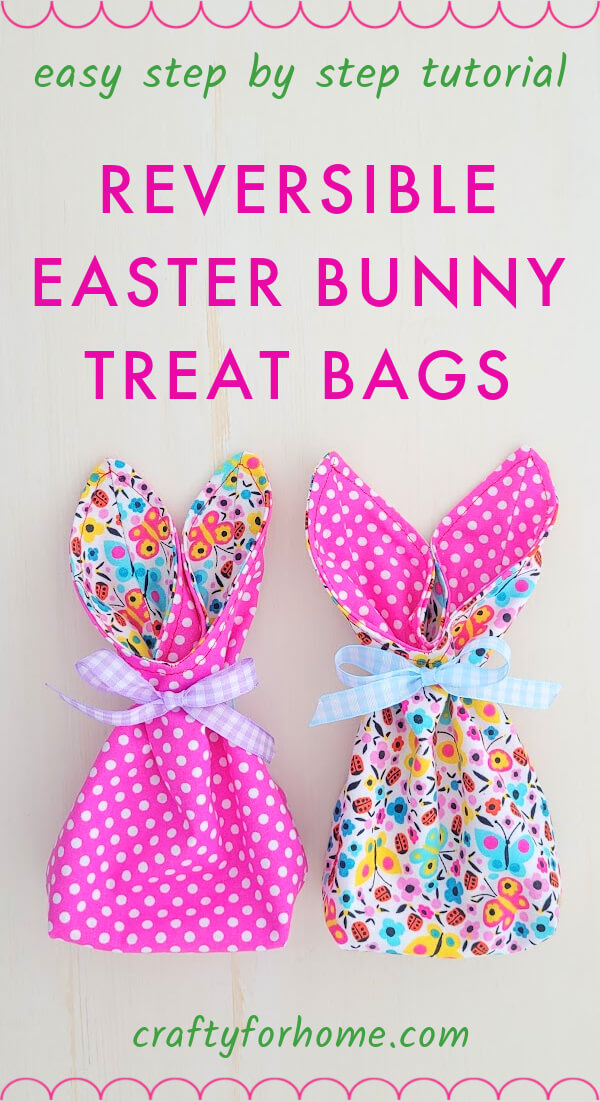
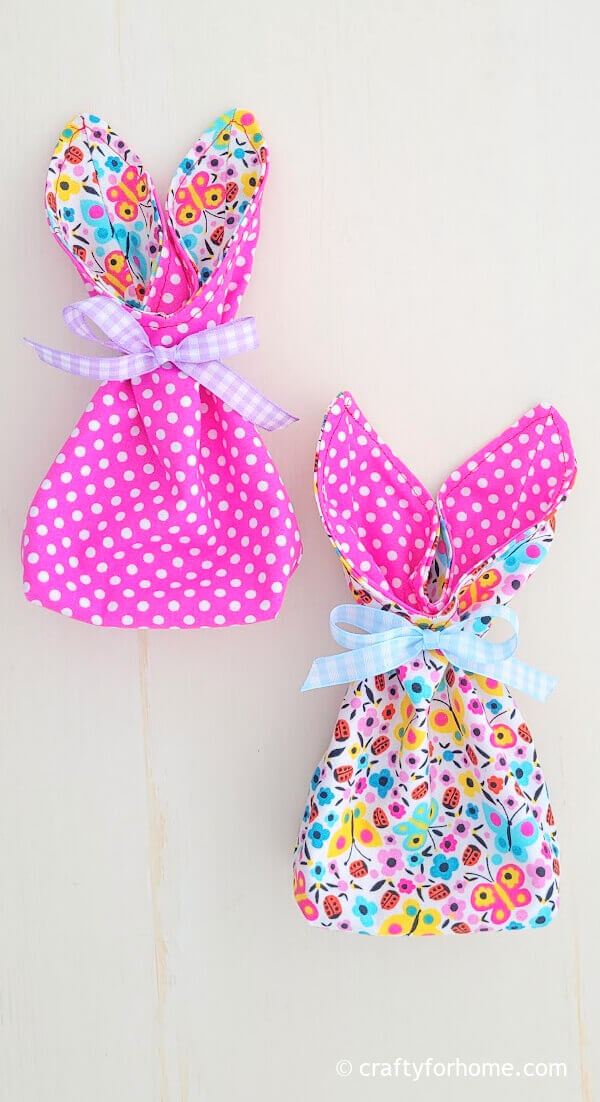
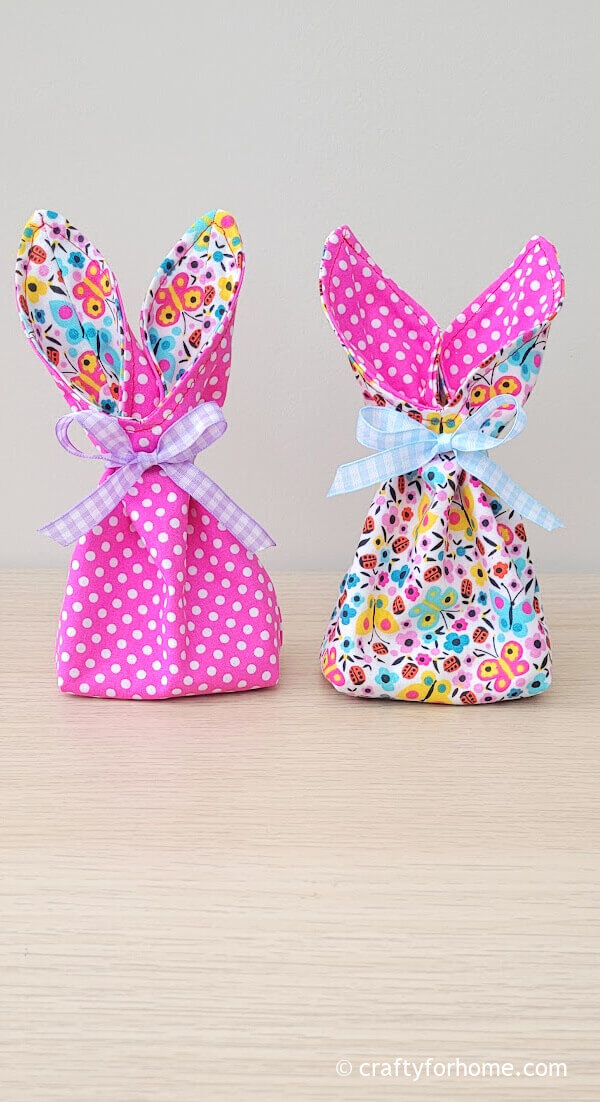
Make a bunch of Easter bunny goodie bags for the upcoming occasion. Make the bag smaller, the same size as in this tutorial, or larger, depending on your need.
Supply To Make Easter Bunny Treat Bag
The bunny treat bag is reversible, so use two 5.5″ x 18″ cotton fabric sheets with different prints.
If you use fat quarter fabric that is 18″ x 22″, fold it four times widthwise, and you will get the exact measurement of 5.5″ x 18″ each.
Note: Some fat quarter fabric is 18″ x 21″ in size, which still works for this project. After folding it four times, the fabric pieces would be 5.25″ x 18″. Depending on your need, you can reduce or add the fabric width to make smaller or larger bags.
You will get two pieces of bunny pouch bag from one fat quarter cotton fabric sheet with the same print for both sides.
Use satin or grosgrain ribbon for the drawstring. There would be no channel for threading the ribbon. Instead, you will use a little piece of rectangle fabric or ribbon on the left and right sides of the treat bag, like a belt loop for treading the ribbon.
You can skip making the ‘belt loop’ and wrap the ribbon around the bag below the ears instead, or tie it with the hair elastic.
- 2 sheets of 5.5″ x 18″ rectangle cotton fabric or 1 sheet of fat-quarter size fabric
- 1 piece of 15″ satin ribbon or grosgrain ribbon, these adorable spring theme printed ribbons is perfect for this project
- 4 pieces of 2″ matching satin ribbon or gross grain ribbon
- Disappeared ink marker, I always use the dual-purpose fabric marker
- Pin or quilting clips
- Chopstick
- Lighter
- Ruler
- Thread
- Scissors
- Sewing machine
- Ironing machine
Easter Bunny Treat Bag Tutorial
Video tutorial is also available to watch. Click here for the Easter Bunny Treat Bag video tutorial on my YouTube channel, and subscribe for more videos.
Cut the fabric into two 5.5″ x 18″ rectangles with different prints on each layer.
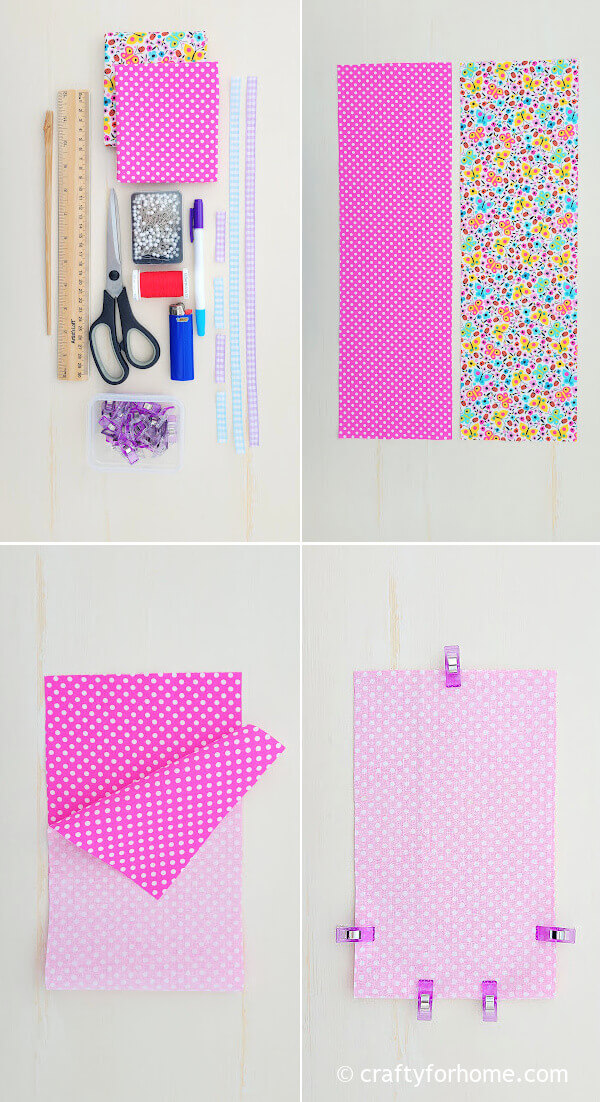
Take one fabric piece, and fold the fabric in half, with the right side of the fabric facing each other.
Pin or use quilting clips to both fabric layers together.
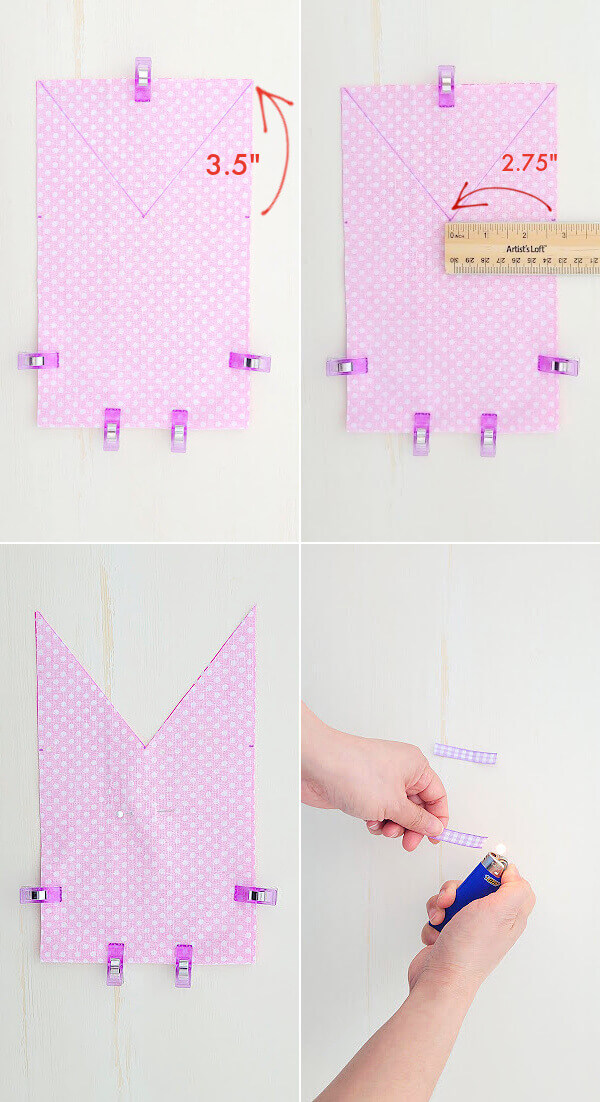
Measure the ear by marking 3.5″ from the top corner, mark both left and right sides, then mark 2.75″ in the middle between marked lines.
Draw the line to connect the marked spot and the corner, resemble the V shape, then trim it along the V shape line.
Next, cut two pieces of ribbon about 2″ long, and use the lighter to seal the frayed edge.
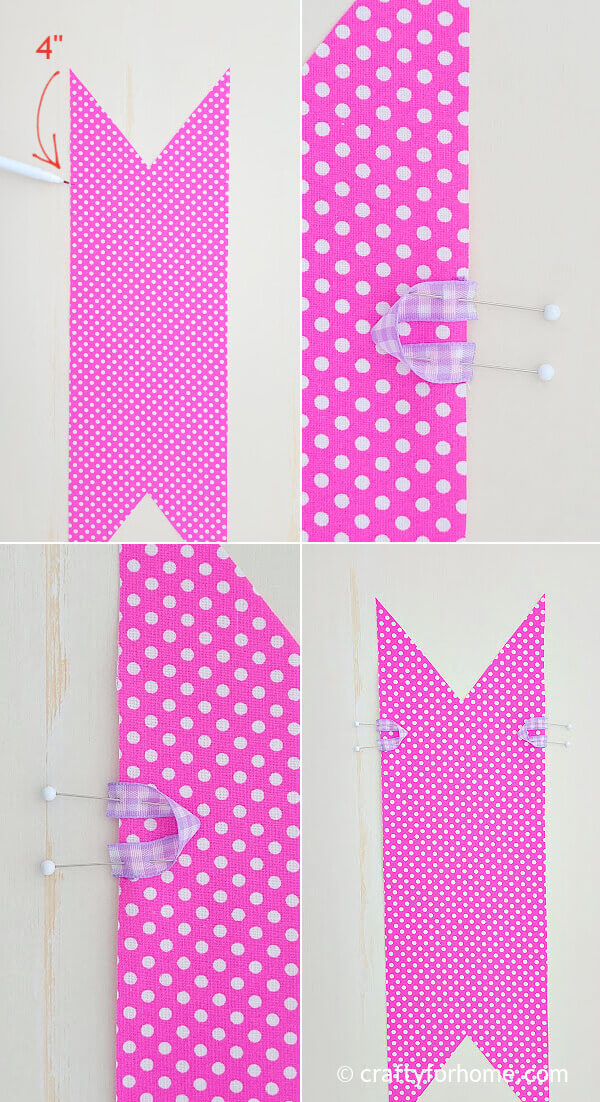
Pin the ribbon pieces on the edge of the right side fabric, about 4″ from the top corner, one on the left side and one on the right side of the fabric.
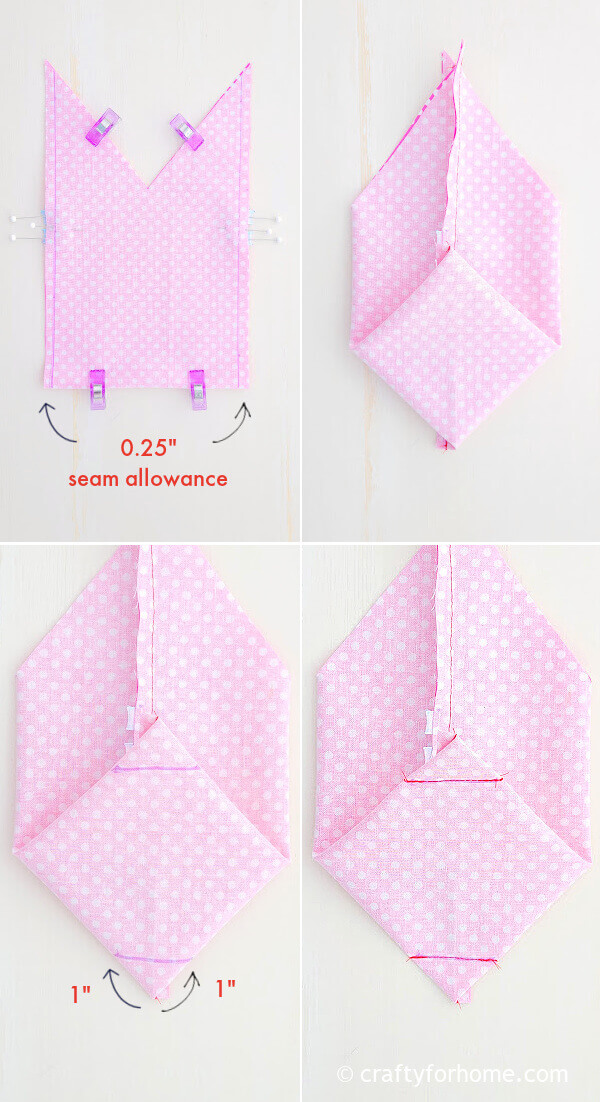
Sew along the edge to the bunny ear top corner with 0.25″ seam allowance.
Open the bottom pouch to resemble a diamond shape by aligning the side seam and the bottom pouch line. The side seam would be precisely in the center.
Mark 1″ from the corner stitch seam on both sides, then draw a line to connect the marked spot.
Sew along the line, then trim it about 0.5″ from the stitched line.
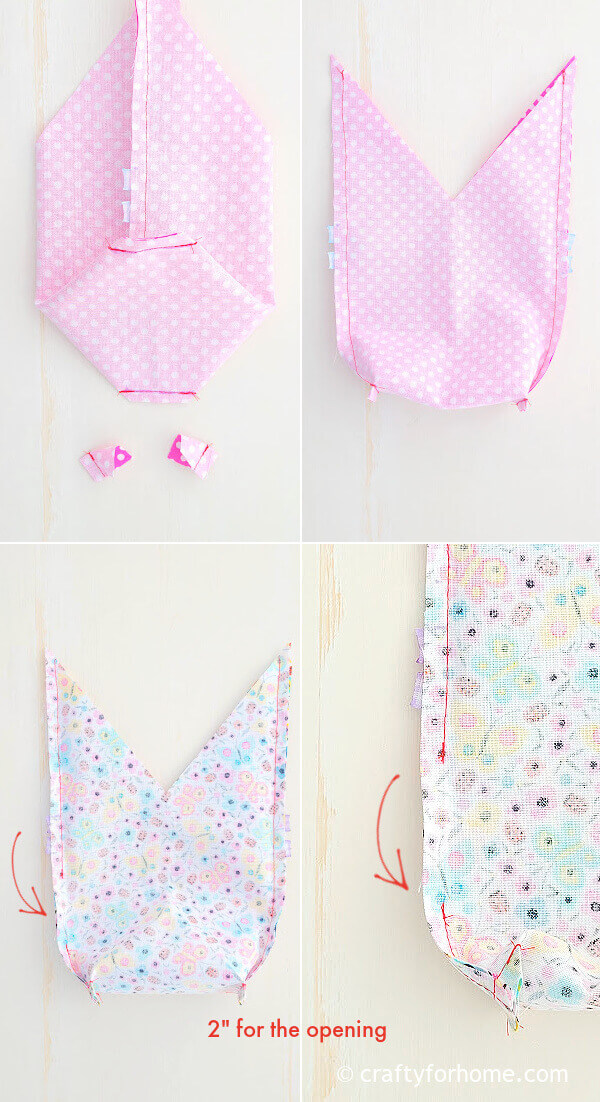
Repeat the same process of measuring and sewing for the other piece of fabric but skip 2″ for the opening on the side of the bag between the bottom pouch and the ribbon loop.
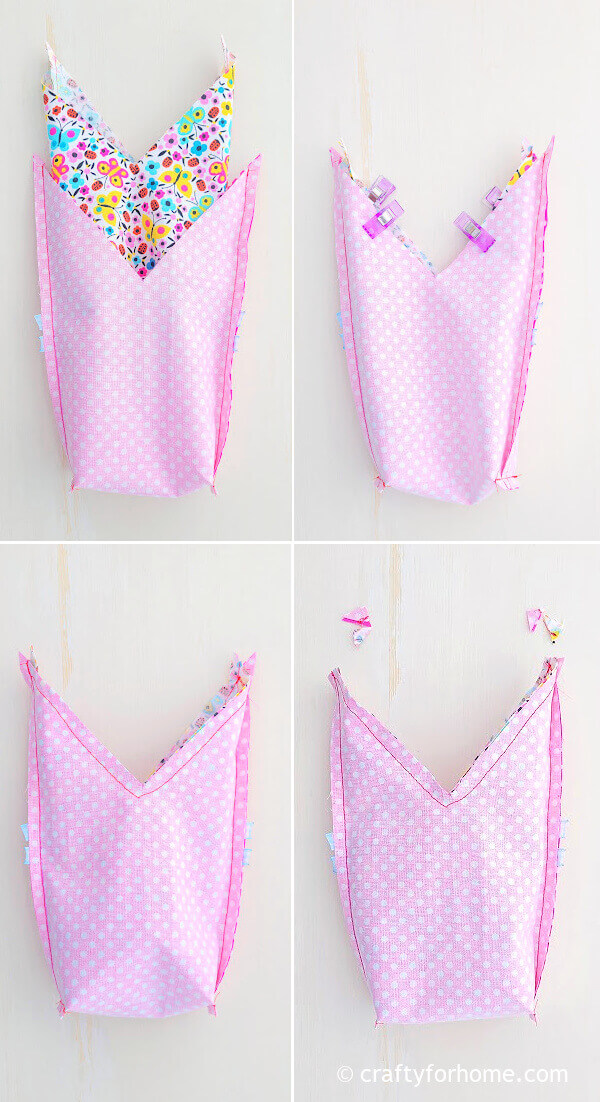
Insert one layer of the pouch into another layer with the right side of both fabrics facing each other.
Sew along the inner of the bunny ear side (V shape area).
Clip the extra fabric on the ear top to reduce bulk.
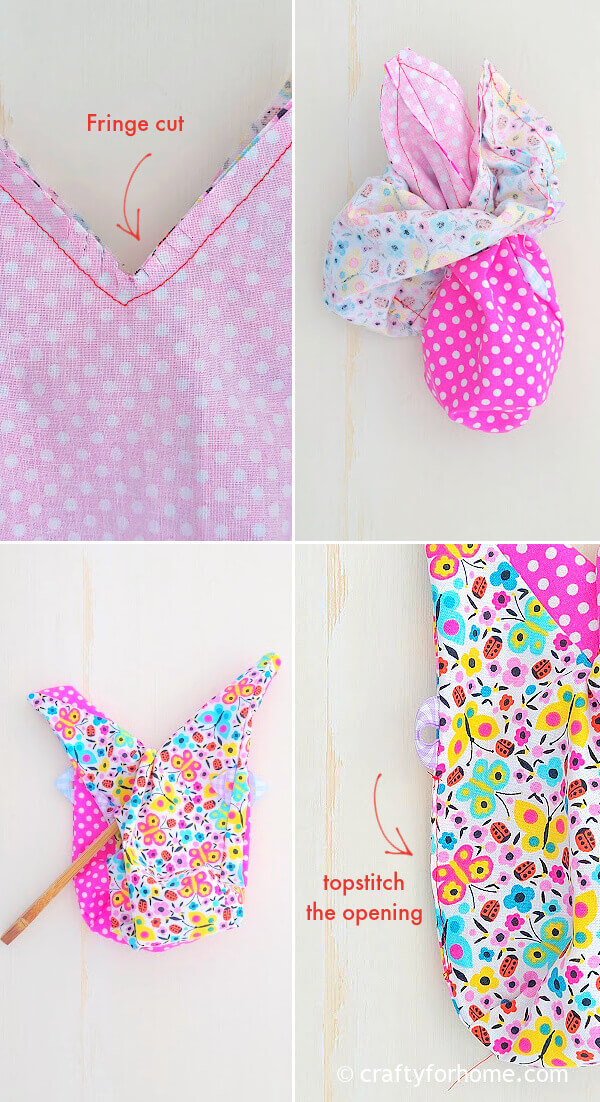
Clip or fringe cut the corner V shape. Turn the bunny pouch right side out through the opening gap.
Push each pointy corner with a chopstick. Topstitch the opening gap with a tiny seam.
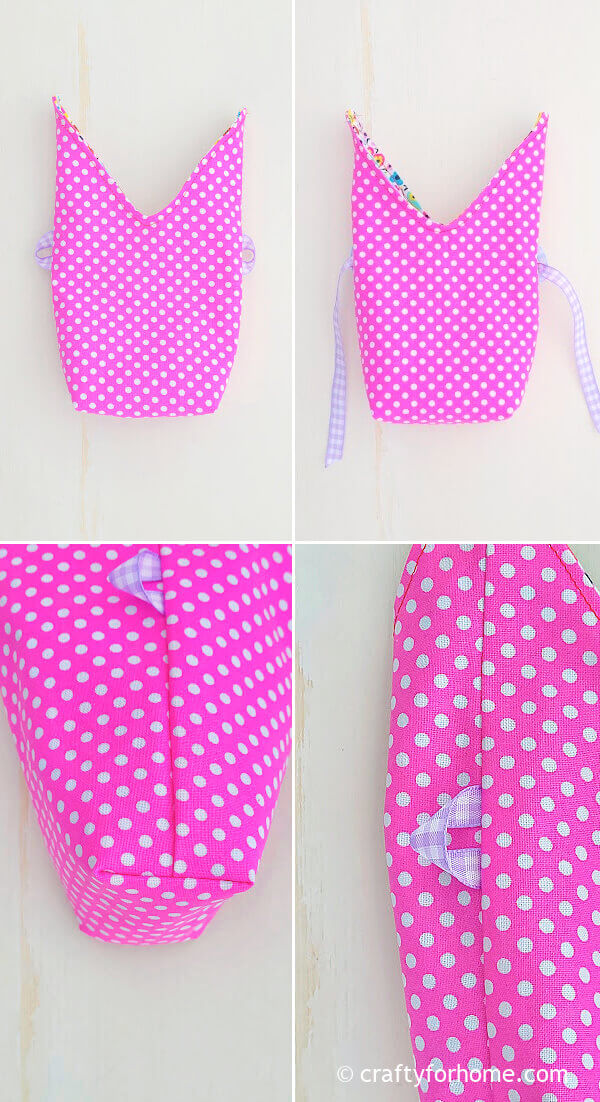
Press the ears with the ironing machine. Topstitch around the inner ear side.
Thread the ribbon on the loop.
Fill the bag with treats. Make a bow tie with the ribbon.
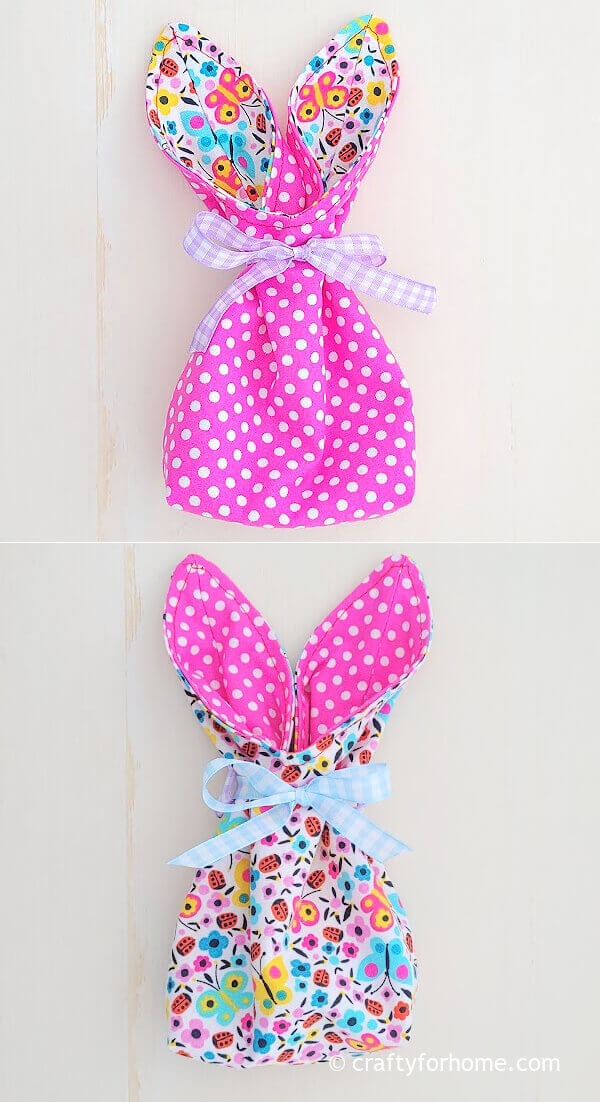
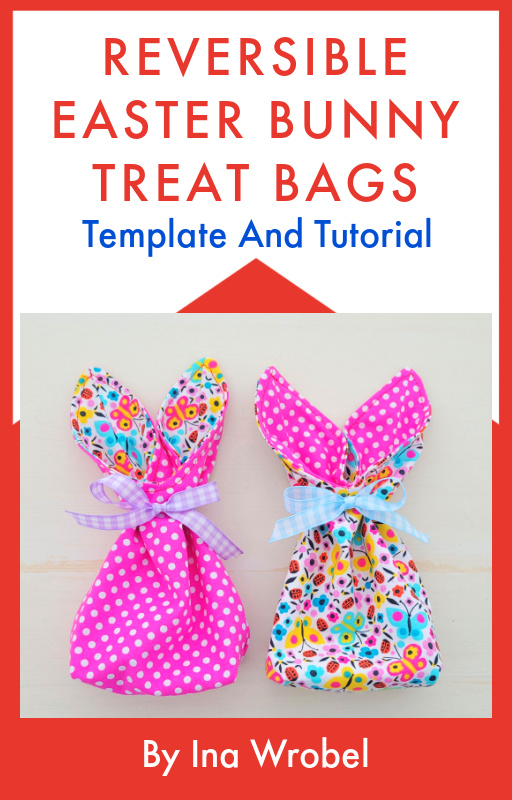
The cute bunny treat bag is reversible. First, remove the ribbon from the loop, then turn the pouch inside out. Now you have a different print on the outer side of the bag.
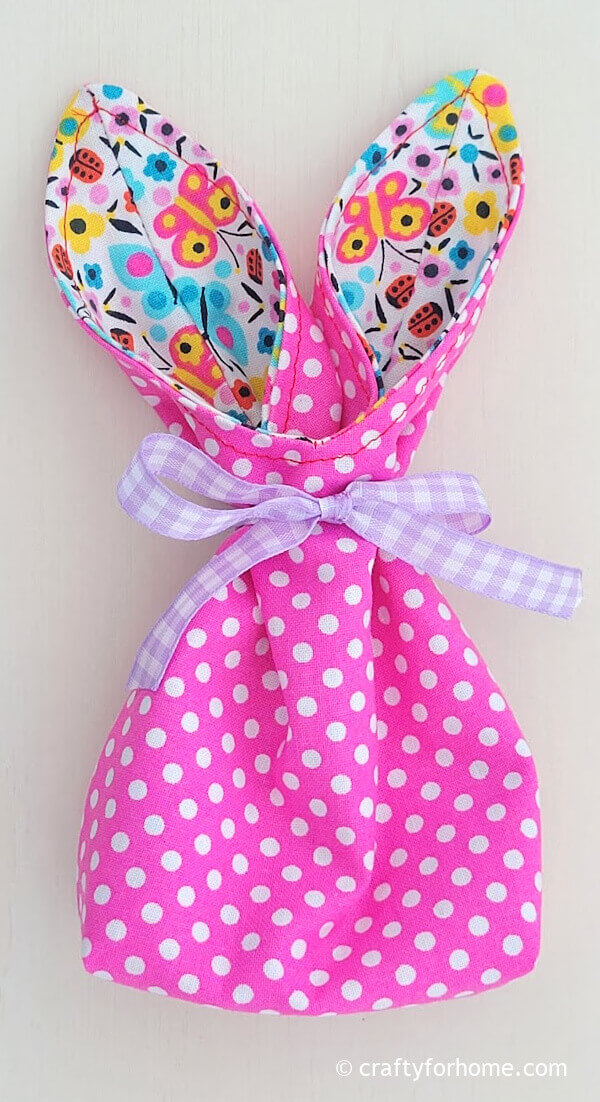
Thread the ribbon on the loop, and fill the bag with all your favourite goodies or Easter theme toys. Make a bow tie with the ribbon.
Easter Gift Idea
This DIY bunny goodie bag is perfect for a gift or an addition to the Easter basket ideas.
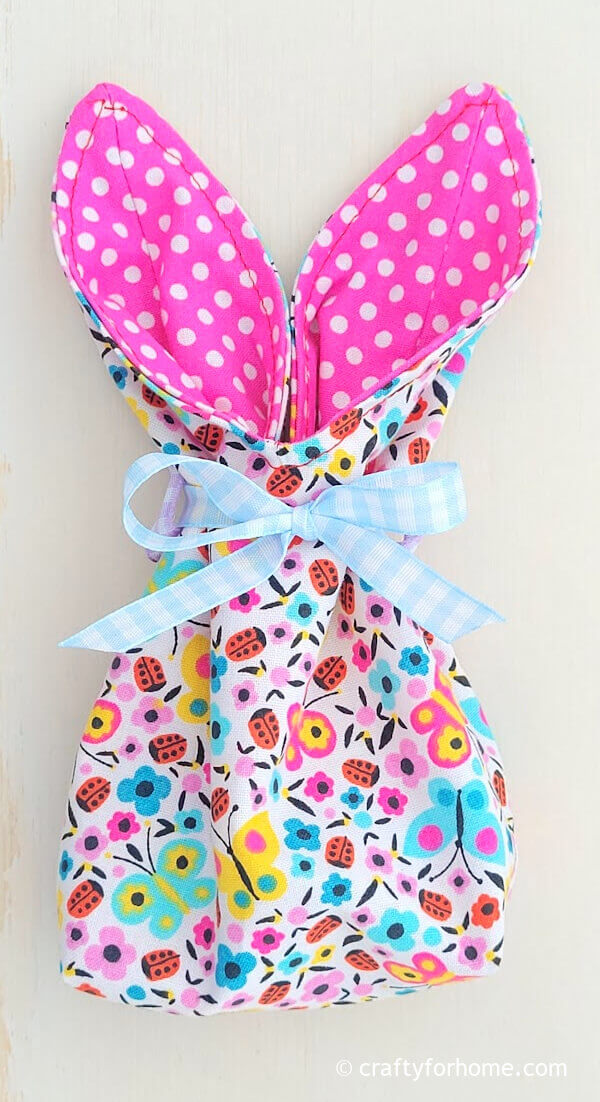
The bag is not transparent, so the treat inside the pouch is well hidden, making it a surprise for the gift receiver.
Pair it with the Easter Bunny Mason Jar for a cute Easter gift idea.
This adorable Easter bunny treat bag is perfect for gifts or an Easter basket filler. #Easterbunny #sewingforEaster Share on XGet the PDF
If it is more convenient to have the printable version of this tutorial for the project, you can purchase the Printable PDF format of Reversible Easter Bunny Treat Bags Template And Sewing Tutorial here. The e-book has the template and complete tutorials with pictures included. There are no ads or video displays on the PDF so that you can print it, and it will be available for you anytime you need the tutorial for your next project. Click on the e-book cover image above to purchase.
More sewing projects for homemade gift ideas
- Reversible Casserole Dish Cozy
- Reversible Ice Cream Cozy
- Reversible Pie Plate Cozy
- Reversible Dinner Plate Cozy
- Reversible Baking Dish Cover
- Reversible Large Hot Pad For Casserole Dish
Adorable DIY Easter Bunny Treat Bags For Easy Gift Ideas
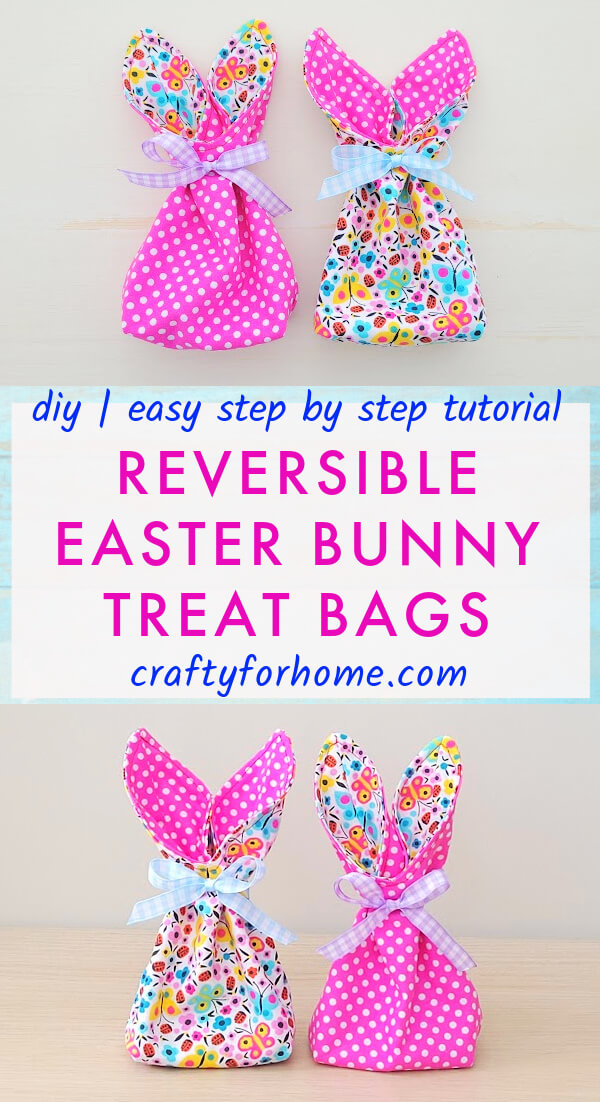
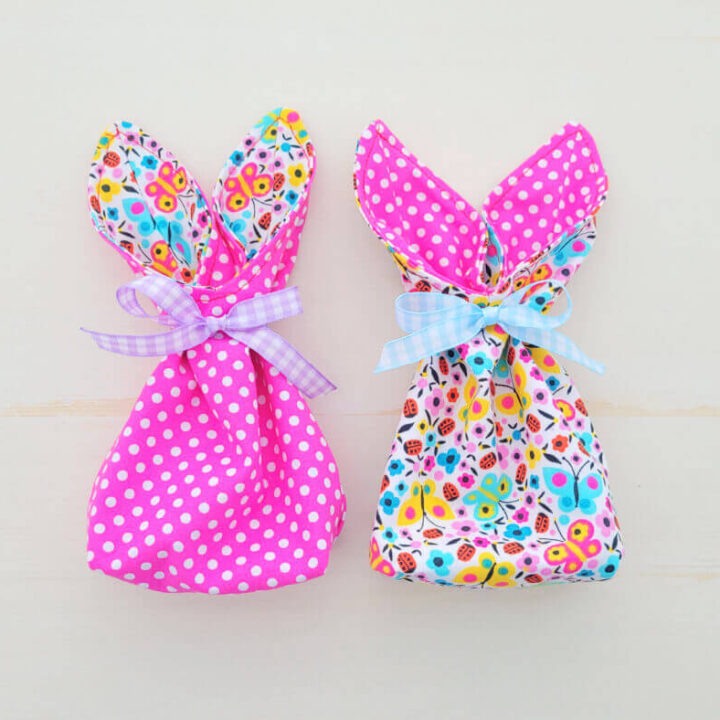
Easter Bunny Treat Bags With Easy Tutorial
Easy and quick to sew adorable Easter bunny treat bags and fill them with all your favourite sweet treats for an Easter egg hunt or Easter gift basket filler.
Materials
- 2 sheets of 5.5" x 18" rectangle cotton fabric or 1 sheet of fat-quarter size fabric
- 15" satin ribbon or grosgrain ribbon
- 2 pieces of 2" matching satin ribbon or gross grain ribbon
Tools
- Disappeared ink fabric marker
- Pin or quilting clips
- Chopstick
- Lighter
- Thread
- Scissors
- Sewing machine
- Ironing machine
Instructions
- Cut the fabric into two 5.5" x 18" rectangles with different prints on each layer.
- Take one fabric piece, and fold the fabric in half, with the right side of the fabric facing each other.
- Pin or use quilting clips to both fabric layers together.
- Measure the ear by marking 3.5" from the top corner, mark both left and right sides, then mark 2.75" in the middle between marked lines.
- Draw the line to connect the marked spot and the corner, resemble the V shape, then trim it along the V shape line.
- Next, cut two pieces of ribbon about 2" long, and use the lighter to seal the frayed edge.
- Pin the ribbon pieces on the edge of the right side fabric, about 4" from the top corner, one on the left side and one on the right side of the fabric. This little piece of ribbon is for the 'ribbon loop.'
- Sew along the edge to the bunny ear top corner with 0.25" seam allowance.
- Open the bottom pouch to resemble a diamond shape by aligning the side seam and the bottom pouch line. The side seam would be precisely in the center.
- Mark 1" from the corner stitch seam on both sides, then draw a line to connect the marked spot.
- Sew along the line, then trim it about 0.5" from the stitched line.
- Repeat the same process of measuring and sewing for the other piece of fabric but skip 2" for the opening on the side of the bag between the bottom pouch and the ribbon loop.
- Insert one layer of the pouch into another layer with the right side of both fabrics facing each other.
- Sew along the inner of the bunny ear side.
- Clip the extra fabric on the ear top to reduce bulk.
- Clip or fringe cut the corner V shape.
- Turn the bunny pouch right side out through the opening gap.
- Push each pointy corner with a chopstick.
- Topstitch the opening gap with a tiny seam.
- Press the ears with the ironing machine.
- Topstitch the around the inner ear side.
- Thread the ribbon on the loop.
- Fill the bag with treats.
- Make a bow tie with the ribbon.
Leave a Reply