This easy gardening project tutorial is for making biodegradable newspaper plant pots that are great for seed starting and recycling items for the garden.
Easy Tutorial For Making Newspaper Seed Starting Pots
When you have too many newspapers waiting to go to the recycling bin, it is better to turn them into something useful for your garden, especially when you need more seed starting supplies for the upcoming season.
As an Amazon Associate I earn from qualifying purchases. This post may contain affiliate links. Please see the Disclosure Policy for details.
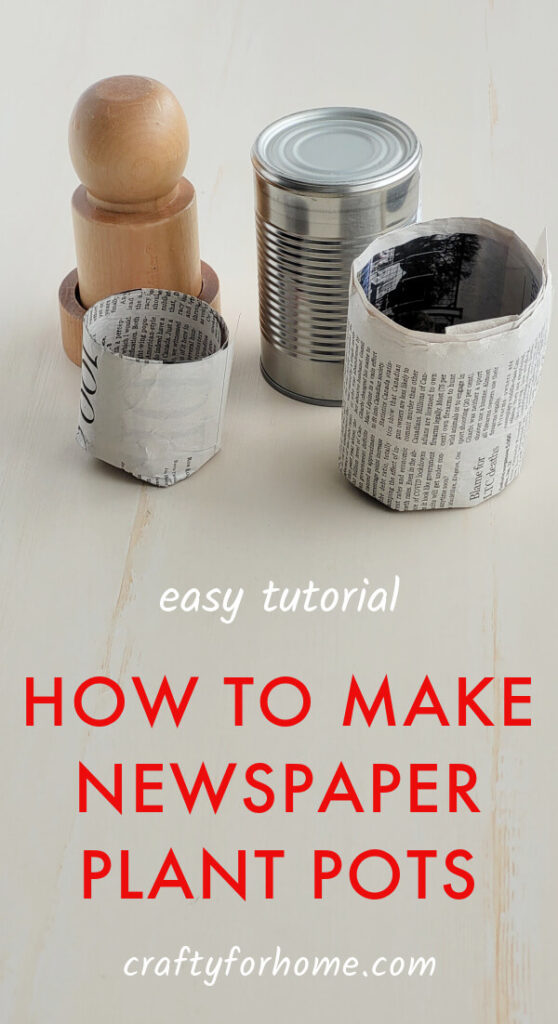
Making newspaper seed starting pots is easy and great to save you on the gardening budget. Who knew that from a bundle of newspaper, you would get tons of seedling pots you need.
When kids want to involve in the garden, then ask them to make these newspaper pots. It is an excellent project for the weekend, and they also can learn how to upcycle things around the house for DIY seed starting containers.
You don’t want to use glossy paper, only the regular newspaper for this project. This day, most newspapers use soy-based ink, which is safe for the garden. You can ask your local newspaper company to ensure the ink is safe to use for gardening.
How To Fold Newspaper Into Biodegradable Plant Pots
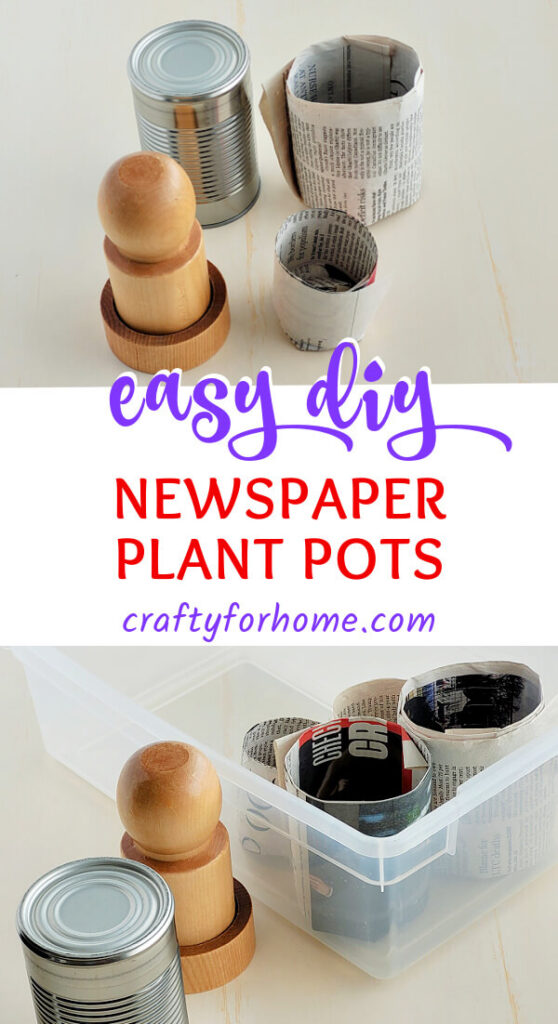
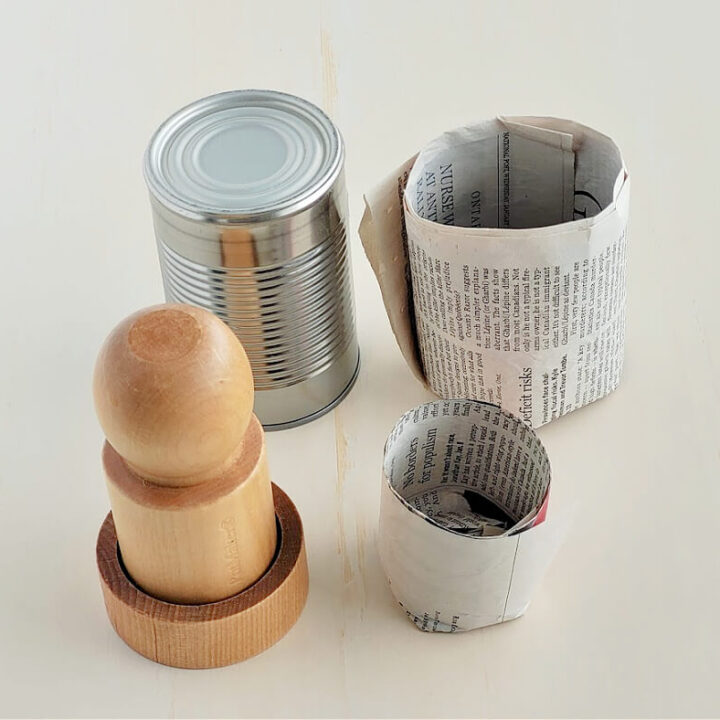
You can use anything that has a cylinder shape for the mold. Something like a small tin can from a canned bean, tissue roll, or soda can.
If you want to invest in something for this project, you can get this newspaper pots mold similar to what I use here. This tool will last year after year and make it easier for you to shape the seedling planters.
Supply You Need For Making Newspaper Seedling Planters
- Newspaper
- Tin can, soda can, or this newspaper plant pots mold
- Ruler
- Scissor
- Pencil
Newspaper Seedling Pots Tutorial Using Tin Can
Start by folding one sheet of newspaper, or measure the newspaper into about 5 inches in width.
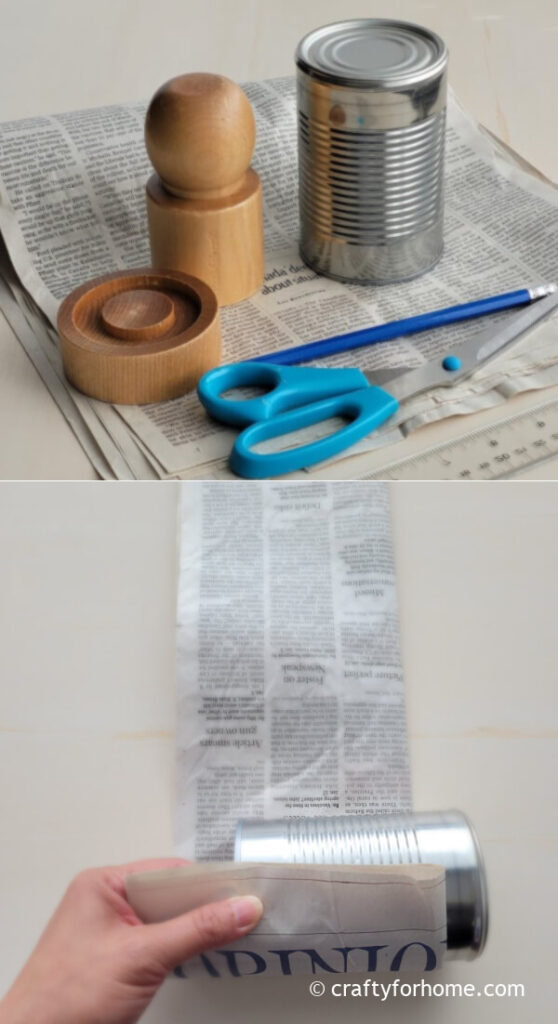
Roll the newspaper strip on the tin can or soda can.
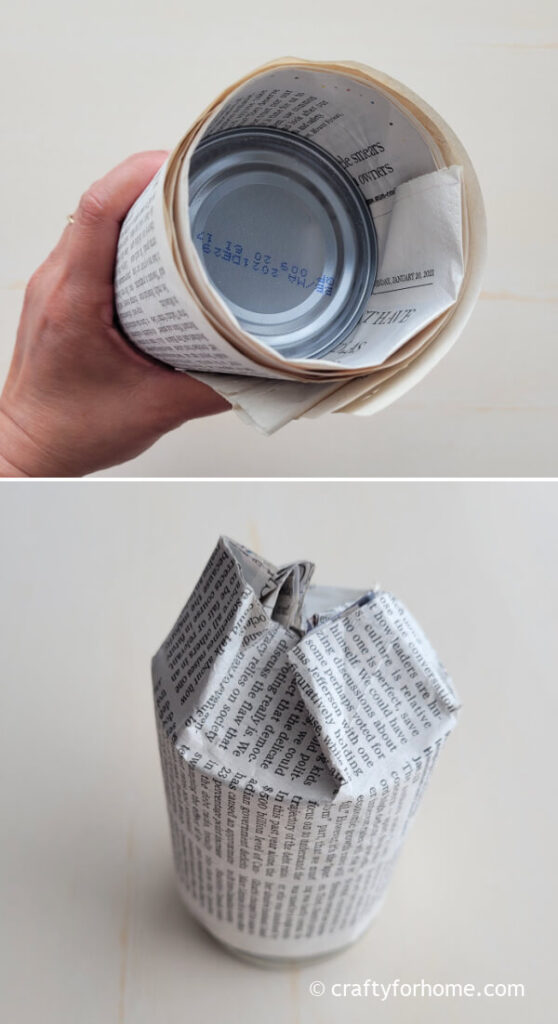
Fold the extra paper around the bottom of the can.
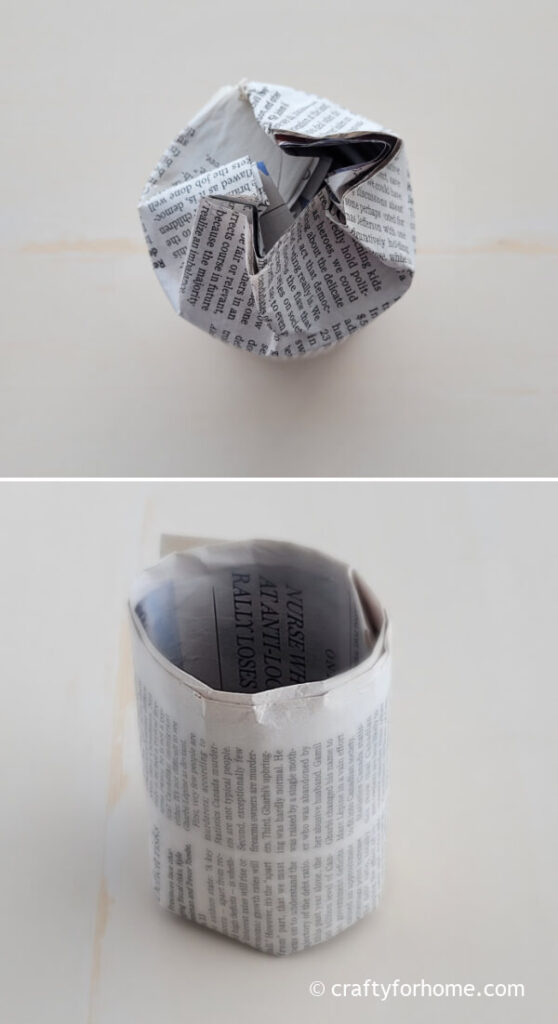
Remove the can by sliding it out.
Newspaper Seedling Pots Tutorial Using The Planter Mold
Start by folding one sheet of newspaper, or measure the newspaper into about 3.5 inches in width.
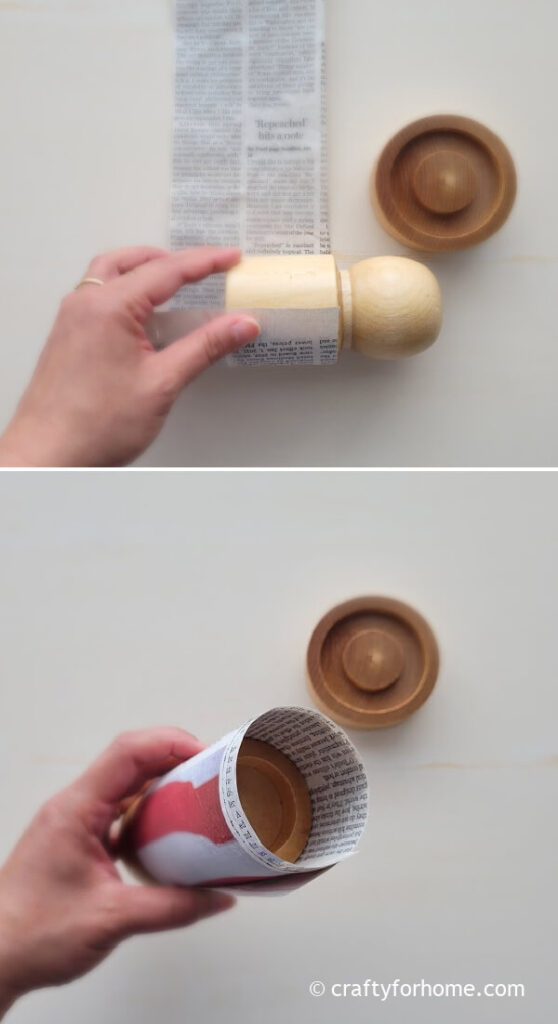
Roll the newspaper strip on the planter maker.
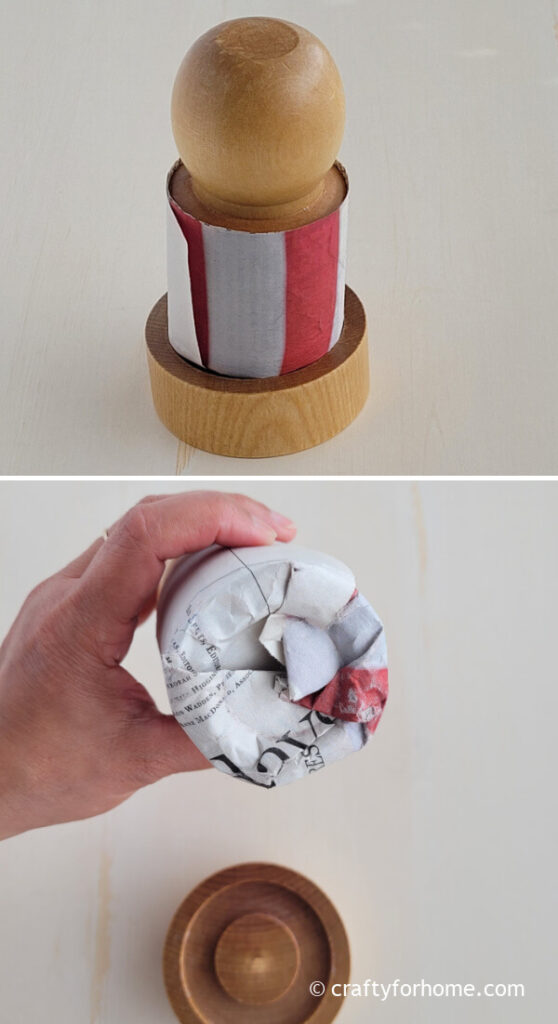
Put the planter maker on the planter base. Turn it several times so that you will create the crease for the bottom of the paper planter.
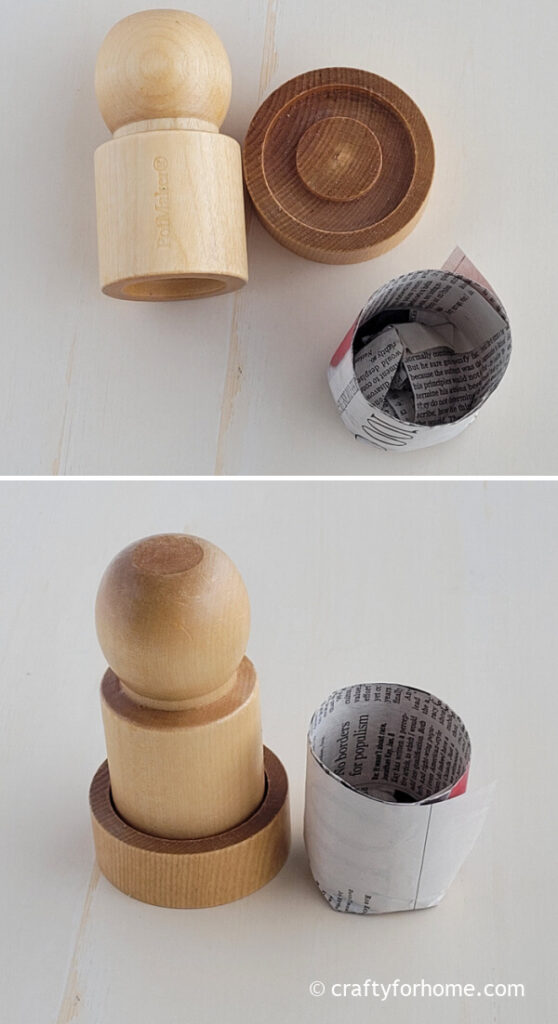
Remove the planter maker.
The Best Way To Water Newspaper Plant Pots
Arrange the paper pots close together neatly on the clear tote box (shoebox size), seedling tray, or even plastic salad container. The tote box is almost the same height as the paper pots to prevent the paper planter toppled over.
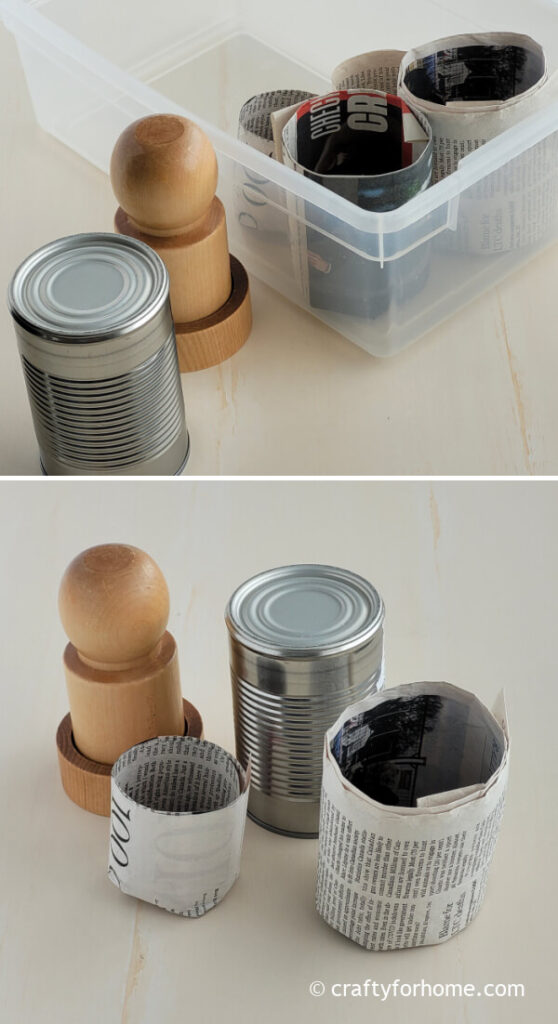
Use the growing medium specifically for seed starting. Moist the soil first before putting it into the pot to prevent drying out quickly. Then plant the seed.
The best way to watering the newspaper pots is by pouring about half an inch of water on the tray or tote box. Let the water seeping through the bottom part of the soil mix.
This way is to prevent overly moist growing medium, which will promote fungus. If the fungus appears, then there is a chance it will ruin your newly planted seed.
If the top of the soil mix looks dry, use the fine mist to water it. You can get one like this fine mist spray bottle for the easy watering job.
How Long Do Newspaper Pots Last
The newspaper planter only lasts up to 6 weeks or earlier. That’s because newspapers break down quickly. That is a good reason also to put shredded newspaper on the compost bin as brown material.
If the seedling is getting too big already and the last frost date is still far away to come, you have to transplant it to another larger planter until it is ready to go to its final spot in the garden.
Because newspaper degrades quickly, you want to use it for some quick sprouting seeds only like marigold, zinnia, cosmos, zucchini, beans, or squash.
The Benefit Of Using Newspaper Pot
Even though newspapers degrade quickly, you still get lots of benefits by using them for seed starting.
Recycle and reuse items.
Feel overwhelmed with the pile of newspapers you get from the neighborhood, then turn it into good use. Reusing newspaper for seedling pots helps you reduce waste, and it is one of the DIY planters you can make from around the house.
Biodegradable planter.
There is no need to remove the seedling out of the pots. You can plant the whole planter and all.
The whole point of using newspaper for planting seeds is that you don’t need to make the planter super thick because you want the pots to degrade quickly.
Reduce transplant shock.
Newspaper pot is a plantable one. Without removing the seedling from its pot will minimize disturbing the plant root. This way will reduce transplant shock.
Plants like beans will benefit from the biodegradable planter, as the seedling tends to grow better if you don’t disturb the root system. But of course, beans will grow better by direct sow in the garden.
Save money on gardening.
Recycling things around the house will save you money for the gardening budget. The newspaper planters are perfect when there are not enough seed starting plugs available and still too many seeds to plant.
Easy DIY gardening project
Besides making plant markers, making a planter is also a fun and easy DIY gardening project. You only use items you find around the house.
Disadvantage Of Newspaper Plant Pots
Even though it is a practical way to use up those forgotten newspapers, a seedling planter made of paper also has disadvantages.
The soil mix dries out quickly.
The paper is thin and dries out quickly in a warm place. That will make the soil mix also dries out.
Keep checking the soil mix if it needs more moisture. Most plant seeds won’t germinate in a dry soil condition.
Prone to damping off.
The paper wicked the moisture quickly, and it can make the soil get soggy. The overly moist soil can ruin the little seedling to rot or create soil-borne fungal disease.
A wilted seedling indicates that you have a damping-off problem even though you keep watering it as necessary. You can read about damping-off in seedlings here.
Paper planter doesn’t last long.
Unlike plastic one, a paper planter doesn’t last long. You have to prepare for the next transplanting stage once the seedling has few true leaves about six weeks or earlier, depending on what plant you grow.
The newspaper pots might get crumble in the bottom if it sits too long with the seedling on it. Once it crumbles, it might difficult to move the seedling for transplanting.
Require more time for preparation.
There is extra time for seed starting preparation if you make the paper planters first. But you can make this a family fun weekend project.
Plan in advance for when is your schedule to start planting seeds. It also will help you to determine how many planters you need.
Possible rootbound.
Like any other seedling plug, plants may have rootbound if left there for too long. Fast-growing plants such as squash might have rootbound easily.
For that reason, you need to transplant them to a larger pot once it has the two sets of true leaves. Make sure to harden off plants first when it is ready to transplant outside.
Turn that pile of newspapers into seed starting planters. #plantingseeds #seedstartingindoors Share on XEven though there are disadvantages to using a newspaper planter, it is still good to use it as a repurpose item and fun gardening project you can do with kids.
Easy Plants To Grow From Seed
- 10 Easy To Grow Herbs
- 20 Easy To Grow Vegetables From Seed
- 10 Vegetables You Can Plant In The Early Spring
- 13 Perennial Flowers From Seed
- 15 Annual Flowers From Seed
This DIY Newspaper Seedling Pots Is Easy And Fun Recycling Project For The Garden
How To Make DIY Newspaper Plants Pots
This easy garden project is for repurpose old newspapers into biodegradable plant pots that are great for seed starting indoors.
Materials
- Newspaper
Tools
- Tin can or soda can
- Scissor
- Pencil
Instructions
- Start by folding one sheet of newspaper, or measure the newspaper into about 5 inches in width.
- Roll the newspaper strip on the tin can or soda can.
- Fold the extra paper around the bottom of the can.
- Remove the can by sliding it out.
Notes
Make sure to see the complete steps of picture tutorials in the post for more detailed instructions.
Leave a Reply