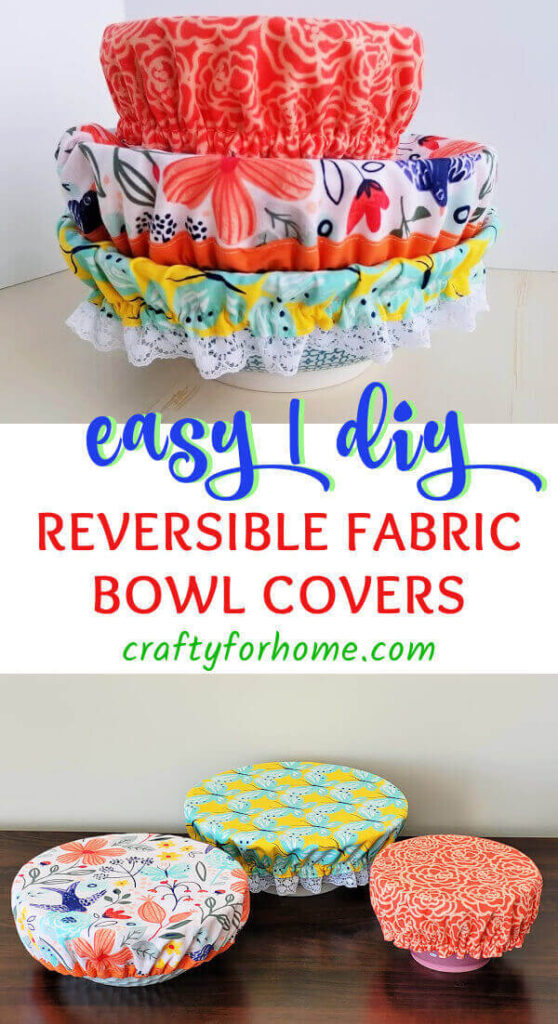
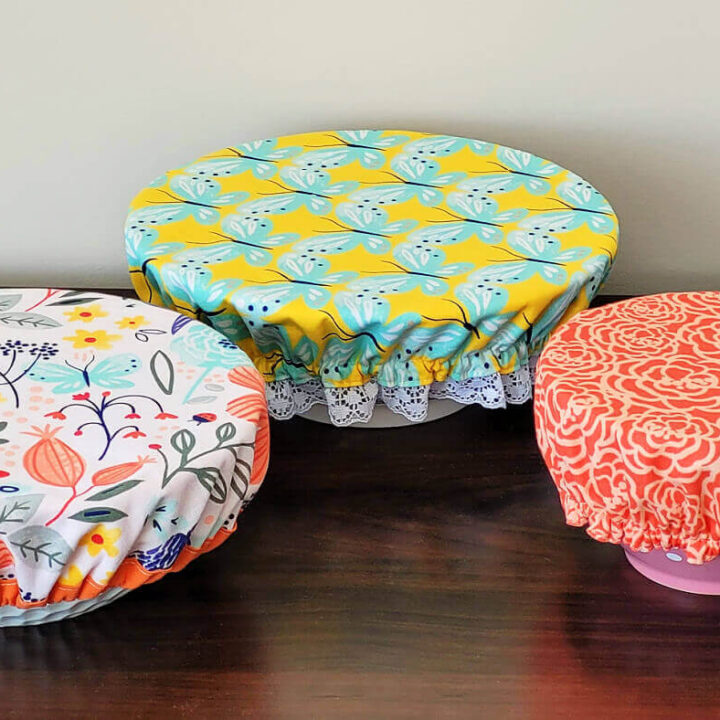
This easy sewing tutorial is for making reusable and reversible fabric bowl covers that are easily customized to fit the size of any bowl you are using.
Use This Guide To Make Reversible Fabric Bowl Covers
When you want to bring food for a potluck party, picnic to the park, or cookie exchange party, use the reusable bowl cover instead of plain-looking plastic or foil because you can make it colorful and customize it for the occasion themes.
As an Amazon Associate I earn from qualifying purchases. This post may contain affiliate links. Please see the Disclosure Policy for details.
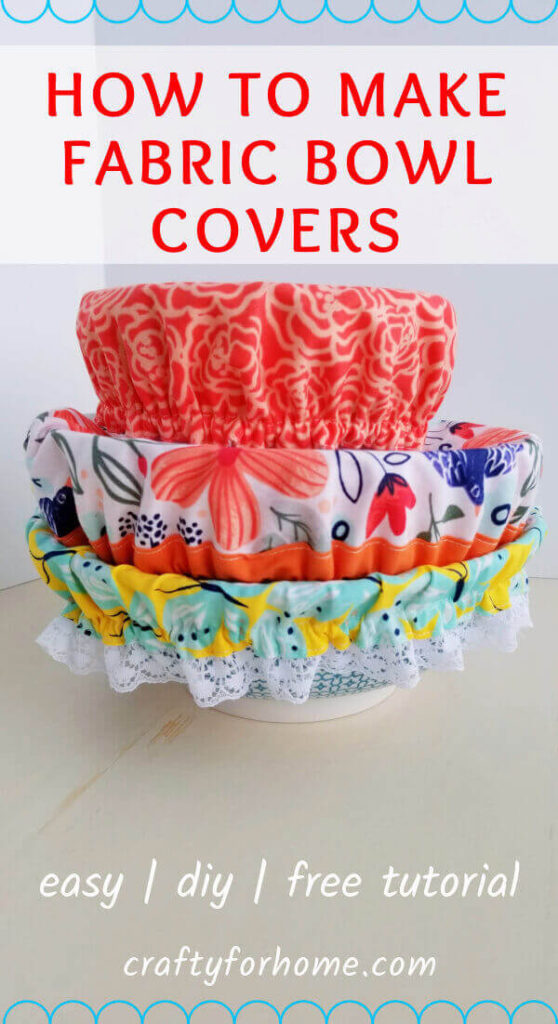
Once it is finished, then toss the bowl cover to the washer. It reduces disposable items, and you will use the bowl cover repeatedly as it is reusable and completely washable.
Material To Make Bowl Covers
This DIY bowl cover is reversible without any fraying edge exposed. Therefore it will last longer, even for daily use.
You can either use a fat quarter fabric bundle or 1 meter/1 yard fabric for making bowl covers. If you are using one meter of fabric, you will have the same print on each side of the bowl cover.
I use cotton quilt weight in a fat quarter bundle for this project, which is fantastic because I can get so many beautiful and fun prints in one bundle.
Depending on the size of the bowl you are using, there is a probability you will have some extra fabric as scraps when you are done with the project if you are using a fat quarter as it is only around 18″ x 22″ wide.
But no worries, you can use the scraps for making a gift card holder or pocket tissue holder. Also, here are some of these quick sewing projects from fabric scraps:
Cotton quilt fabric, flannel, linen, polyester mix cotton, or oilcloth are the best material for reusable fabric bowl covers. If you use oilcloth for this project, here is the article about how to wash oilcloth properly.
What You Need To Make Reversible Bowl Cover
- 1 meter of cotton fabric, or use mix and match fat quarter cotton fabric for different prints on each side.
- Elastic cord, small size about 1/4 inch or 6 mm wide.
- Disappeared ink fabric marker
- Scissors
- Ruler
- Pin or quilting clips
- Thread
- Sewing machine
- Ironing machine
- Pinking shears or this fray check liquid
- Bowl
- Extra-wide double fold bias tape (additional material)
- Cotton lace eyelet or crocheted lace trim (additional material)
Sewing Bowl Cover Tutorial
This project has three different reusable bowl cover tutorials. All tutorials will use basic sewing tools and basic materials (fabric and elastic).
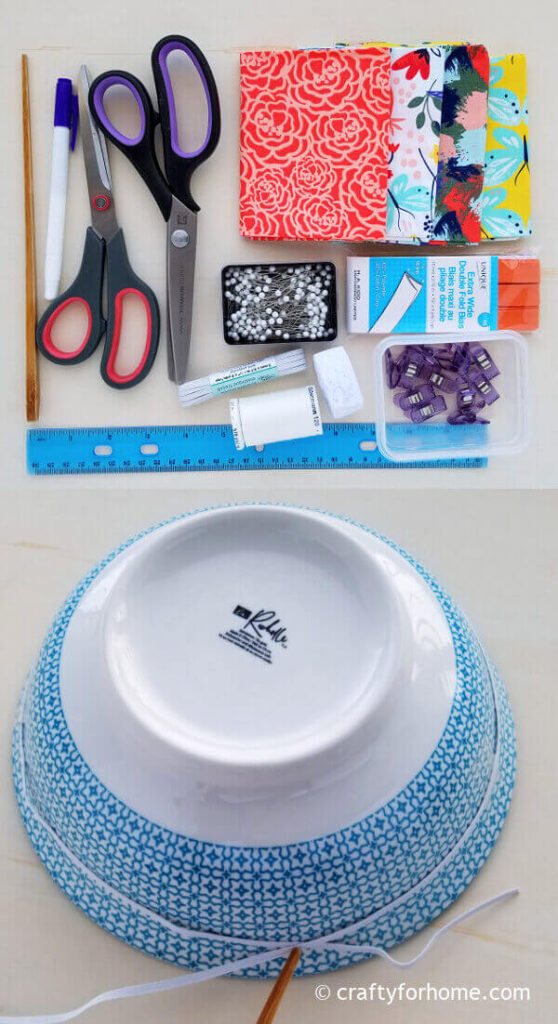
Lace and bias tape are additional items. These are for modifying the simple bowl cover.
All tutorials are also suitable for a square/rectangular baking dish, casserole dish, bread loaf pan, ramekin, and even the kitchen aid bowl cover.
Simple Reversible Bowl Cover With Elastic
See the Simple Reversible Bowl Cover video tutorial here.
Pick the bowl you are going to use. Turn the bowl upside down on top of the fabric.
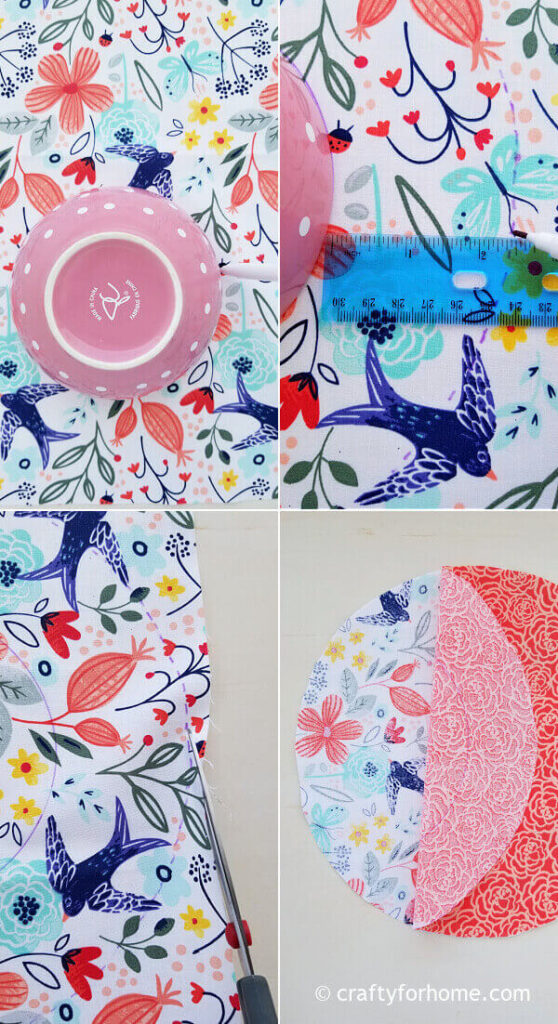
Trace the bowl on the fabric.
Use the ruler to make the second circular line. Mark the spot 2.5 inches from the traced bowl line and along the circular line. You will have a circular dash line once you finish using the ruler.
Repeat the process on the second sheet of fabric.
Pin the fabric together with the right side facing each other. Sew along the edge with a 0.25 inches sewing allowance and skip the stitch around 1.5 inches for the opening.
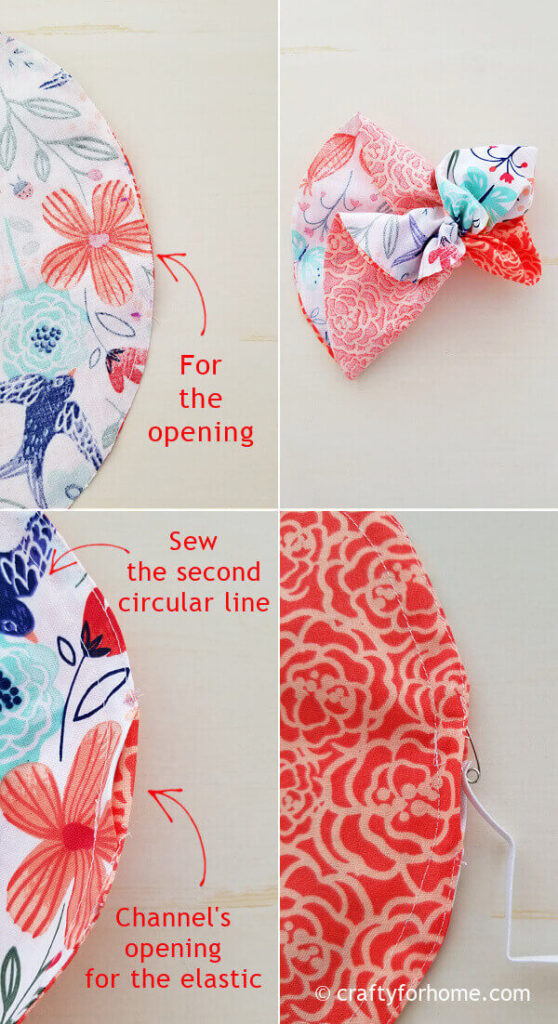
Turn it right side out. Press it with the ironing machine.
Mark another circular line about 1/2 inch from the edge. Sew along the line.
Prepare the elastic by measuring the bowl you are using, then subtract 2 inches and cut it off.
Attach the safety pin to the elastic. Then, thread the elastic through the opening along the channel.
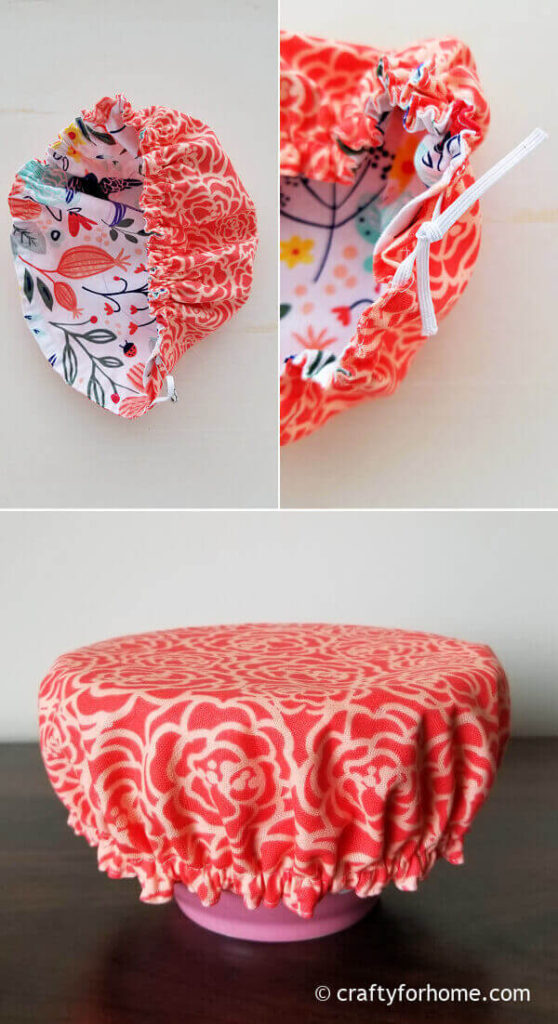
Knot the elastic or sew it by using the zigzag stitch, then tuck it inside the channel. Topstitch the opening to close it.
Reversible Bowl Cover With Elastic and Lace
See the Bowl Cover With Elastic And Lace video tutorial here.
This tutorial is similar step by step to the simple bowl cover. There is only an additional step for attaching the lace.
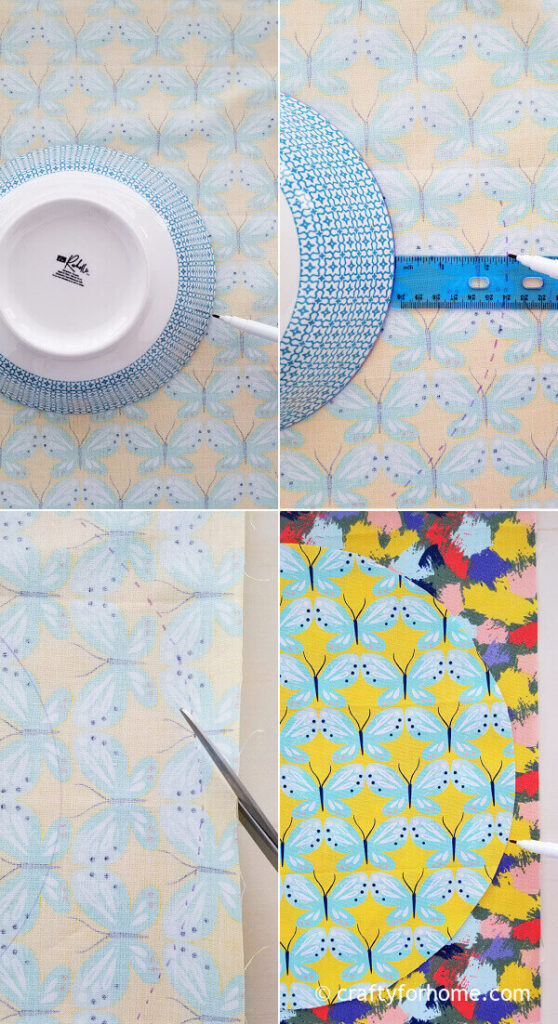
Trace the bowl on the fabric.
Use the ruler to make the second circular line. Mark the spot 2.5 inches from the traced bowl line and along the circular line. You will have a circular dash line once you finish using the ruler.
Repeat the process for the second sheet of fabric.
Measure the lace you will use as the same circumference as the second circular line (the dash line) and add 1 inch.
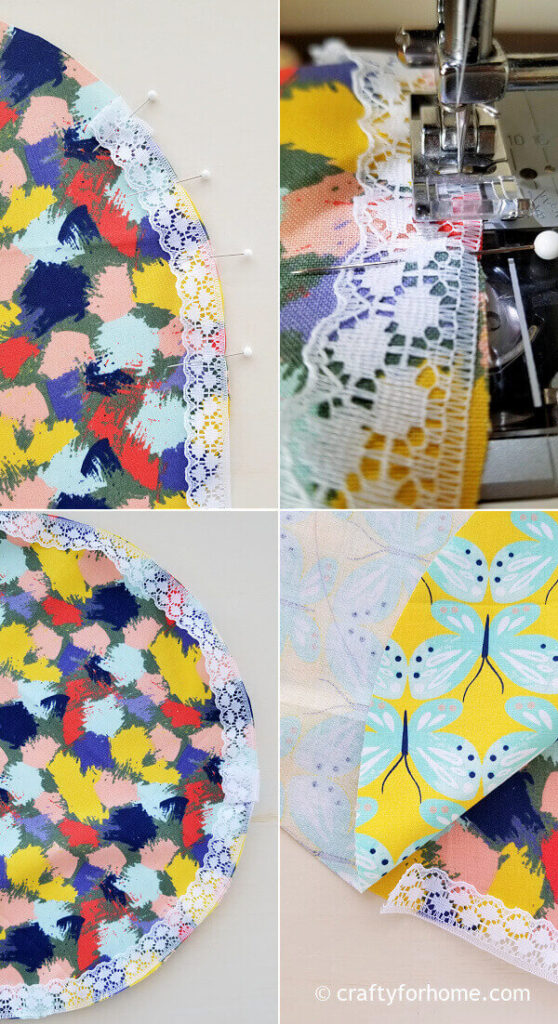
Pin the lace on the edge of the first fabric circle.
Topstitch the edge of the lace trim.
Sandwich the material with this order, wrong side of the first fabric facing down, lace, wrong side of the second fabric facing up.
The lace will be between the right side of both fabrics.
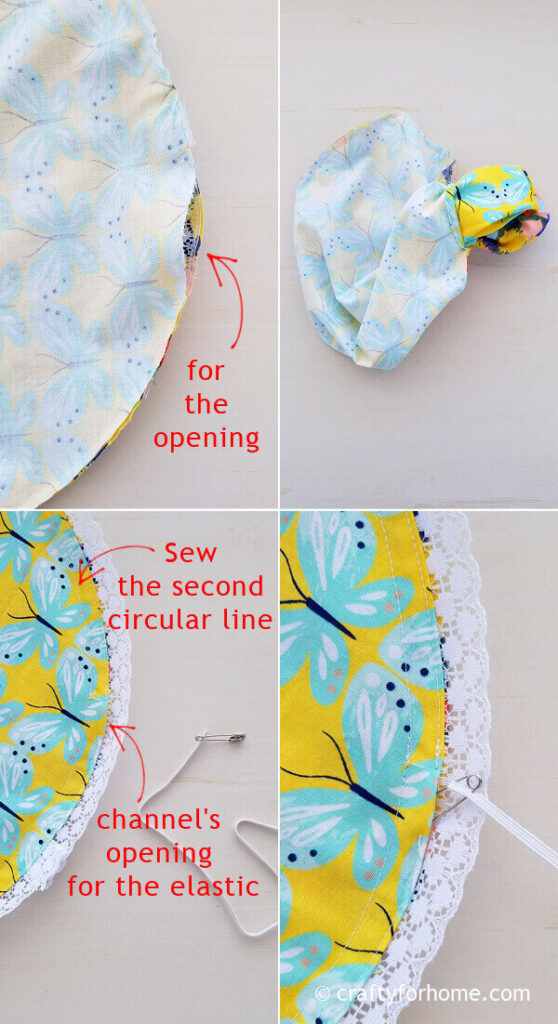
Sew along the edge with 0.25 inches seam allowance, and skip 1.5 inches for the opening.
Turn the fabric right side out. Press it with the ironing machine.
Mark another circular line about 1/2 inch from the edge. Sew along the line.
Prepare the elastic by measuring the bowl you are using, then subtract 2 inches and cut it off.
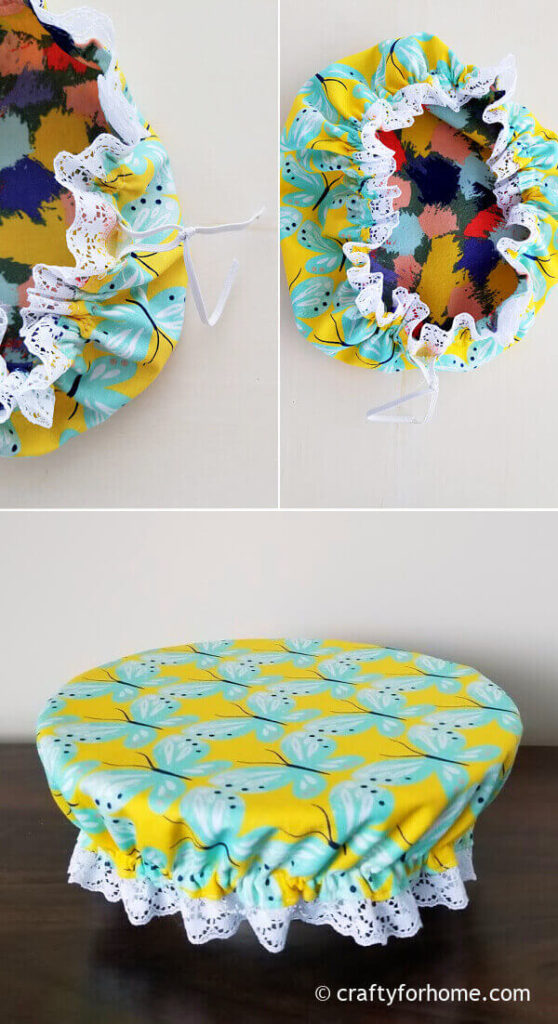
Attach the safety pin to the elastic. Then, thread the elastic through the opening along the channel.
Knot the elastic or sew it by using the zigzag stitch, then tuck it inside the channel. Topstitch the opening to close it.
Reversible Bowl Cover With Bias Tape
Trace the bowl on the fabric.
Use the ruler to make the second circular line. Mark the spot 2.5 inches from the traced bowl line and along the circular line. You will have a circular dash line once you finish using the ruler.
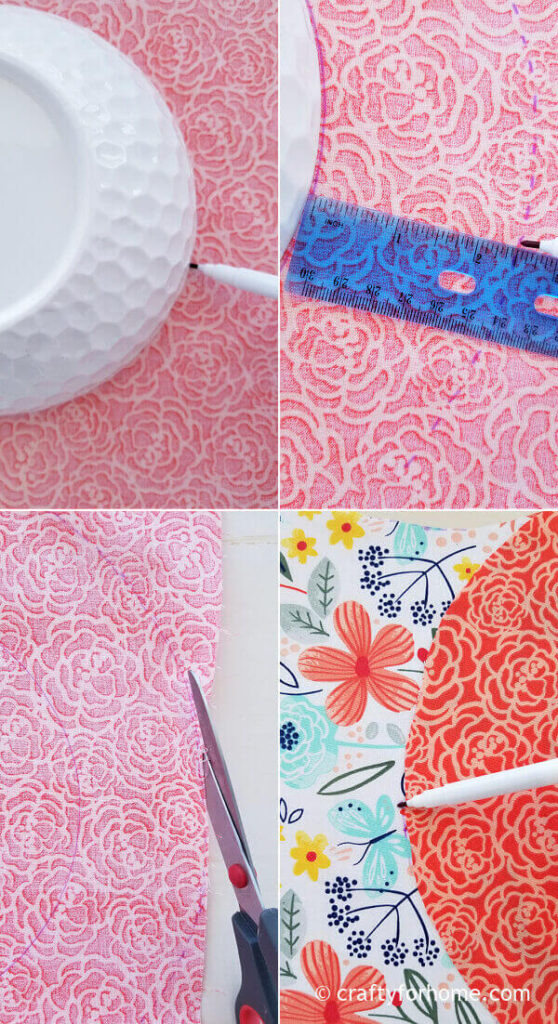
Repeat the process for the second sheet of fabric.
Pin the fabric together with the wrong side of the fabric facing each other.
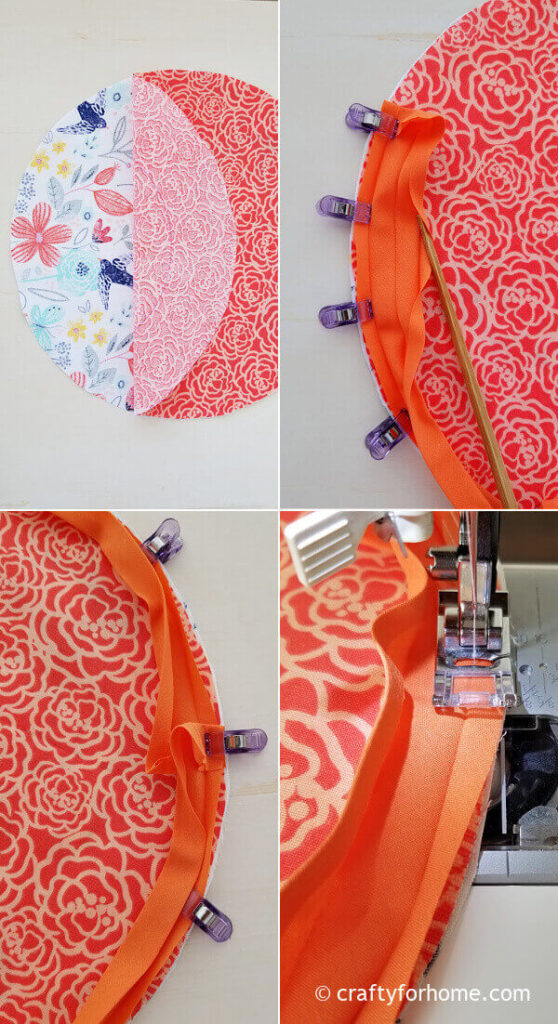
Open up the crease of the bias tape. Pin or use the quilting clip on the inside of the bias tape along the edge.
Add an inch of the bias tape on one end.
Sew along the crease. Fold over the bias tape to the second fabric.
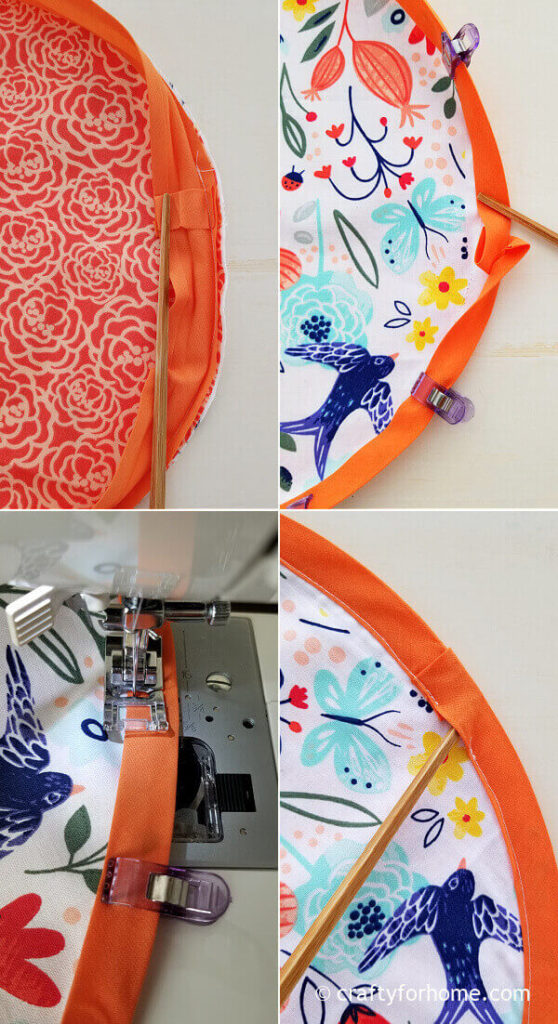
Pin or clip the bias tape. Sew along the bias tape but skip 0.5 inches for the elastic channel opening.
Prepare the elastic by measuring the bowl you are using, then subtract 2 inches and cut it off.
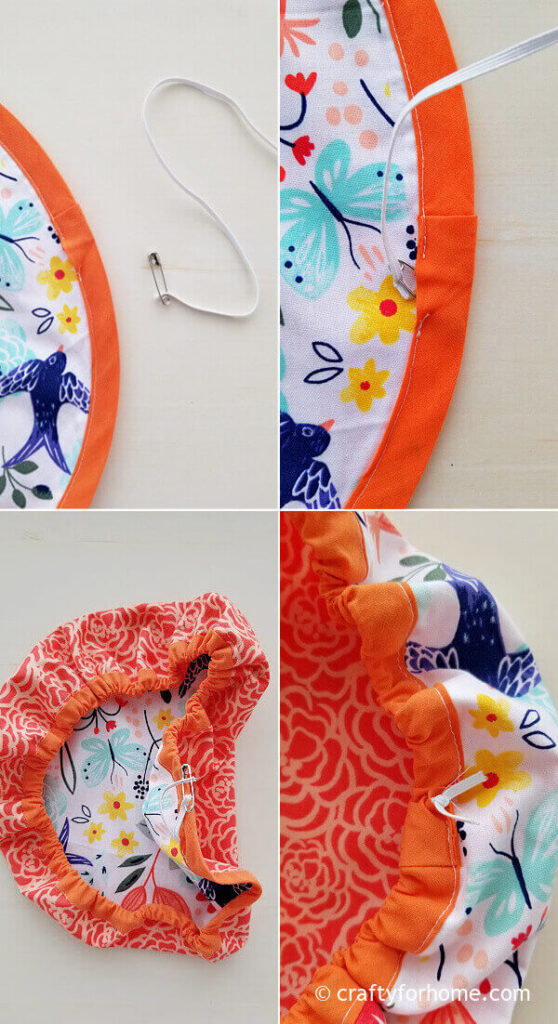
Attach the safety pin to the elastic. Thread the elastic through the bias tape opening along the channel.
Knot the elastic or sew it by using the zigzag stitch.
You can topstitch the opening to close it or leave it open.
Useful tips:
To prevent the fabric from fraying, you can use a serger, pinking shears, overcast, zigzag stitch, or fray check liquid along the raw edge. You can also leave the edge raw, as it is inside the channel for the elastic.
Use the tape when you measure the elastic on the bowl, as it is quite slippery.
Why Do You Need Fabric Bowl Cover
This fabric bowl cover is not an air-tight material like saran wrap or foil. But the fabric cover will keep your food from bugs and dust, which is perfect for a picnic or camping.
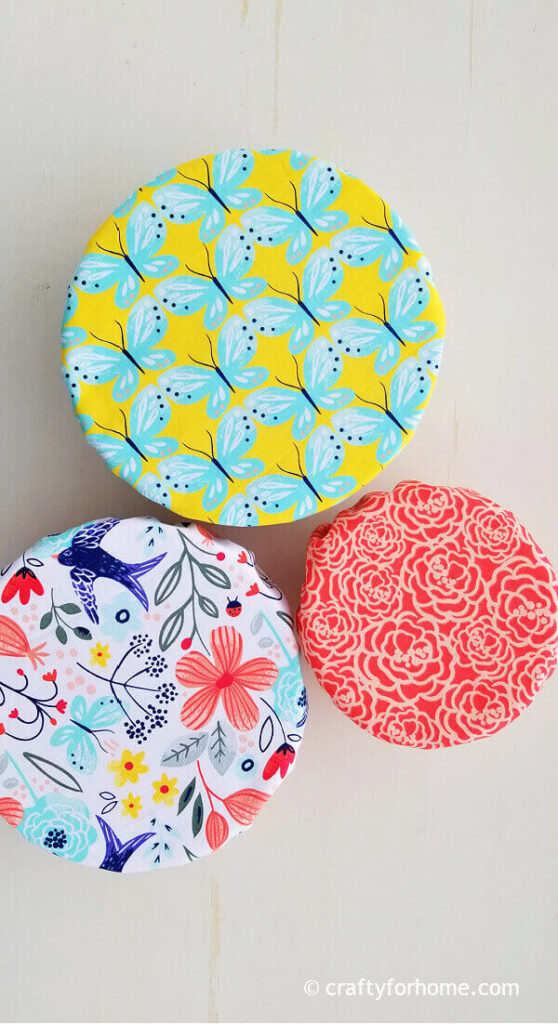
The fabric bowl cover will keep baked goods like cookies or muffins warm and not soggy from condensation. It also will keep the bread dough warm to double the size before shaping it.
The bowl cover is washable and reusable, which is fantastic for reducing disposable items. However, even though it is a reusable bowl cover, it is not stackable like hard plastic or silicone cover.
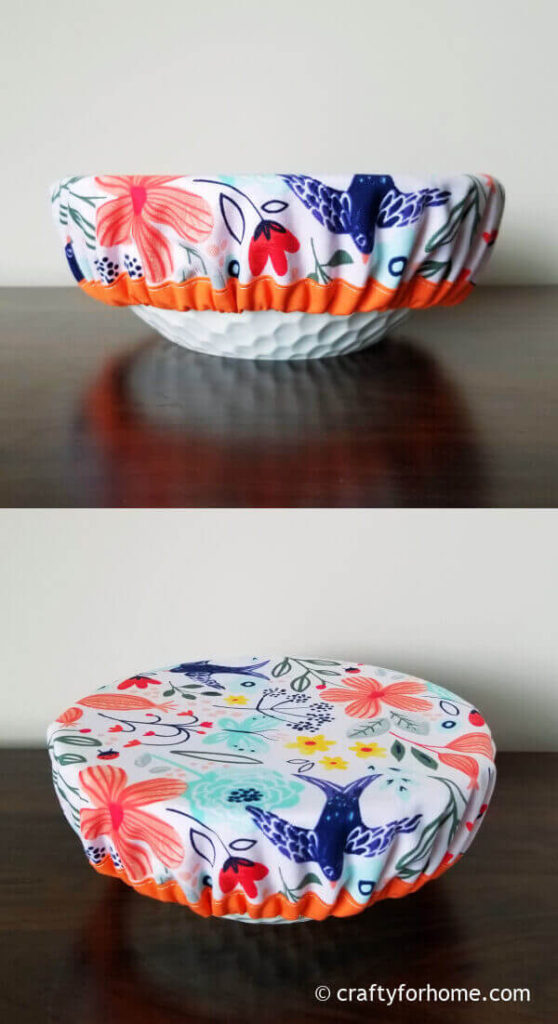
The cover is reversible to give you the option to use both sides as you like.
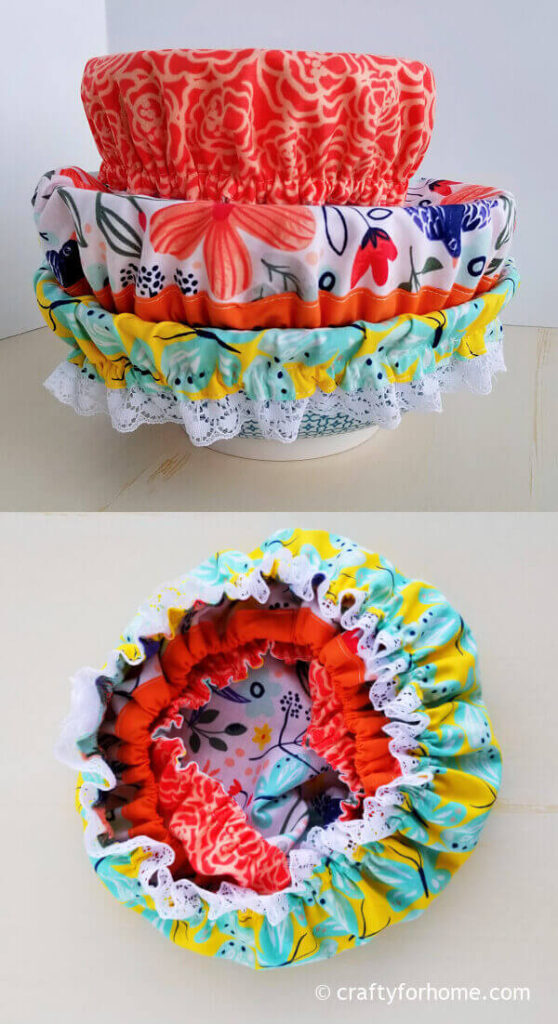
Easy for storage and save space by tucking one cover inside the other, rolling it, or folding it over. There is no need to make a big space in the drawer, like using boxed plastic wrap or foil.
Reduce the disposable items by using these reversible fabric bowl covers that are completely washable and reusable. #bowlcover #reversiblebowlcover Share on XMore of Easy Sewing Project For The Kitchen
- Easy Binding Mug Rug
- Reversible Bowl Cozy
- Mitered Corner Cloth Napkins
- Easy Oval Placemat
- Dinner Plate Cozy
This Reversible And Reusable Bowl Cover Tutorial Is Easy And Quick Sewing Project
How To Make Reversible Bowl Cover
This easy sewing tutorial is for making reusable and reversible fabric bowl cover that easily customize to fit the size of any bowl you are using.
Materials
- 1 meter of cotton fabric, or use mix and match fat quarter cotton fabric for different prints on each side.
- Elastic cord, small size about 1/4 inch or 6 mm wide.
Tools
- Disappeared ink fabric marker
- Scissors
- Ruler
- Pin or quilting clips
- Thread
- Sewing machine
- Ironing machine
- Pinking shears or this fray check liquid (optional)
- Bowl
Instructions
- Pick the bowl you are going to use. Turn the bowl upside down on top of the fabric.
- Trace the bowl on the fabric.
- Use the ruler to make the second circular line. Mark the spot 2.5 inches from the traced bowl line and along the circular line. You will have a circular dash line once you finish using the ruler.
- Repeat the process on the second sheet of fabric.
- Pin the fabric together with the right side facing each other. Sew along the edge with a 0.25 inches sewing allowance and skip the stitch around 1.5 inches for the opening.
- Turn it right side out. Press it with the ironing machine.
- Mark another circular line about 1/2 inch from the edge. Sew along the line.
- Prepare the elastic by measuring the bowl you are using, then subtract 2 inches and cut it off.
- Attach the safety pin to the elastic. Thread the elastic through the opening along the channel.
- Knot the elastic or sew it by using the zigzag stitch, then tuck it inside the channel.
- Topstitch the opening to close it.
Notes
You can use a serger, pinking shears, overcast, or a zigzag stitch, or fray check liquid along the raw edge to prevent fraying. You can also leave the edge raw, as it is inside the channel for the elastic.
Use the tape when you measure the elastic on the bowl, as it is quite slippery.
Leave a Reply