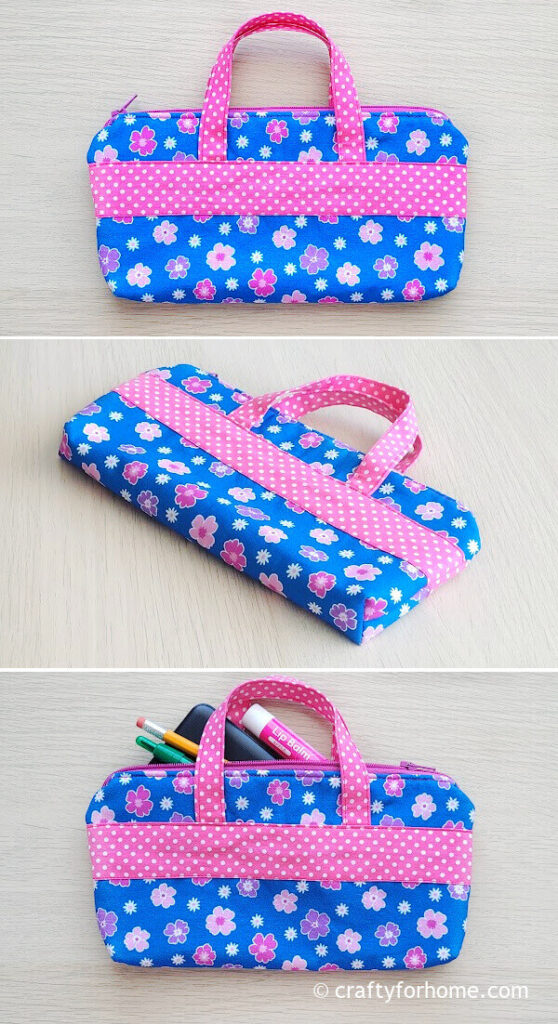
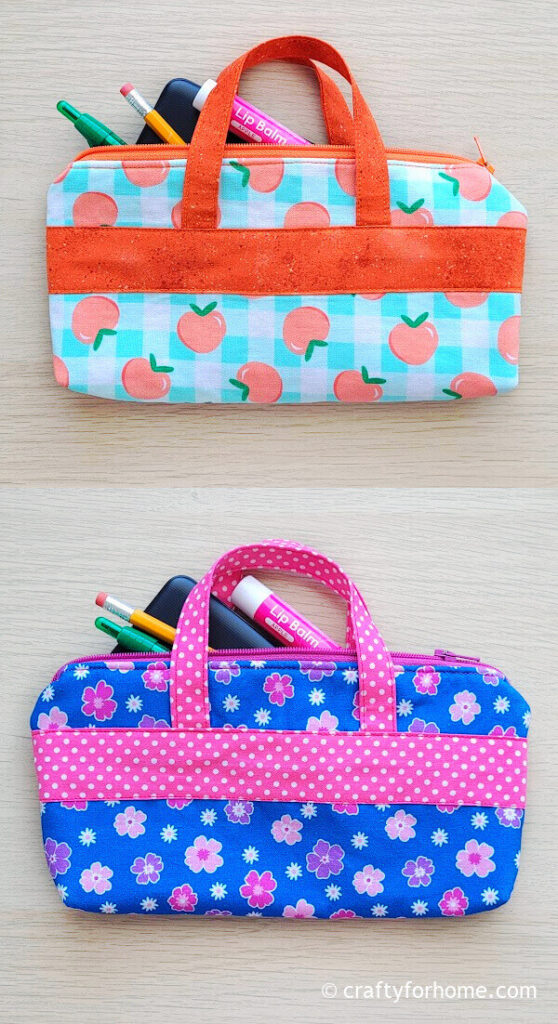
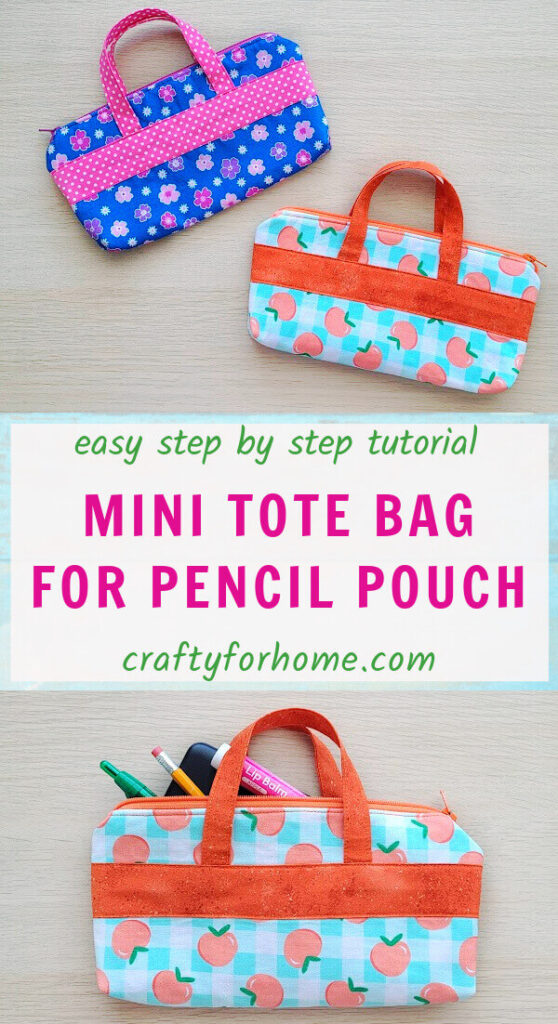
This incredibly easy small tote pencil bag sewing pattern is perfect for a school supplies must have item. A stylish DIY pencil pouch to keep all small items, pencils, pens and even as a phone bag.
Zippered Pencil Pouch With Handle
Back to school season is approaching. Time to whip up a cute pencil pouch from new or scrap fabrics.
As an Amazon Associate I earn from qualifying purchases. This post may contain affiliate links. Please see the Disclosure Policy for details.
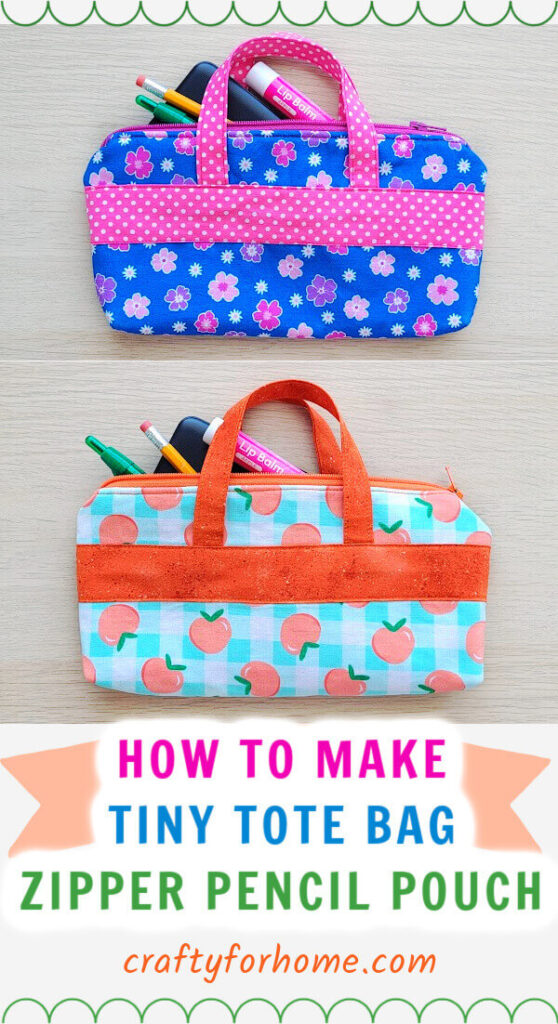
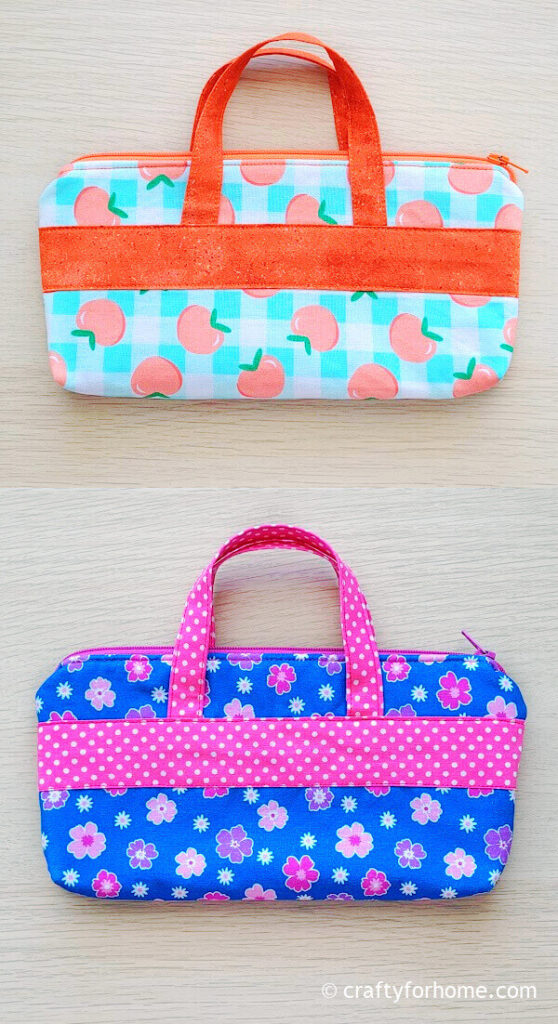
This DIY pencil bag resembles a mini tote bag with a zipper enclosure. The bag has enough space to use as a phone pouch as well.
Supplies To Make a Pencil Tote Bag
The layer cake precut fabric is perfect to make this pencil bag, as you only need three pieces of 10″ square fabric.
Also, you can use a piece of fat quarter fabric. There would be enough fabric for two pieces of 10″ squares and four small rectangular pieces for the bag handle.

- 2 of 10″ x 10″ fabrics
- 4 of 2.5″ x 10″ fabrics for the bag handle
- 1 of 10″ x 10″ fusible fleece
- 14″ zipper
- Zipper foot
- Disappeared ink fabric marker. I use this dual-purpose marker.
- Quilting clips or pins
- Chopstick
- Ruler
- Scissors
- Sewing machine
- Clothes iron
Pencil Bag With Handle Tutorial
The video tutorial is also available. Click on this link to watch the Cute Pencil Bag Sewing Tutorial on my YouTube channel, and subscribe for more videos.
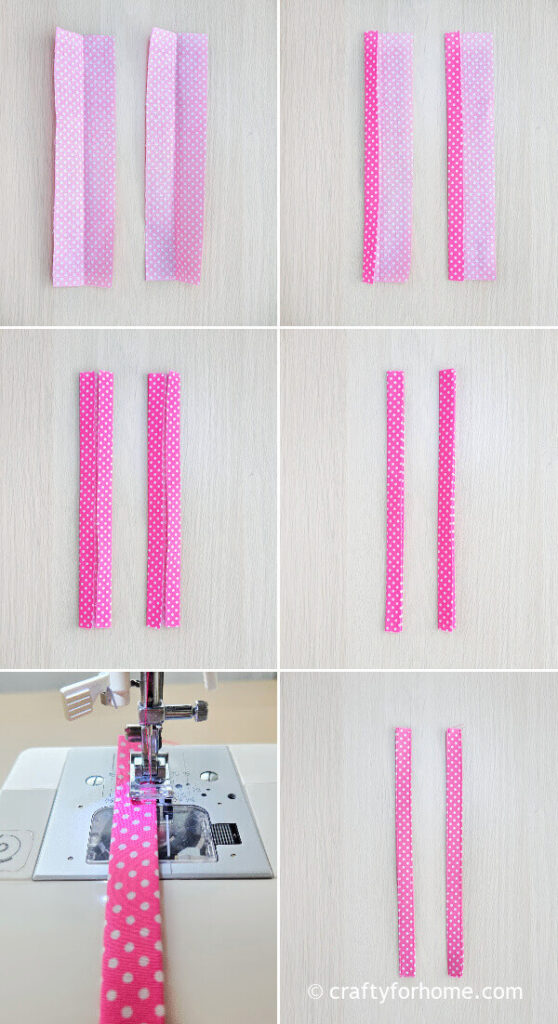
Take two of the smaller fabric pieces to make the bag handle. With the wrong side facing up, fold the fabric in half lengthwise, open it again.
Then fold both long edges toward the center fold. Then fold it again so both frayed edges are inside the fold. Sew along both edges.
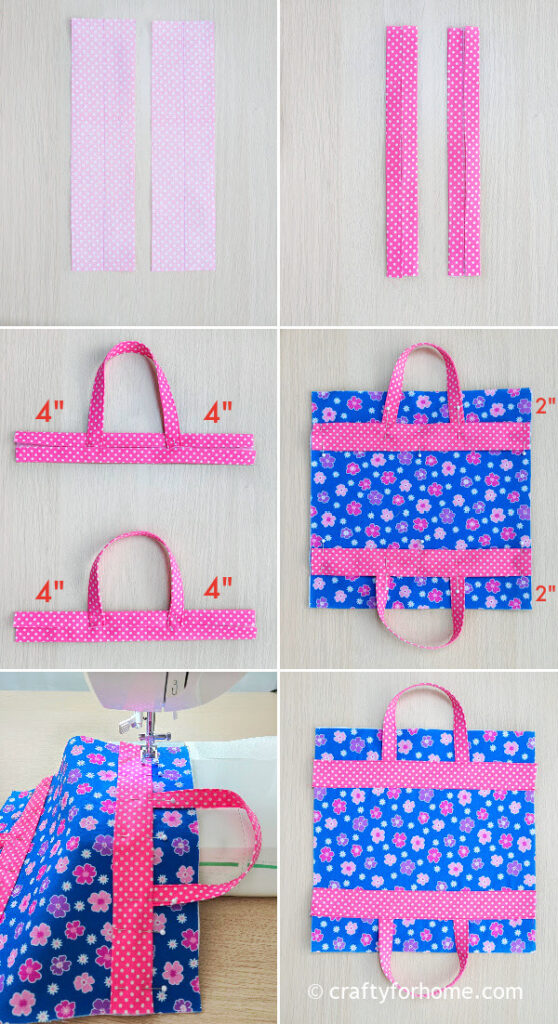
To make the bag strip, take the remaining two smaller fabric pieces. With the wrong side of both fabrics facing up, mark the center line lengthwise. Fold both long edges toward the center line. Press it with a clothes iron.
Mark the strip 4″ from both ends. Pin the bag handle on both 4″ marked spots. Using a clothes iron, fuse the fusible fleece onto the outer fabric piece.
Pin both fabric strips on the outer fabric 2″ from the top edge and 2″ from the bottom edge. Sew along the long edges of the fabric strips.
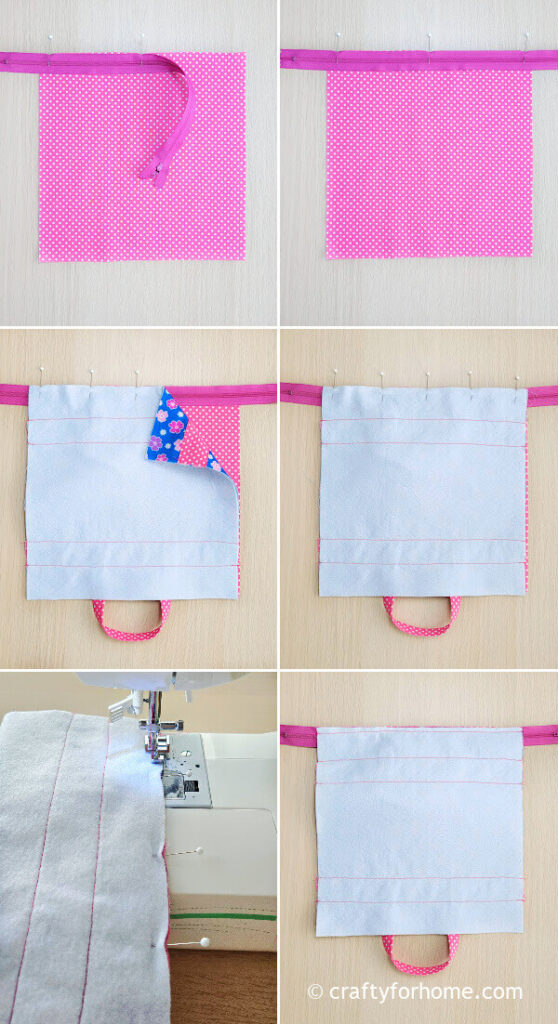
Place the inner fabric with the right side facing up. Pin the zipper with the teeth facing up, then pin the outer fabric with the right side facing down. Sew the zipper by using the zipper foot.
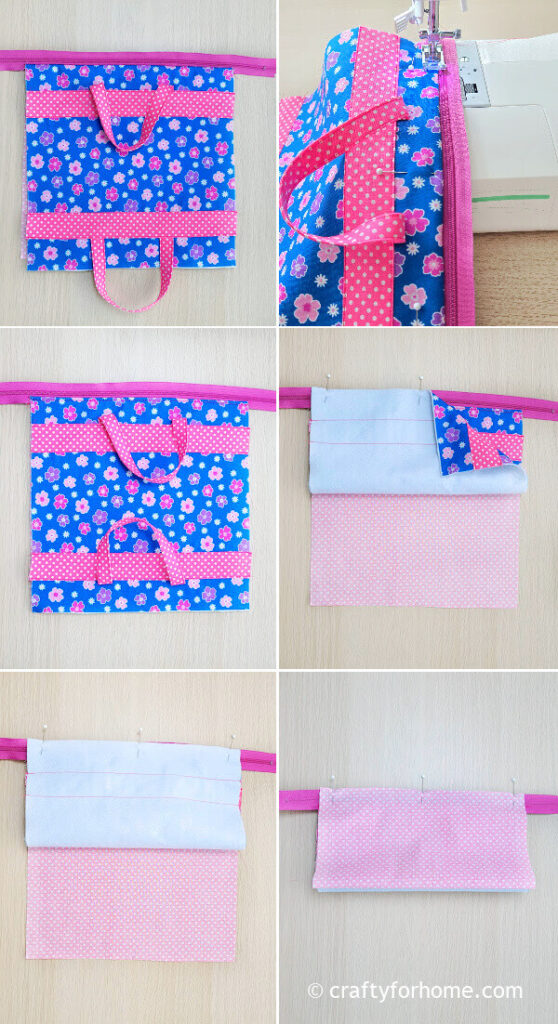
Flip both fabrics over, then topstitch along the zipper seam. Pin the other edges of both fabrics to the zipper, then sew them.
Unzip the zipper, flip both fabrics over, and topstitch along the zipper seam.
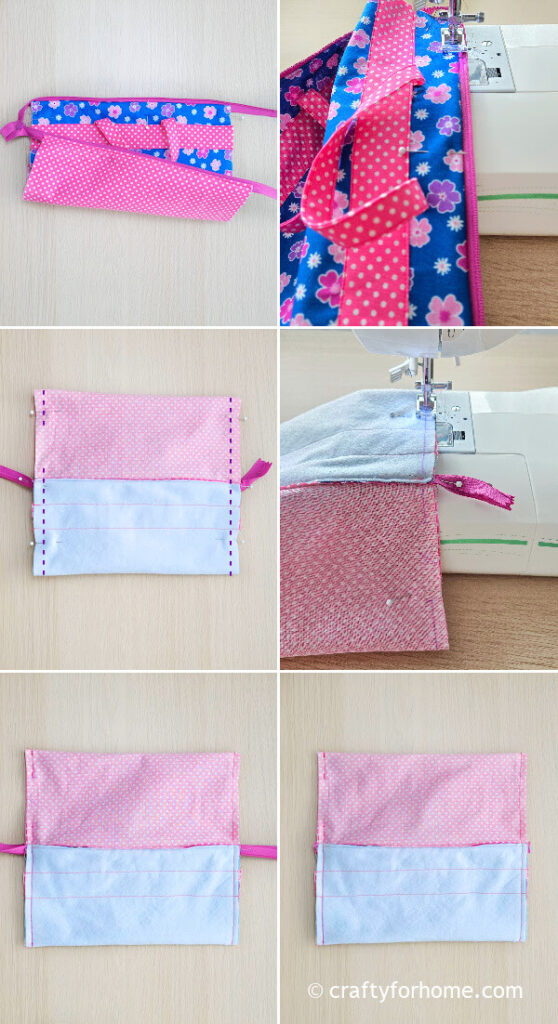
Zip the zipper closed again but position the zipper pull in the center, then turn both fabrics wrong side out.
Mark 3″ for the opening on the inner layer fabric. Sew along the frayed edges of both fabrics with a 0.25″ seam allowance, and skip the opening gap.
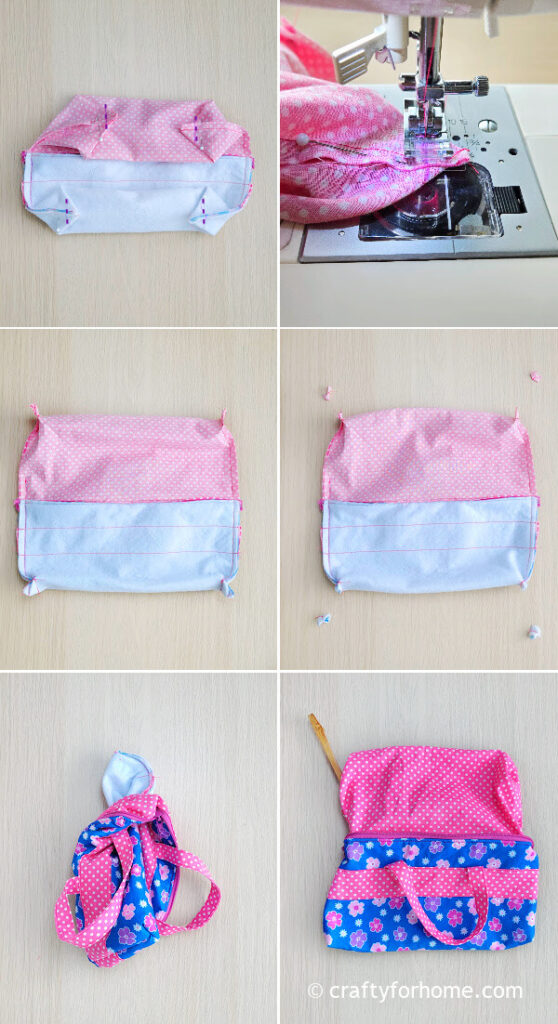
Clip the extra zipper off. Box all corners 1″.
Turn the bag right side out through the opening gap. Push all corners of the outer fabric.

Fold the opening gap inward, topstitch to close it, then press it with a clothes iron.
Push the inner fabric inside the bag. The tiny tote pencil bag is ready to use now.
The Size Of The Pouch
It’s a cute little tote bag, great for back to school item as a pencil pouch and all those small things needed for school.
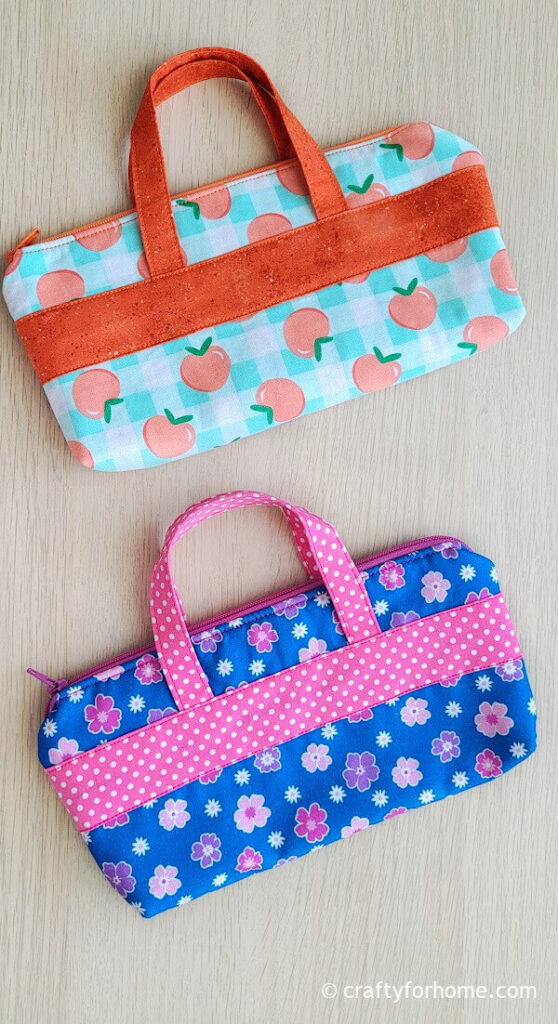
The pouch has two handles for a fun, stylish look. The size of the bag is 7.5″ long, 1″ wide, and 4.5″ tall.

It is also great as a cosmetic bag for any weekend trips.
More Sewing Project For Back To School
- Reversible Library Bag With Pocket
- Fabric Bookmarks From Scraps
- Corner Bookmarks Tutorial
- 3 Ring Binder Pencil Pouch
Easy DIY Small Tote Bag For Pencil Pouch


Leave a Reply