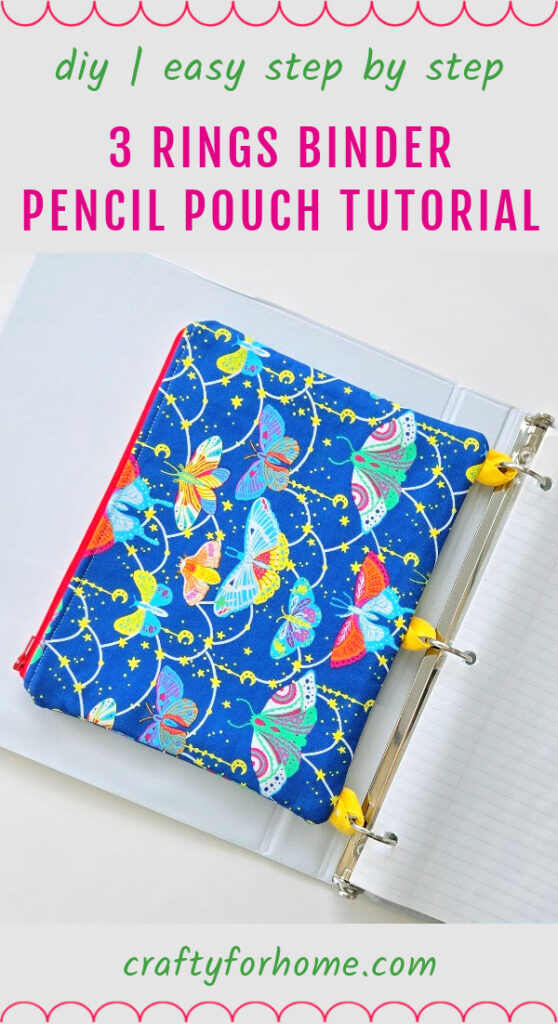
Use this step-by-step sewing tutorial to make a 3 ring binder pencil pouch for a back-to-school sewing project. Customize the zippered binder pencil case with your favourite print and color fabrics.
Easy Zippered Pencil Holder For Three Ring Binder
Add this DIY zippered pencil bag for a 3-ring binder to the list of sewing projects. The pouch is handy for someone who needs a binder for school or work to organize all tasks in one folder.
As an Amazon Associate I earn from qualifying purchases. This post may contain affiliate links. Please see the Disclosure Policy for details.
The pencil pouch is also helpful to keep all pencils and small items inside the folder. You will have those items within reach whenever you need them.
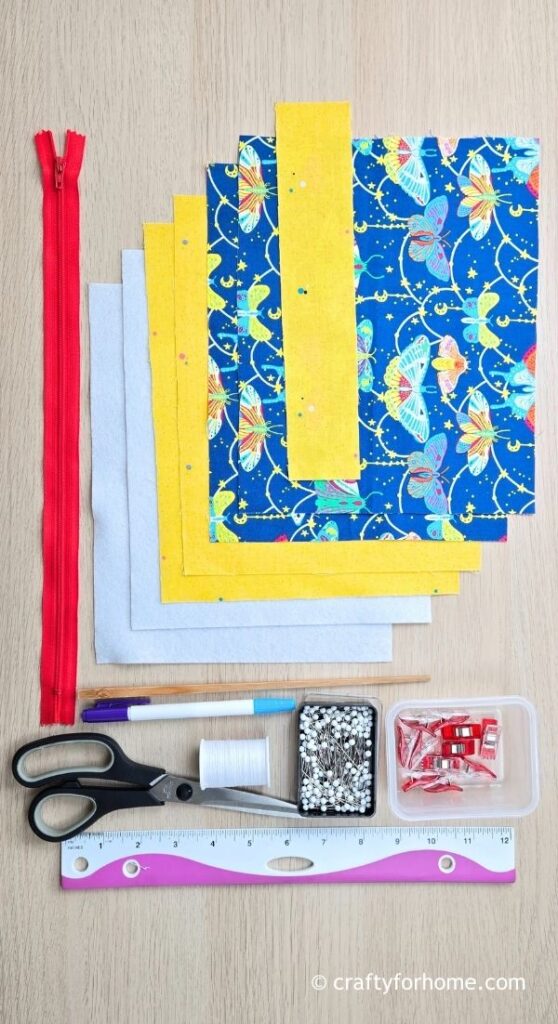
Supply To Make Binder Pencil Bag
Use two pieces of fat-quarter cotton fabrics or four pieces of 10″ square layer-cake size fabrics and cut the fabric into the size below.

Use the 14″ zipper to make it easier to move the zipper pull when sewing the zipper, or use the separating zipper.
- 2 of 8″ x 10″ inner fabrics
- 2 of 8″ x 10″ outer fabrics
- 2 of 8″ x 10″ fusible fleece
- 1 of 2″ x 10″ fabric strip for the loop
- 14″ zipper
- Zipper foot
- Disappeared ink fabric marker. I use the dual-purpose fabric marker.
- Quilting clips or pins
- Ruler
- Chopstick
- Sewing machine
- Thread
- Clothes iron
3 Ring Zipper Pouch Tutorial
A video tutorial on making a binder zipper pouch is also available. Click on this link to watch how to make a 3-ring Binder Pencil Case With Zipper on my YouTube channel, and subscribe for more sewing videos.
To make the pouch panel, fuse the fusible fleece on the wrong side of both outer fabrics.

With the right side of the inner fabric up and the zipper front side up, pin the zipper on the longer edge, then pin the outer fabric piece with the right side down so that the zipper is between the right side of both fabric layers, or the right side of both fabric layers are facing each other.
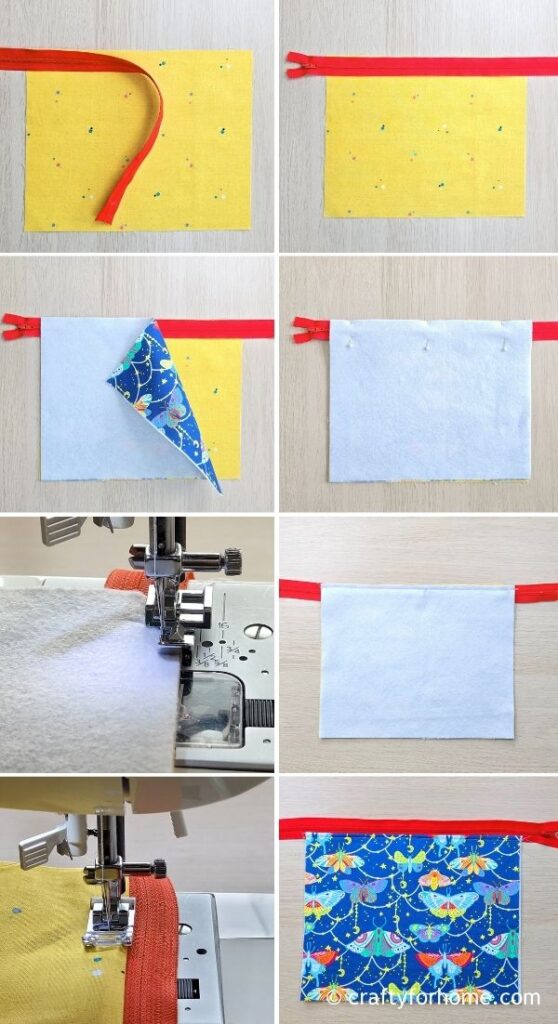
Sew straight along the edge by using a zipper foot. Flip both fabric layers so that the right sides are facing out, then topstitch along the hem.
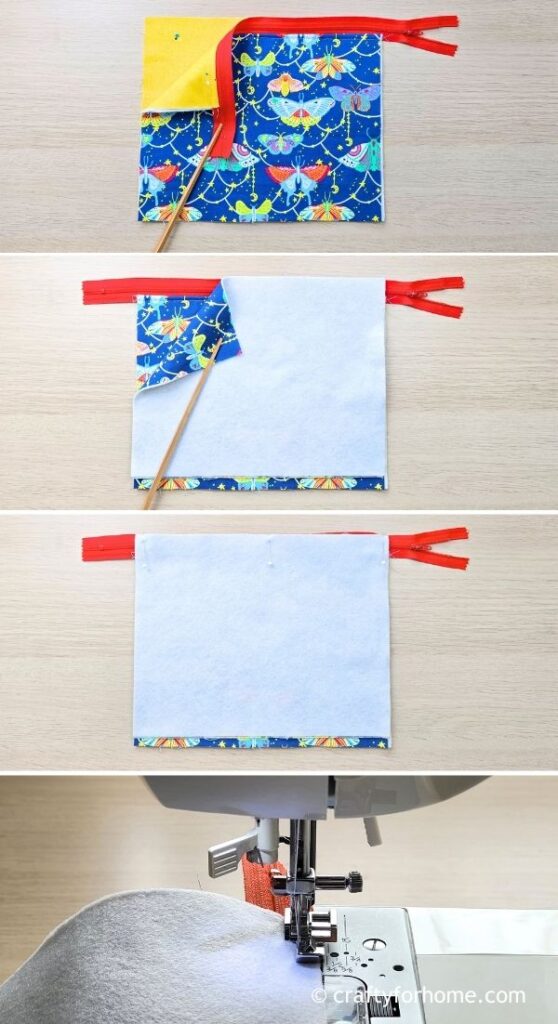
Pin the other inner fabric to the zipper edge with the right side up so that the right side of both inner fabric layers face each other. Pin the other outer fabric to the zipper edge with the right side down so that the right side of both outer fabric layers face each other.

Sew straight along the edge by using a zipper foot. Flip both fabric layers so that the right sides are facing out, then topstitch along the hem.

To make the fabric loop for the binder ring, follow the same process as making this fabric strap for a bag or lanyard. Fold the fabric in half lengthwise, open it, fold both long edges inward toward the center fold, then fold it again so that the frayed edge is inside the fold.
Topstitch on both long edges, then divide the fabric strip into 2.5″ each. You will get four pieces, but you only need three pieces for this project.

Loop each fabric strip, then pin them on the bottom edge of one of the outer layers, one loop in the center, and two on 0.75″ from the left and right corners. Sew the loop to secure it.

Move the zipper pull to the middle, pin the inner layer fabrics with the right side facing each other, and pin the outer layer fabrics with the right side facing each other.
Press the zipper by pinching it to make the zipper teeth in between the inner layer fabrics, then pin it in place.
Sew along the edge of the pouch with a 0.25″ seam allowance, and skip 4″ on the inner layer fabric for the opening gap.
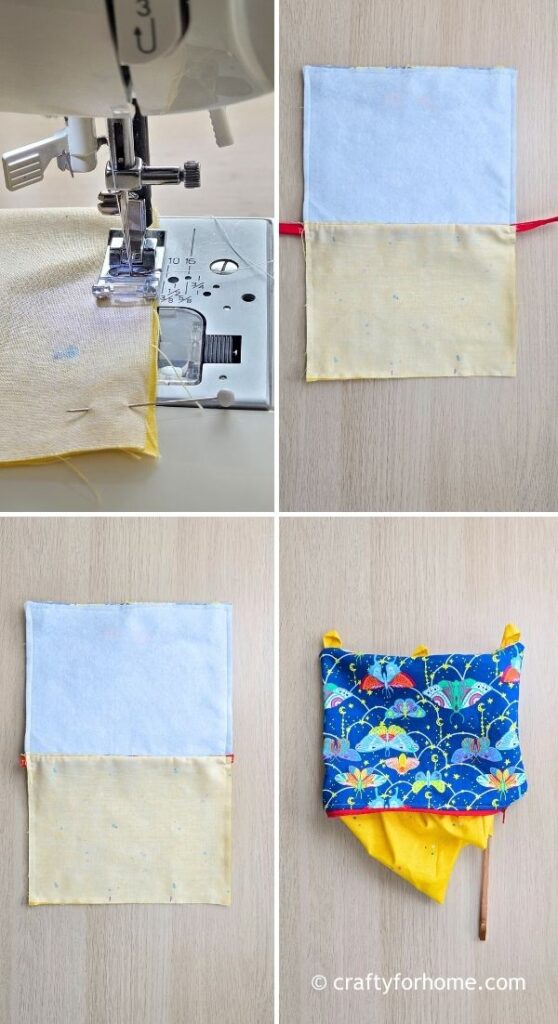
Trim the extra zipper end, backstitch a few times, or use zigzag stitch along the zipper end. Turn the pouch right side out through the opening gap. Push each corner with a chopstick.

Press the pencil pouch with a clothes iron. Topstitch the opening gap to close it. Put the inner layer inside the pouch.

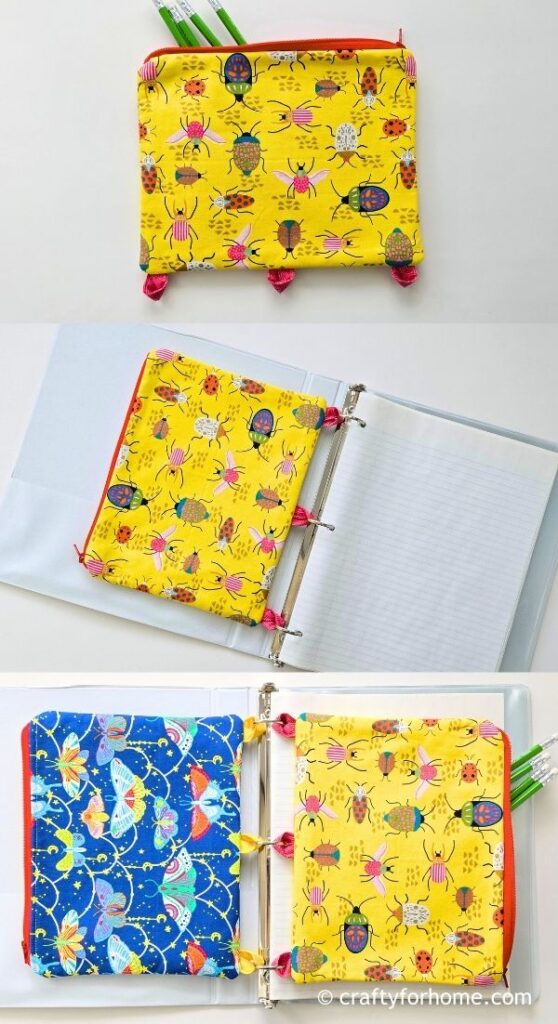
Attach each loop to the binder ring. The binder pencil case is ready to use now.
Zippered Binder Pouch
The three-ring binder pouch size is 7.5″ x 9.5″. There is enough space to put pencils, pens, a small ruler, a small calculator, a phone, cash, sticky notes or anything you need in the pouch.

It’s a great gift idea for back-to-school. Everyone can have a customized zippered pencil holder for their binder.

More Of Small Sewing Project For Back To School
- Corner Bookmark From Charm Pack Fabric
- Easy Fabric Bookmarks From Scraps
- Reversible Library Bag With Pocket
- DIY Laptop Sleeve
DIY Pencil Holder For The 3 Rings Binder


Leave a Reply