With this easy tutorial, you will learn to sew a reversible bottle tote bag from fat quarter fabrics, perfect for gift-giving any time of the year.
Use This Guide To Make DIY Fabric Bottle Tote Bag
When you want to go for a picnic or gift-giving time, you might want to make this bottle tote bag to carry your favourite drink or anything stored in a bottle.
Dinner party, family gathering, picnic at the park, Christmas, Easter, or Valentine, there is always a special occasion coming up. I am usually in charge of food or a list of gifts.
As an Amazon Associate I earn from qualifying purchases. This post may contain affiliate links. Please see the Disclosure Policy for details.
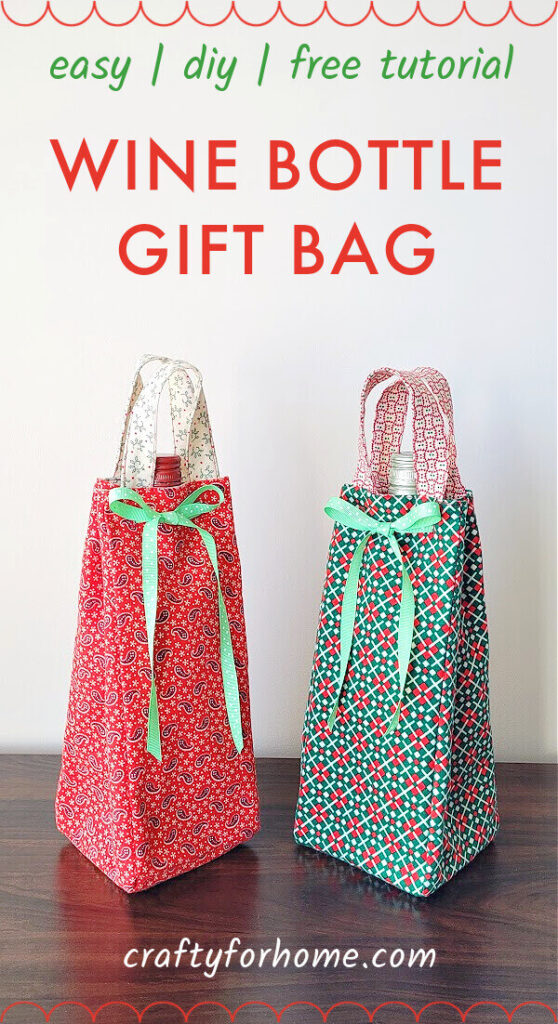
We always include a special drink as a gift. But, of course, it is in a bottle that is hard to wrap like any other boxed gift.
Although there is a gift bag for a bottle ready at any party supplies or dollar store, make one from fabric is always a good idea. It is personalized and makes the gift more special.
What You Need To Make A Bottle Tote Bag
You can use quilting cotton, flannel, outdoor fabric, canvas, twill, home decor fabric, or linen.
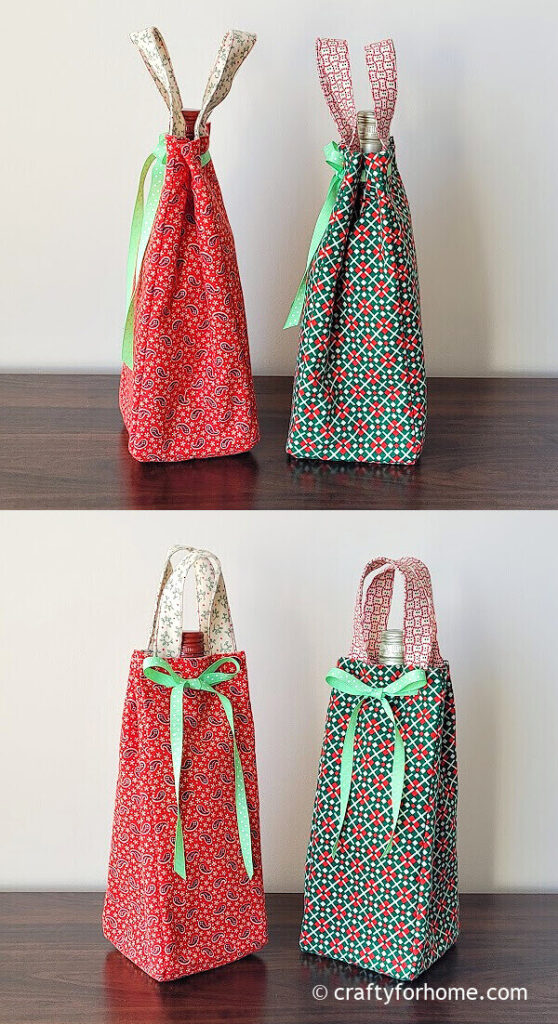
If you use quilting fabric, add fusible interfacing, or use a double layer fabric. I used two fat quarter cotton flannel for this project because they are thick enough without interfacing.
The wine tote bag is reversible, so you might want to pick two different fabric prints. The bottle tote bag template will fit into one sheet of fat quarter fabric.
You will need two fat quarter fabrics for different prints on each side or a half-yard fabric for the same print to make it reversible.
- 2 sheets of fat quarter fabric or half yard fabric, I use fat quarter cotton flannel
- Bottle tote bag template. The template is available as a printable PDF, and you can click here to purchase for only few dollars.
- Disappeared ink fabric marker, I like this dual purpose fabric marker
- Ribbon, I use 3/8″ width grosgrain ribbon
- Thread
- Pin or quilting clips
- Scissors
- Button, I use a 0.5″ diameter button
- Buttonhole foot (not on picture)
- Seam ripper (not on the picture)
- Lighter (not on the picture)
- Ruler
- Sewing machine
- Ironing machine
Easy Wine Bottle Tote Bag Tutorial
If you want to watch the video tutorial instead, click here for the Reversible Wine Tote Bag video tutorial on my YouTube channel and subscribe for more videos.
Trace the template on both fabrics. Or use the measurement below.
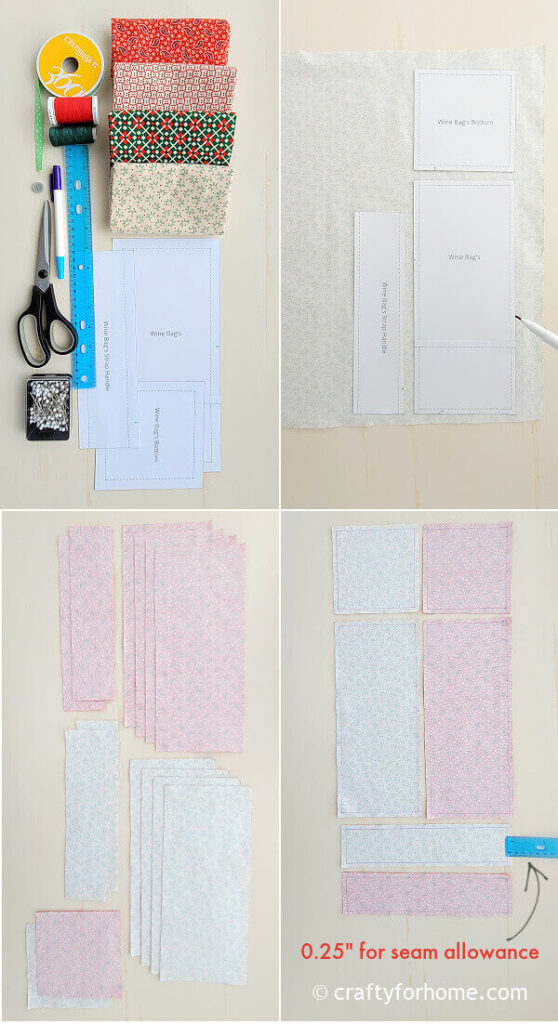
Cut four 11.5 x 5 inches rectangular fabric for the outer and four for inner layer.
Cut two 5 inches of square fabric for the bottom of the bottle.
Cut two 10 x 2.5 inches rectangular fabric for the bag handles.
There will be four fabric sheets for the handle if you use the template. But you only need two pieces for the bag handle, whichever print you like to use.
Cut the ribbon 32″ long.
Mark each fabric piece 0.25″ for the seam allowance line.
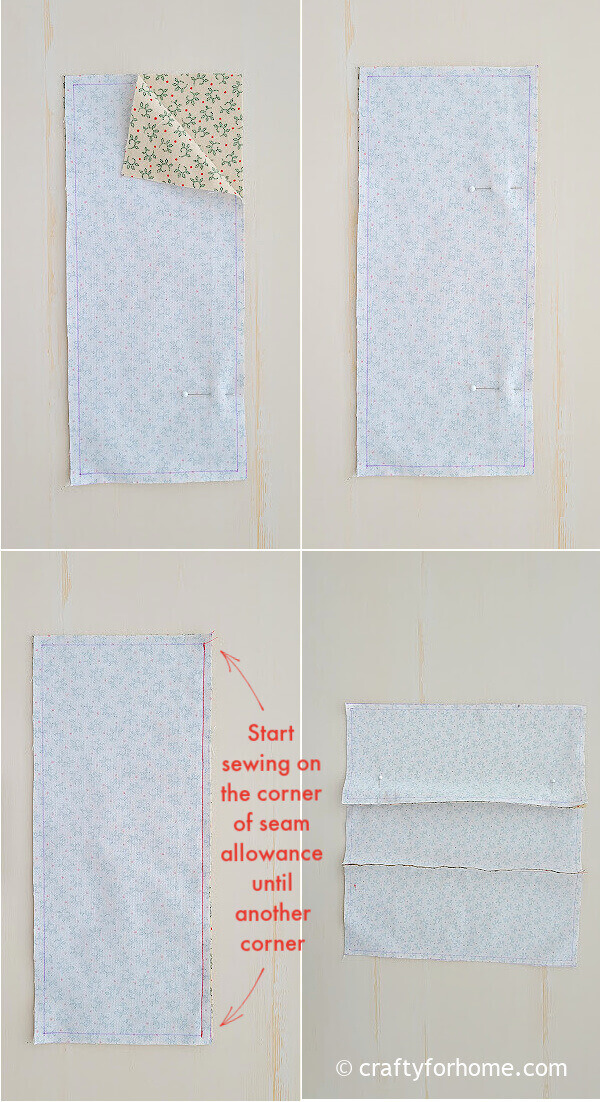
Pin two sheets of rectangular fabric for the bag with the right side facing each other. Start sewing it on one corner of the seam allowance to the opposite corner.
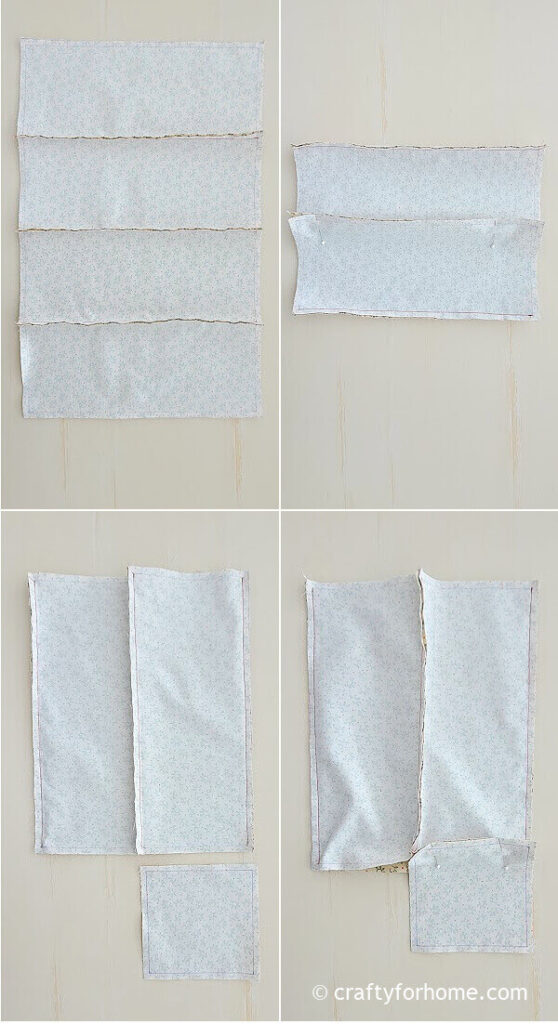
Repeat the process for another three rectangular fabrics. Then attach the first fabric to the fourth so that you will have a hollow bag.
Pin one of the square fabric for the bottom of the bottle. Align the corner and seam allowance. Sew it together on the seam allowance.
Then, turn the bag right side out.
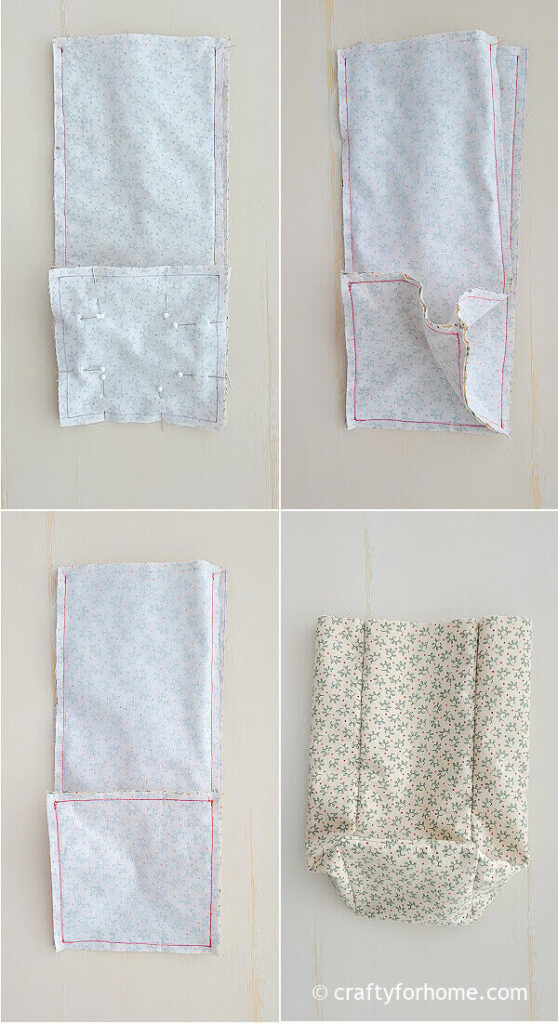
Repeat the process for the inner layer of the bag. Insert the inner layer bag into the outer one.
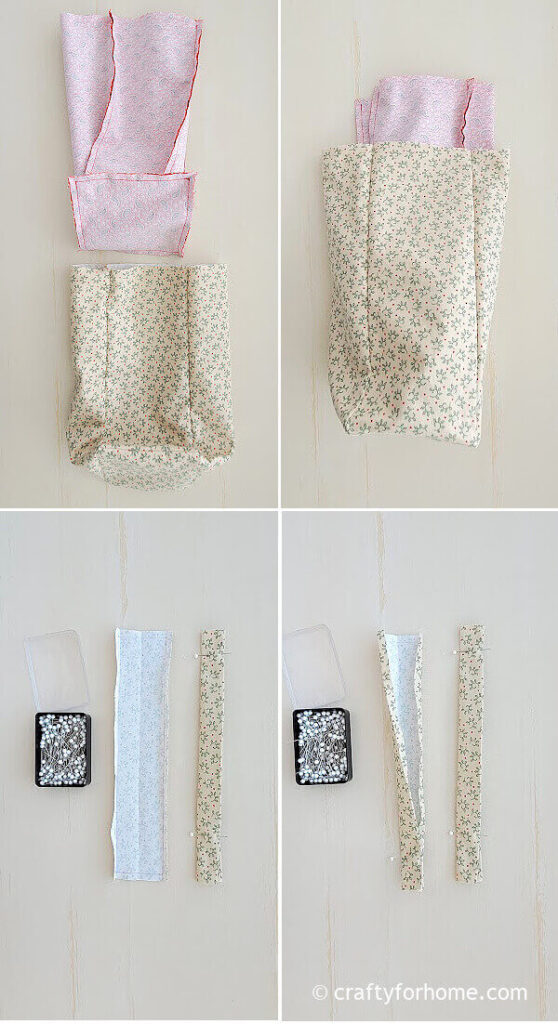
Make the bag handle by folding the long side in half. Fold the raw edge inside on the seam allowance, then pin it.
Press it with the ironing machine to make it easy to sew, then topstitch along the hem.
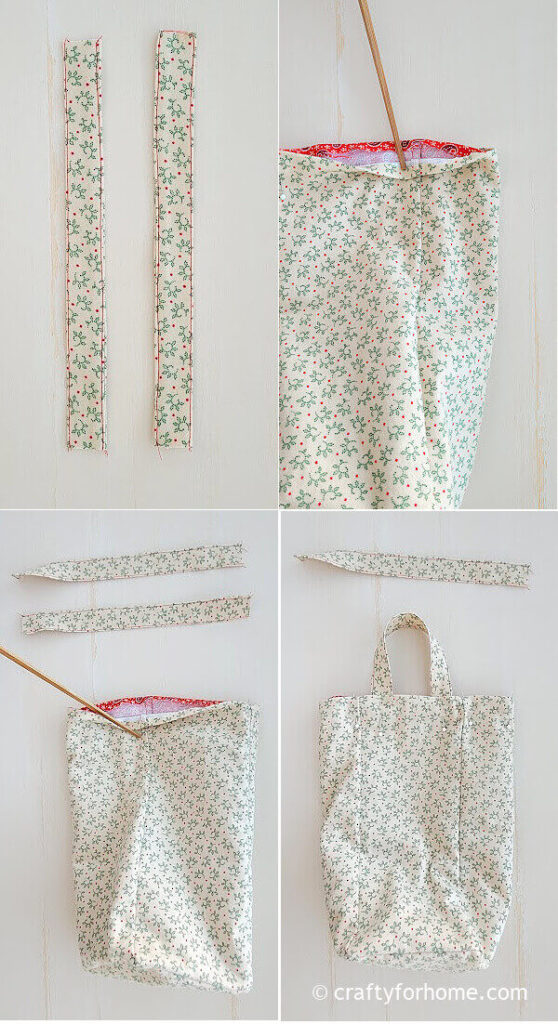
Fold the top of the bag inward, and pin it. Press it with the ironing machine to make it easier to sew.
Pin the raw side of the bag handle on one of the top sides of the bag. Then pin the other bag handle on the opposite side.
Topstitch along the top of the tote bag.
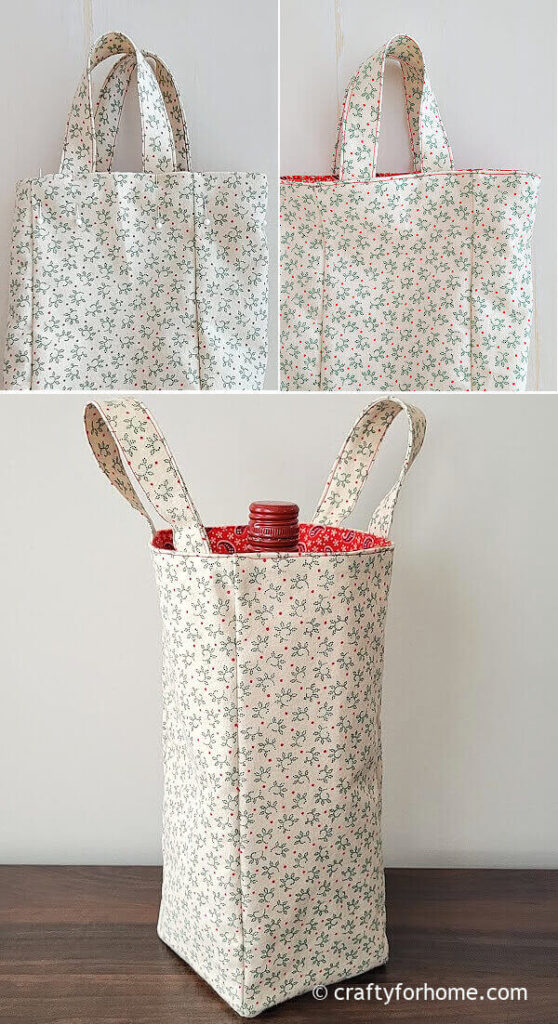
From this point, the bag is ready for a simple style bottle carrier.
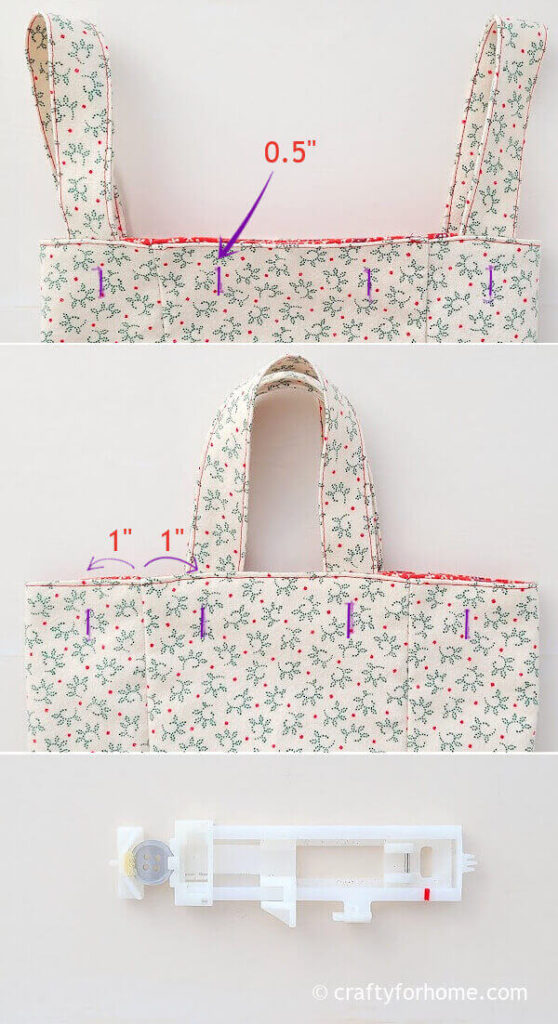
To make a more stylish bottle tote bag, mark eight lines for buttonholes.
Mark 0.5″ from the top of the bag and 1″ from the hemline of each rectangular fabric on the bag. Mark 0.5″ vertical lines for buttonholes or depending on the button size you use.
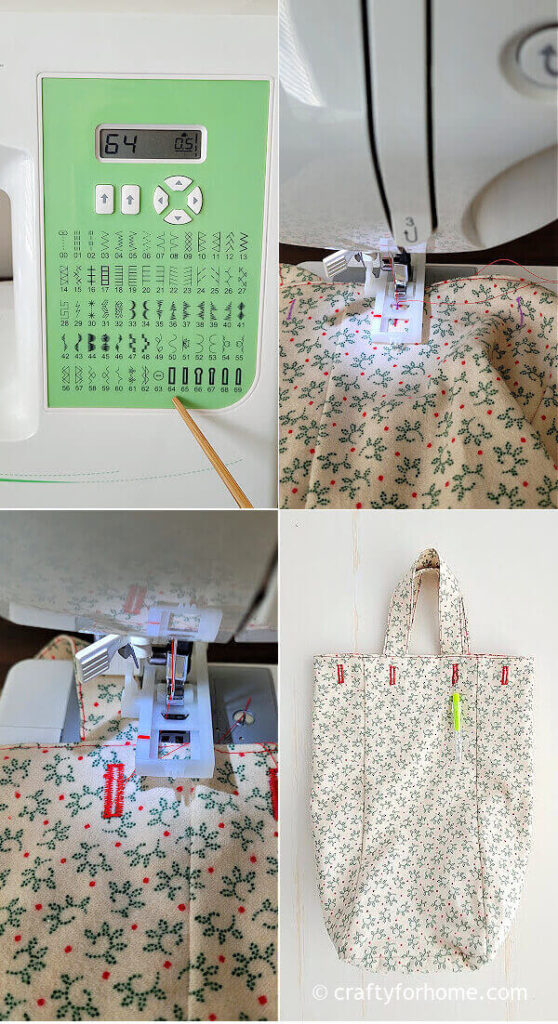
Use the buttonhole foot and buttonhole stitch on your sewing machine. If you are using a Singer sewing machine, here is the tutorial on how to use the buttonhole foot on Singer sewing machine.
Use the seam ripper to open up each buttonhole.
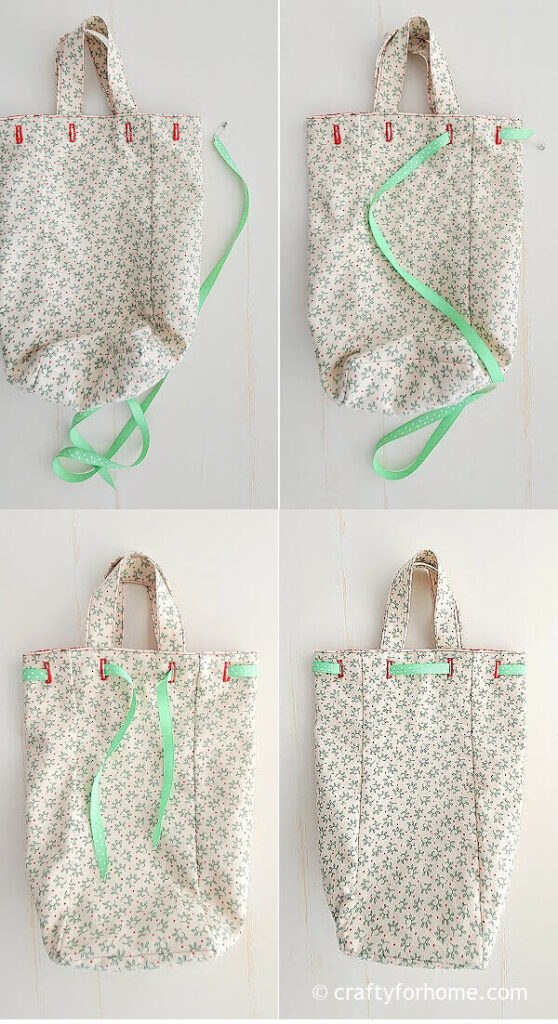
Thread the ribbon through the buttonholes by weaving it. Next, insert the bottle, pull the ribbon in the front, and tie it to make a bow.
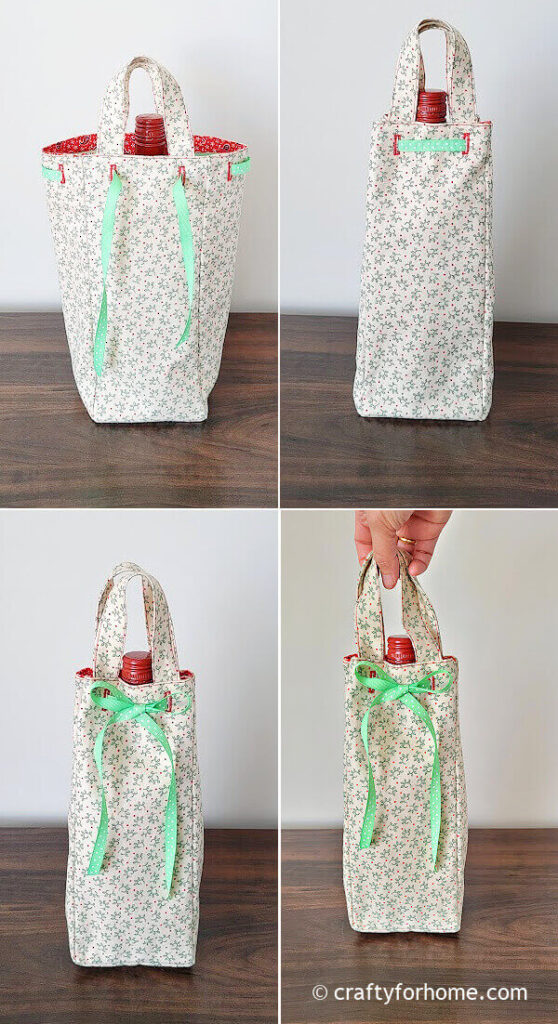
Remove the ribbon, turn the bag inside out, and thread the ribbon in again to show the reverse side.
Now, the bottle is easy to carry. It is a stylish-looking thing for gift giving.

If you use the template and have two extra rectangle fabrics for the handle, you can use it for other bags or make fabric bookmarks.
Use the fat quarter fabric in this easy to sew reversible fabric bottle tote bag. #bottletotebag #bottleholdertutorial Share on XIf you are giving this for Valentine’s day, add this fabric heart for bottle charms. Or use this fabric ornament for holiday season bottle charms. Or add a gift tag for a more personalized gift.
Either way, the bottle tote bag still looks beautiful without adding any bottle charms.
Get The PDF
If it is more convenient to have the printable version of this tutorial for the project, you can purchase the printable PDF format of Reversible Bottle Tote Bag Template And Tutorial for only $5
The e-book has the template and complete tutorials with pictures included. There is no ads or video display on the PDF so that you can print it, and it will be available for you anytime you need the tutorial for your next project. Click on the e-book cover image above to purchase.
More DIY Gift Wrapping Ideas
- Brown Paper For Gift Wrapping
- 10 Red Accent Gift Wrapping
- Yarn For Gift Wrapping
- Fabric For Gift Wrapping
This DIY Fabric Bottle Tote Bag Is An Easy And Quick Sewing Project

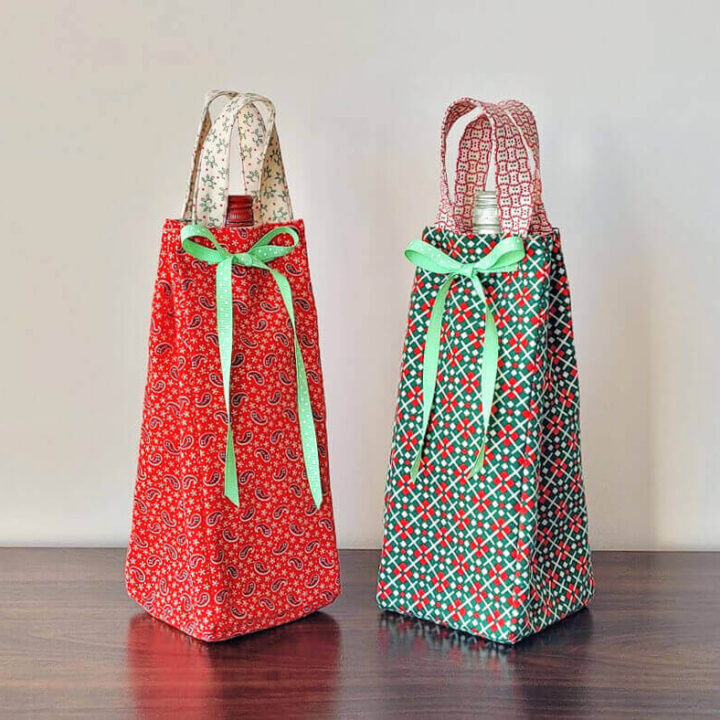
Easy To Sew A Bottle Bag For Gift Idea
With this easy tutorial, you will learn to sew a reversible bottle tote bag from fat quarter fabrics, perfect for gift-giving any time of the year.
Materials
- 2 sheets of fat quarter cotton flannel fabric or half yard fabric
- Bottle tote bag template
- Ribbon, 3/8" width grosgrain ribbon
Tools
- Disappeared ink fabric marker
- Thread
- Pin or quilting clip
- Scissors
- Button, 0.5" diameter button
- Buttonhole foot
- Seam ripper
- Lighter
- Ruler
- Sewing machine
- Ironing machine
Instructions
- Trace the template on both fabrics. Or use the measurement below.
- Cut four 11.5 x 5 inches rectangular fabric for the outer and four for the inner layer.
Cut two 5 inches of square fabric for the bottom of the bottle.
Cut two 10 x 2.5 inches rectangular fabric for the bag handles. - There will be four sheets of fabric for the handle if you use the template. But you only need two pieces for the bag handle, whichever print you like to use.
- Cut the ribbon 32" long.
- Mark each fabric piece 0.25" for the seam allowance line.
- Pin two sheets of rectangular fabric for the bag with the right side facing each other.
- Start sewing it on one corner of the seam allowance to the opposite corner.
- Repeat the process for another three rectangular fabrics. Then attach the first fabric to the fourth so that you will have a hollow bag.
- Pin one of the square fabric for the bottom of the bottle. Align the corner and seam allowance. Sew it together on the seam allowance.
- Then, turn the bag right side out.
- Repeat the process for the inner layer of the bag. Insert the inner layer bag into the outer one.
- Make the bag handle by folding the long side half. Fold the raw edge inside on the seam allowance, then pin it.
- Press it with the ironing machine to make it easy to sew, then topstitch along the hem.
- Fold the top of the bag inward, and pin it. Press it with the ironing machine to make it easier to sew.
- Pin the raw side of the bag handle on one of the top sides of the bag. Then pin the other bag handle on the opposite side.
- Topstitch along the top of the tote bag.
- From this point, the bag is ready for a simple style bottle carrier.
- To make a more stylish bottle tote bag, mark eight lines for buttonholes.
- Mark 0.5" from the top of the bag and 1" from the hemline of each rectangular fabric on the bag. Mark 0.5" vertical lines for buttonholes or depending on the button size you use.
- Use the buttonhole foot and buttonhole stitch on your sewing machine.
- Use the seam ripper to open up each buttonhole.
- Thread the ribbon through the buttonholes by weaving it. Next, insert the bottle, pull the ribbon in the front, and tie it to make a bow.
- Remove the ribbon, turn the bag inside out, and thread the ribbon in again to show the reverse side.
Notes
- Don't forget to grab the Bottle Tote Bag Template.
- The estimated cost doesn't include the template.
- For the video version, you can see the video tutorial here for the Bottle Tote Bag.
Leave a Reply