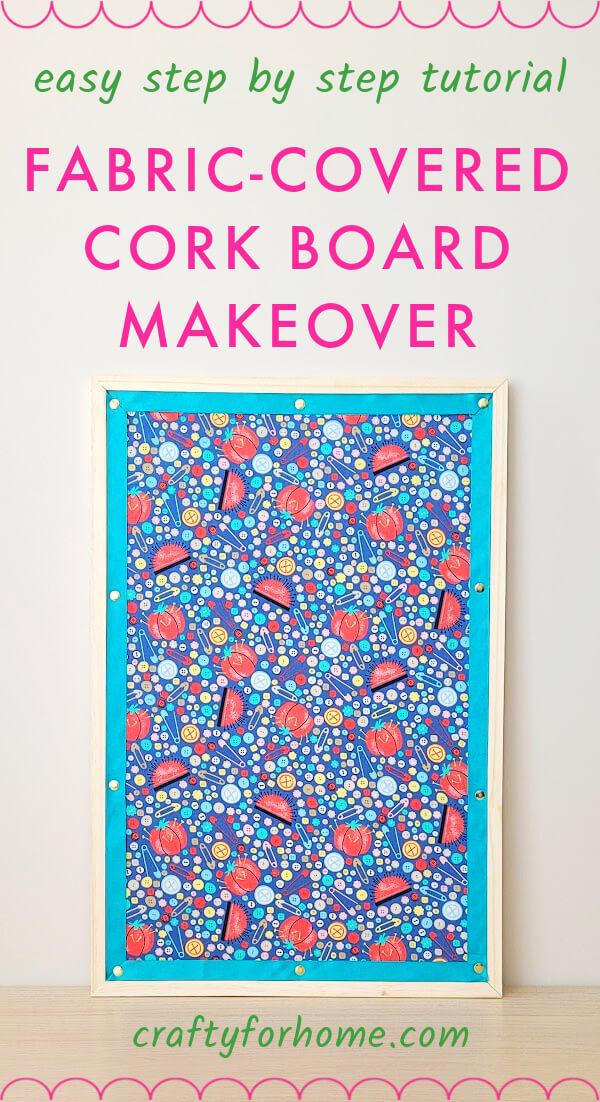
Turn the plain-looking cork board into a simple but stylish fabric-covered bulletin board for an easy makeover idea and inexpensive home decor.
Large Fabric-Covered Bulletin Board Idea
The cork board is a functional bulletin board, but covering it with fabric makes it stylish, and you can match it with your office or interior home decor to organize notes or post a reminder.
As an Amazon Associate I earn from qualifying purchases. This post may contain affiliate links. Please see the Disclosure Policy for details.
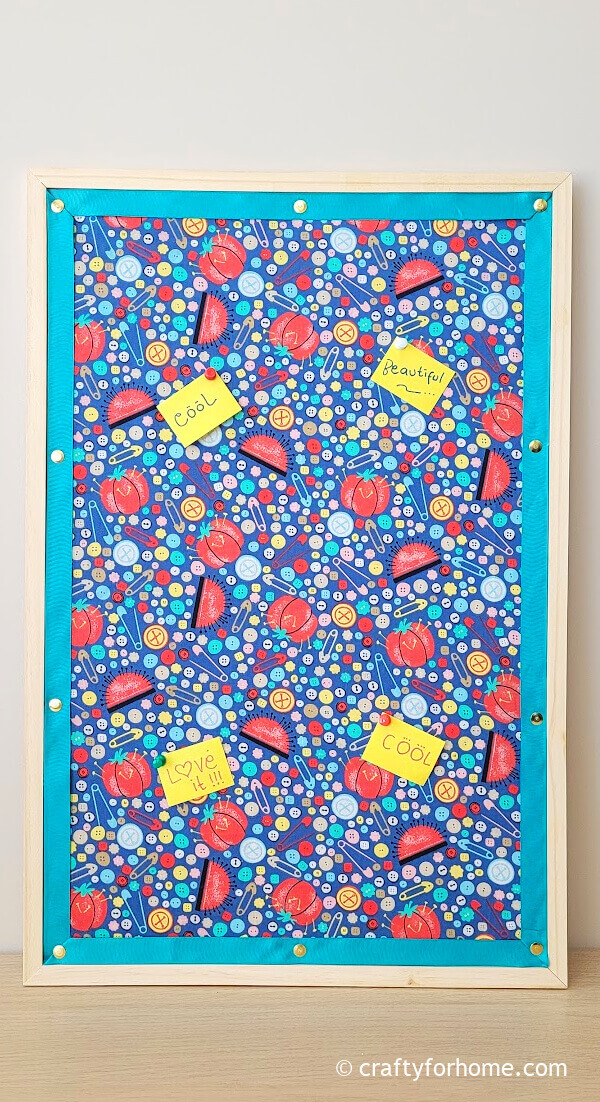
Also, you can use this DIY fabric corkboard to create a vision board. If you are not using a journal book, a vision board is helpful to keep your mind focused on your goals.
The Best Fabric For A Cork Board
Use non-slippery fabric for this project, like quilting cotton, home decor fabric, outdoor fabric, linen, or burlap.
Quilting cotton fabric is thin and easy to wrinkle, so press it with the ironing machine before attaching it to the corkboard.
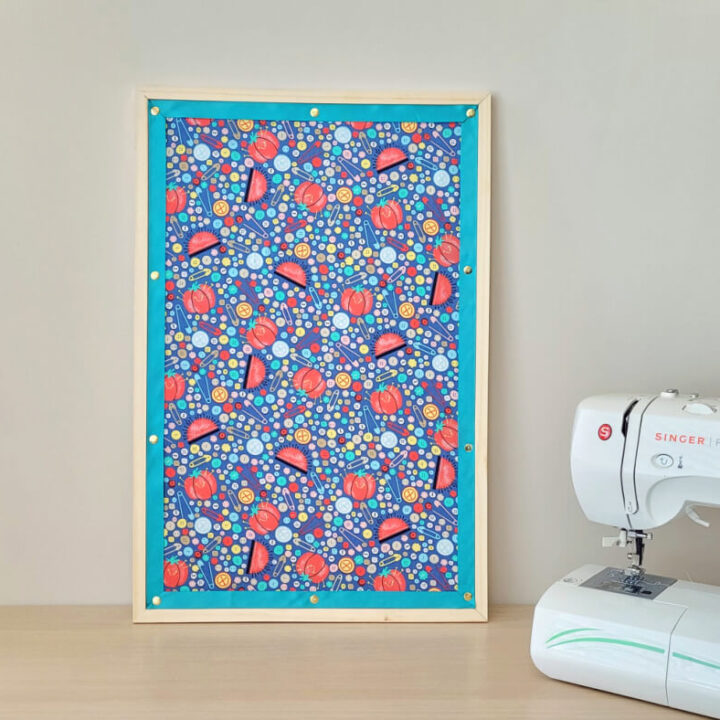
I use quilting cotton leftover from recovering the ironing board a while ago. The fabric print is perfect for this corkboard makeover since I will use it in the crafting room.
Supplies For Fabric Cork Board Makeover
Use a plain ribbon or decorative trims like a sequin braid, rhinestone ribbon, embroidery lace trim, or pompom trim to cover up the edge of the fabric.
No sewing involves here. Use tacky glue for this project. Tacky glue is easy to apply and has no smelly fume. You can also use Mod Podge specifically for fabric.
I use a 16″ x 24″ corkboard, which is big enough to pin all notes and reminders.
I use glue from Unique Creative, which bonds fabric, wood, paper, canvas, cardboard, and ceramic. It is fast setting and dries clear. The adhesive is similar to this tacky glue.
- 1 yard of quilting cotton fabric (depending on the size of your cork board, you might need the fabric more or less). I only use one sheet of fat quarter size.
- Ribbon or decorative trim
- Thumbtack
- Tacky glue
- Scissors
- Pinking shears
- Ruler
- Disappeared ink fabric marker
Fabric-Covered Cork Board Tutorial
If you want to watch the video tutorial instead, click the Fabric-Covered Cork Board Makeover video tutorial here on my YouTube channel, and subscribe for more videos.
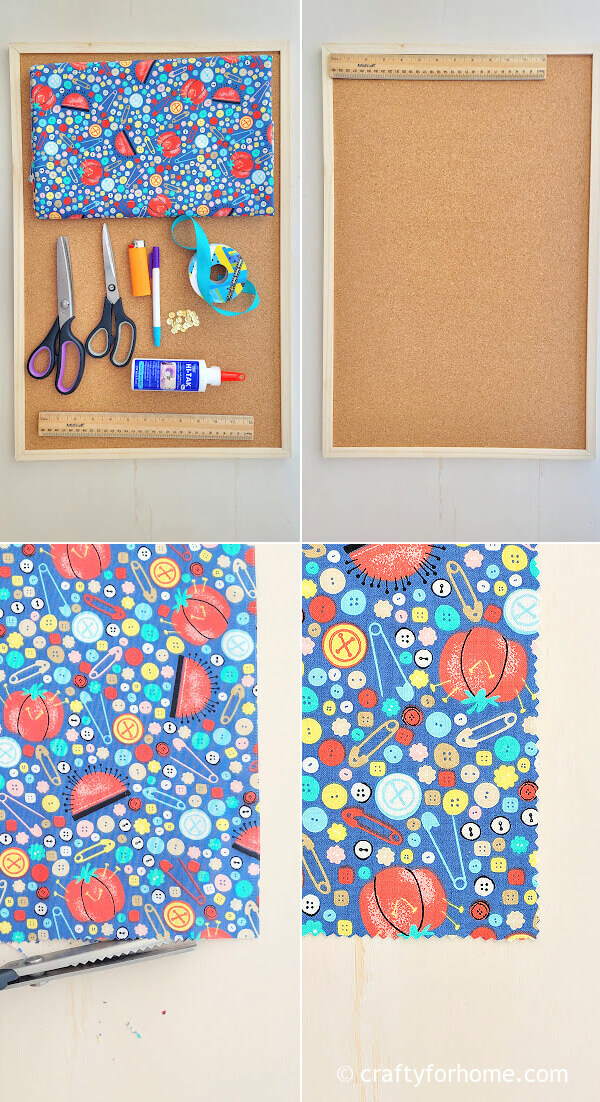
Measure the length and width of the corkboard inside the frame.
Measure the fabric needed, and trim it using the pinking shears to prevent fraying.
Put the trimmed fabric on the board to make sure it fits. It is okay if the fabric doesn’t cover the whole board around the edge. The ribbon will cover it later on.
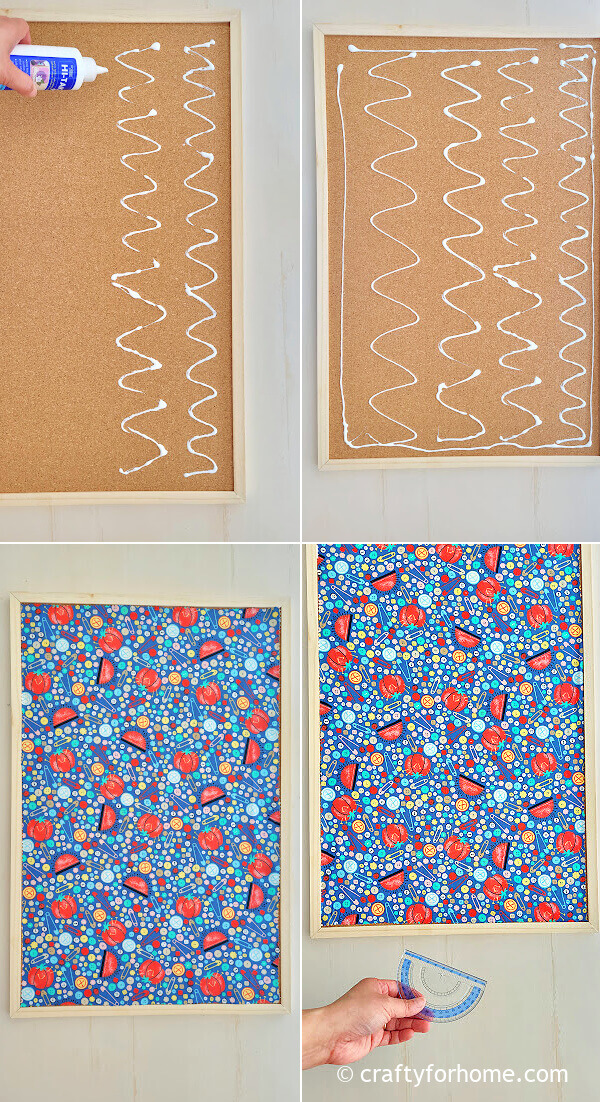
Apply the tacky glue on the board with a zigzag pattern.
Put the fabric on top of it.
Use a small ruler to smooth up the fabric if it looks folded or wrinkled. Also, it helps to spread the glue.
Wait for the glue to dry up before the following process.
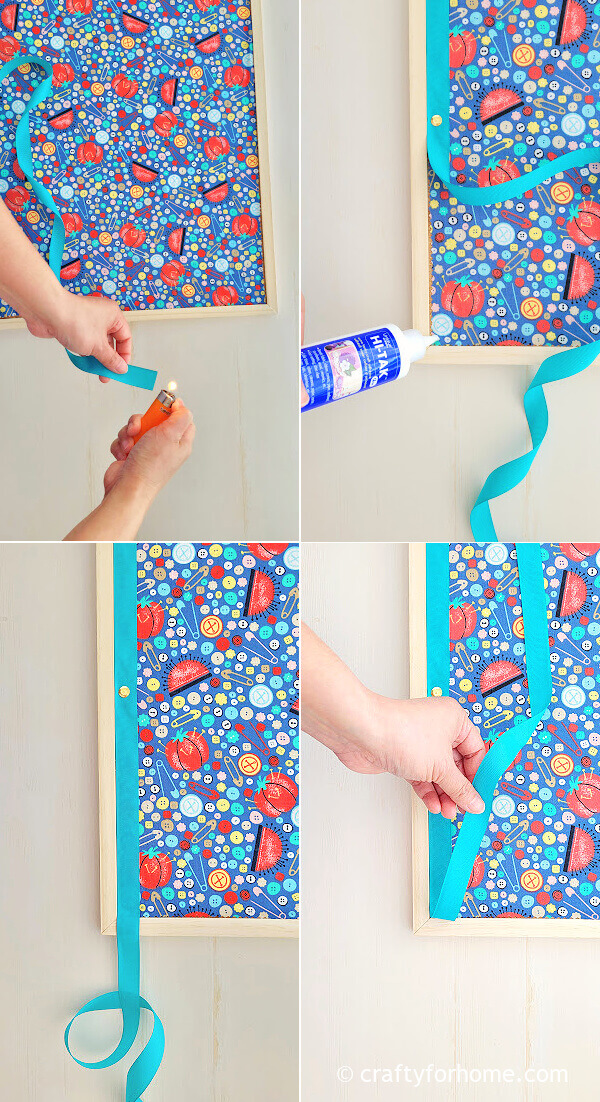
Use the lighter to seal the fraying edge of the ribbon.
Once the glue on the board has dried up, apply the glue around the edge of the fabric inside the frame or dab a little on the corner.
Then attach the ribbon or decorative trim starting from one corner and add the thumbtack.
Apply enough glue on the ribbon when folding it in the corner.
Fold the ribbon to create a mitered corner, then add a thumbtack.
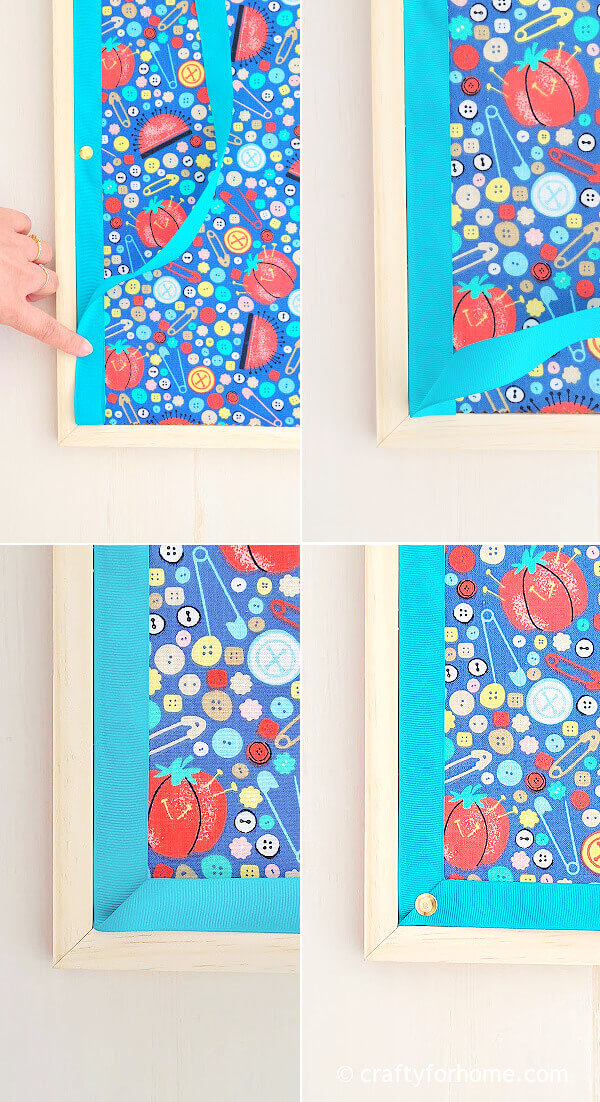
Once the whole fabric edge is covered, add more thumbtacks to help keep the fabric and ribbon in place with the same distance interval between the thumbtacks.
The fabric-covered corkboard is ready to use now.
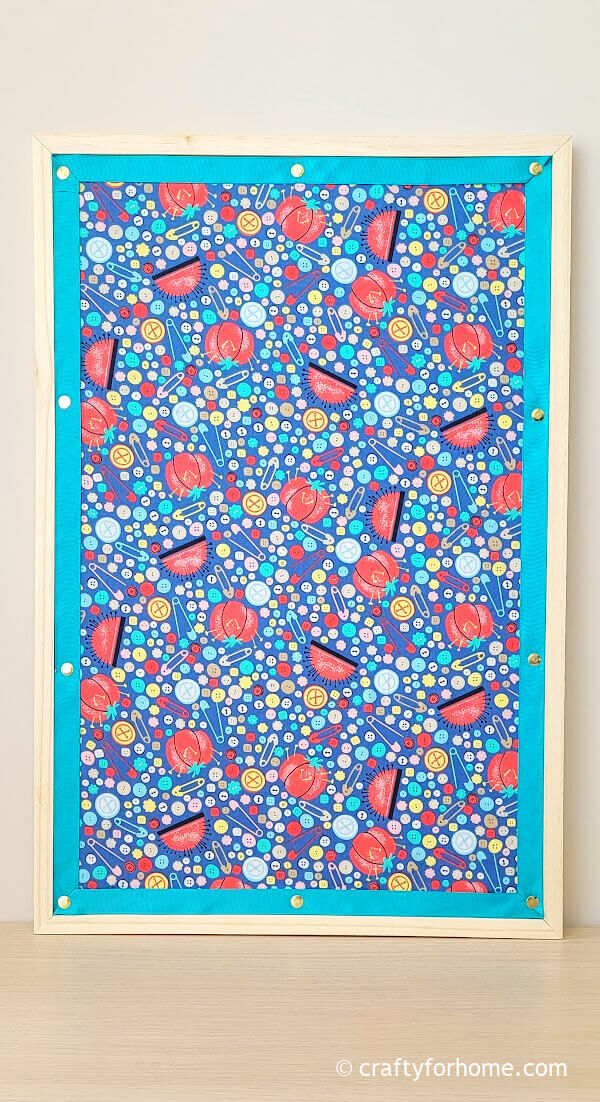
You can hang this pin board on the wall like a picture frame or keep it standing by the desk against the wall.

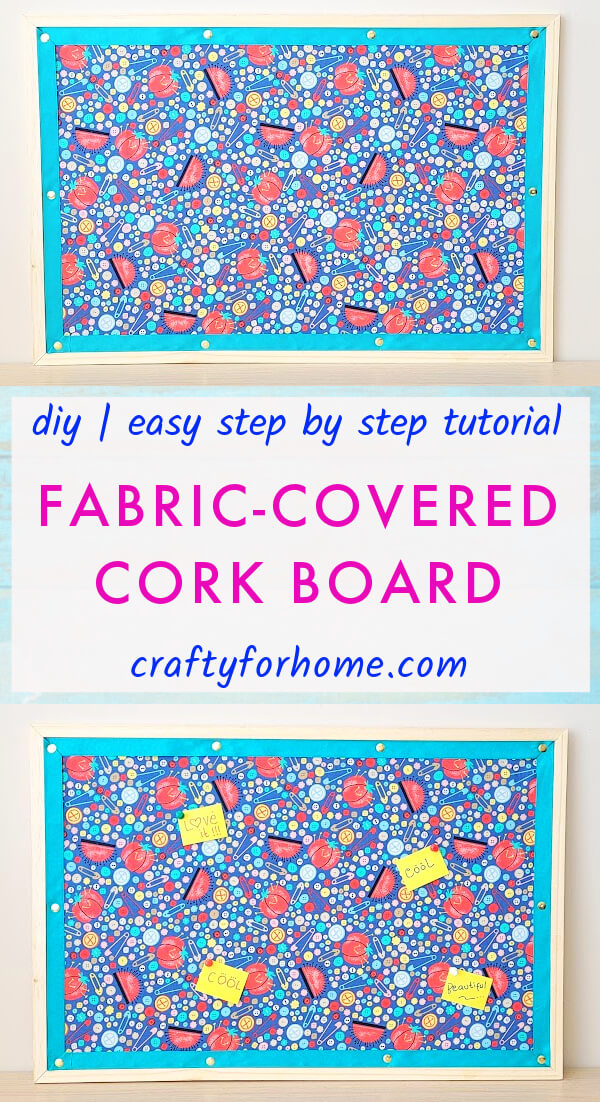
Use the push pin or thumbtack to post a note or reminder on the board.
Turn the boring corkboard into a stylish one with this corkboard makeover idea. #bulletinboard #visionboard #corkboard Share on XMore sewing projects for covering household items
DIY Fabric Wrapped Cork Board For An Easy Decor Idea
DIY Fabric Covered Cork Board: Easy Makeover Idea
Turn the plain-looking cork board into a simple but stylish fabric-covered bulletin board for an easy makeover idea and inexpensive home decor.
Materials
- 1 yard of quilting cotton fabric (depending on the size of your cork board, you might need the fabric more or less). I only use one sheet of fat quarter size for the 16" x 24" corkboard.
- Ribbon or decorative trim
- Thumbtack
- Tacky glue,
Tools
- Scissors
- Pinking shears
- Ruler
- Disappeared ink fabric marker
Instructions
- Measure the length and width of the corkboard inside the frame.
- Measure the fabric needed, and trim it using the pinking shears to prevent fraying.
- Put the trimmed fabric on the board to make sure it fits. It is okay if the fabric doesn't cover the whole board around the edge. The ribbon will cover it later on.
- Apply the tacky glue on the board with a zigzag pattern.
- Put the fabric on top of it.
- Use a small ruler to smooth up the fabric if it looks folded or wrinkled. Also, it helps to spread the glue.
- Wait for the glue to dry up before the following process.
- Once the glue on the board has dried up, apply the glue around the edge of the fabric inside the frame or dab a little on the corner.
- Then attach the ribbon or decorative trim starting from one corner and add the thumbtack.
- Apply enough glue on the ribbon when folding it in the corner.
- Fold the ribbon to create a mitered corner, then add a thumbtack.
- Once the whole fabric edge is covered, add more thumbtacks to help keep the fabric and ribbon in place with the same distance interval between the thumbtacks.
- The fabric-covered corkboard is ready to use now.
Leave a Reply