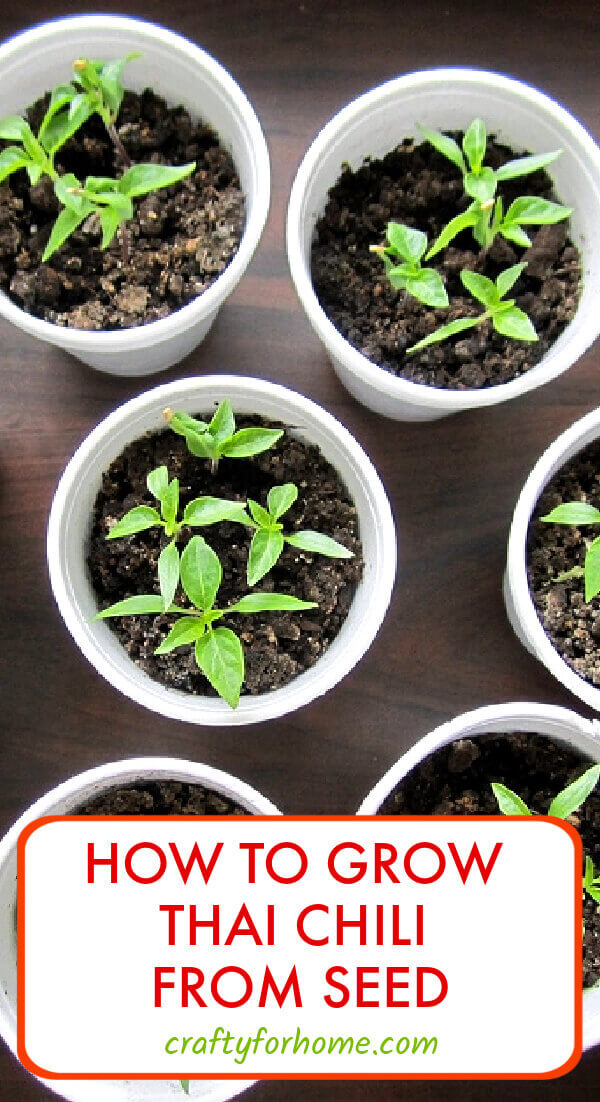
Use This Guide To Grow Thai Chili From Seed
These easy gardening tips are for how to grow Thai chili peppers from seed. You can grow Thai chili peppers in a container or square foot garden if you have limited space.
Spring is almost here. There is still snow outside on every corner. Currently, there is a one-foot high snow pile in front of my house. But it is the middle of March, so technically it is almost spring.
I put a big hope here for that pile of snow melt faster. I got to admit, looking the snow fall through the window is so much fun.
I still find it beautiful when there is a big snowflake tap the window. But having a cold and snowy day from November until now is kind of too much, but it also gives us a break for the gardening season.
On January, I usually start making a plan for the upcoming gardening season. Make a list of plants, planting rotation, companion planting, indoor seeding, redo the garden, try new plant, plan the container garden, and so much more.
I usually make a note from what I did in the last season and for the upcoming season. But most of the time I just decide what kind of things to do after looking pictures of the garden or after what I remembered how much fresh produce I got from the garden last season.
Last year was the best summer ever for the last five years I remembered. Tomatoes were plentiful and ripe on time before picking it, strawberries were non stop, carrots were abundant, my three cherry trees were overloaded with red juicy cherries.
Last year I also planted Thai chili peppers from grocery produce chili. I just took the seed out of the pod, then plant it on the cup with regular potting soil, keep it on the windowsill for the whole time until now, it is still growing and I got lots of chili from it.
This time, I plant more Thai chili peppers from the seed pod came from this indoor chili plant. It actually work just fine and because the seed is fresh, I can see all seeds are sprouting.
How To Grow Thai Chili From Seed
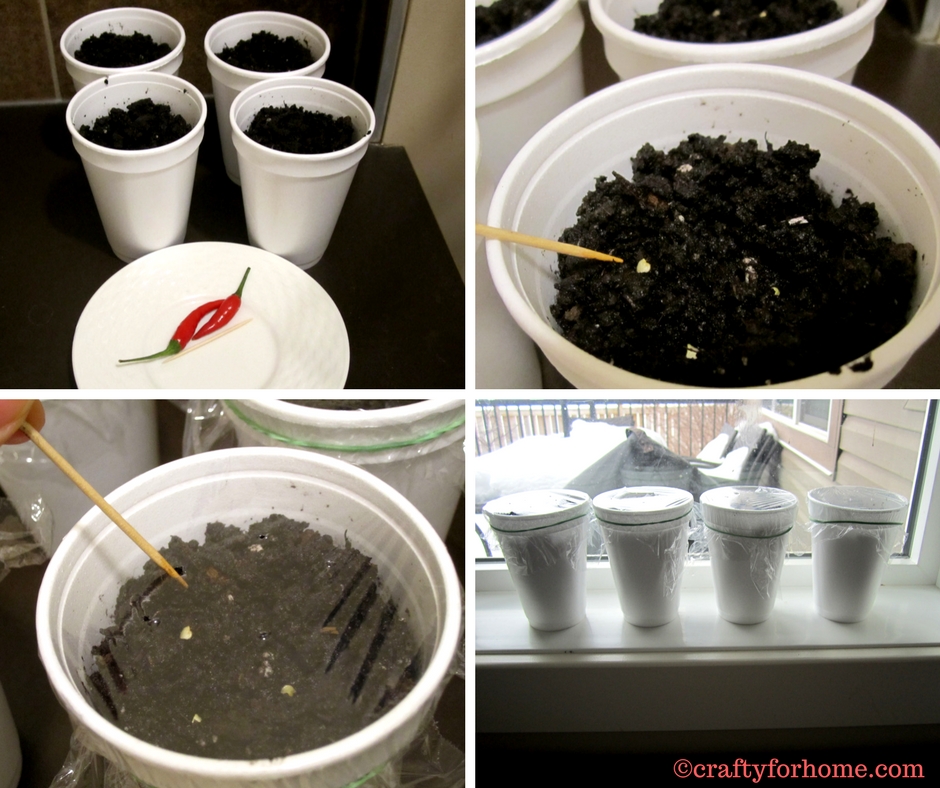
Here I planted one group of Thai chili on the peat pellets method and also one group straight on the potting soil. To see what is the different result between both methods.
Planting Thai Chili On Peat Pellets
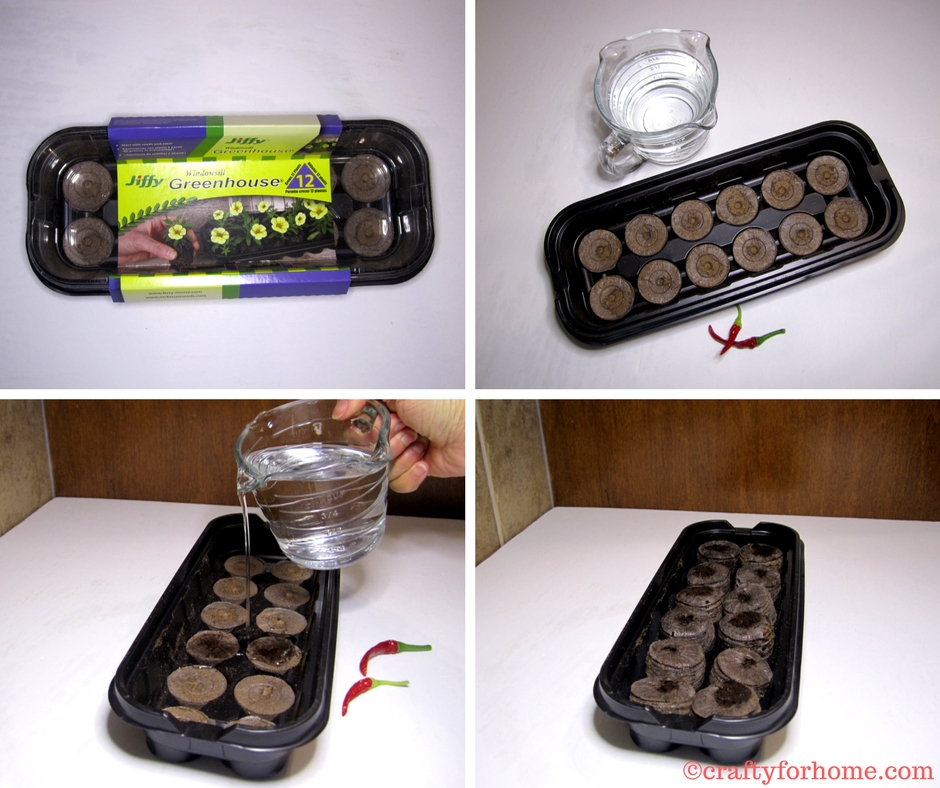
Let’s start with the peat pellets method, the propagating dome is the perfect size to put it on the windowsill.
- Arrange the peat pellets on the container.
- Pour hot water over the peat pellets, wait and see until the pellets expanding, it is quite fun looking at this process.
- Prepare the seeds and toothpick.
- Use the toothpick to put few seeds on the pellets.
- You can push the seeds deeper or cover it up with the moist peat by using the toothpick.
- Put the clear lid on, so now you have a little plant propagation dome.
- Put the dome in the warm place in your house or window sill.
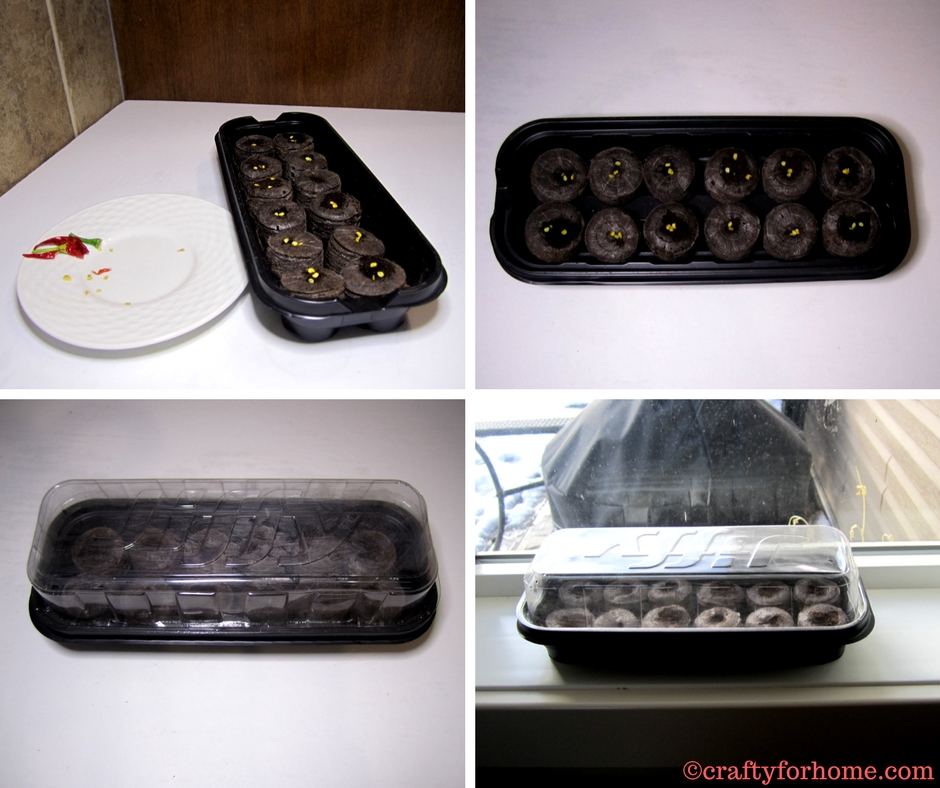
The dome is getting warm humid air inside from the warm peat, it is actually beneficial for quick germinating. I found the Thai chili seed that planted this way was germinate in five days.
There might a few key factors for this quick and successful germinating the seeds, the right environment for the seed and using the fresh seed.
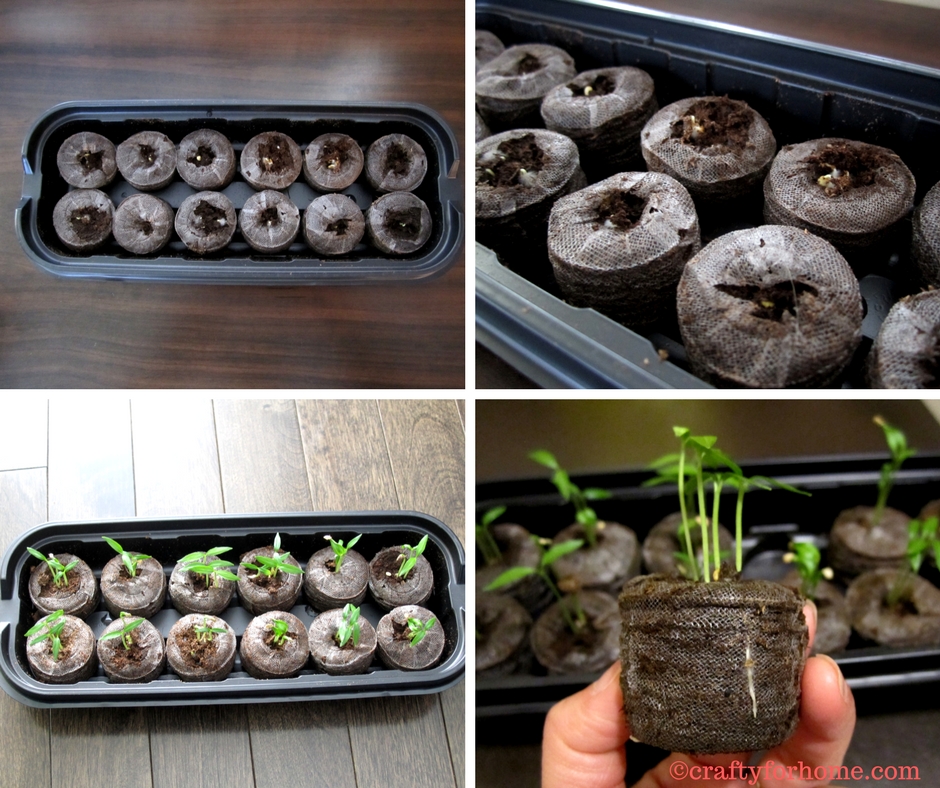
Once the seeds germinate, gradually take the lid off. Let the seeds have their first set of leaves, and keep the peat moist by pouring little bit water on the container, it will seeped through the peat.
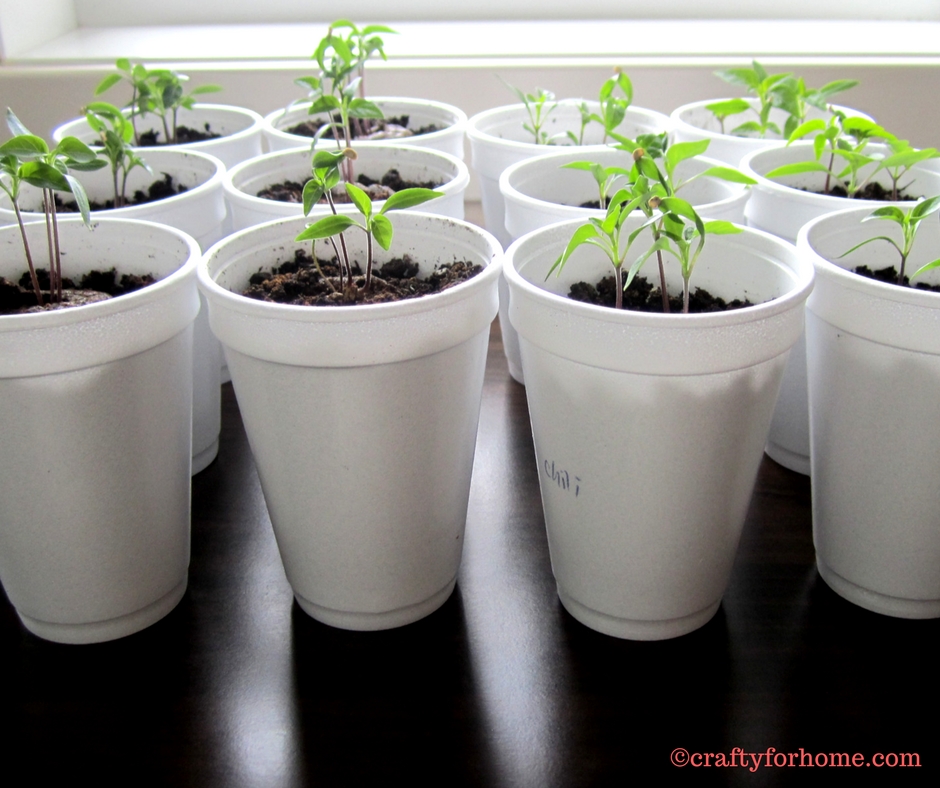
Once you see the roots coming out of the peat, then it is time to move it to bigger container with the potting soil. Just prepare the container you are going to use, I use a styrofoam cup without drainage hole.
Make the potting soil moist, scoop it to the cup or container you use halfway. Try to tear the bottom net of the pod without disturbing the root.
Carefully put the seedling with the peat pod on top of the potting soil. Add more potting soil around the pod.
Keep the seedling on the windowsill, water it until the soil just moist. Leave the plant there until it ready to move to a bigger container or outside in the garden.
Planting Thai Chili Using Potting Soil
The potting soil method.
- Prepare the potting soil or seed starting soil.
- Prepare the bigger container, or little bucket, put some potting soil on it, pour some water and mix it well to get the potting soil moist but not like a puddle looking soil. I use the reverse osmosis water for this, if I use tap water then I will keep the water in the bottle or jug and let it sit overnight before I use it.
- Put some moist potting soil in the cup (you can use seed starting container, yogurt cup, paper cup, anything you have available).
- Put few seeds on top of the soil, make a distance between each seed, about half inch in between.
- Cover the seeds with a little soil.
- Cover the cup with a piece of saran wrap and tight it with a rubber band. Poke a few holes on top of the saran wrap to get air circulation for the germination process.
- Put the cups on the windowsill or warm place inside your house.
This method is still a simple one by using stuff you have around the house, it is good for recycling those little yogurt cups we always collected. I use the styrofoam cup for this.
I did not make any drainage hole in the bottom of the cup because I find it unnecessary for this. Once the seeds grow, I only water them with few tablespoons of water to keep the soil moist.
If you make a drainage hole on the bottom of the cup, make sure put the cups on top of a plastic plate or anything to hold the drained water.
With this method I found the seeds germinate a little bit later but still on a normal time frame for chili. It germinated in 10 days, which is still normal.
Once the seeds germinate, I just take the plastic cover off, leave the plant there until it ready to move to a bigger container or their final place like outside in the garden.
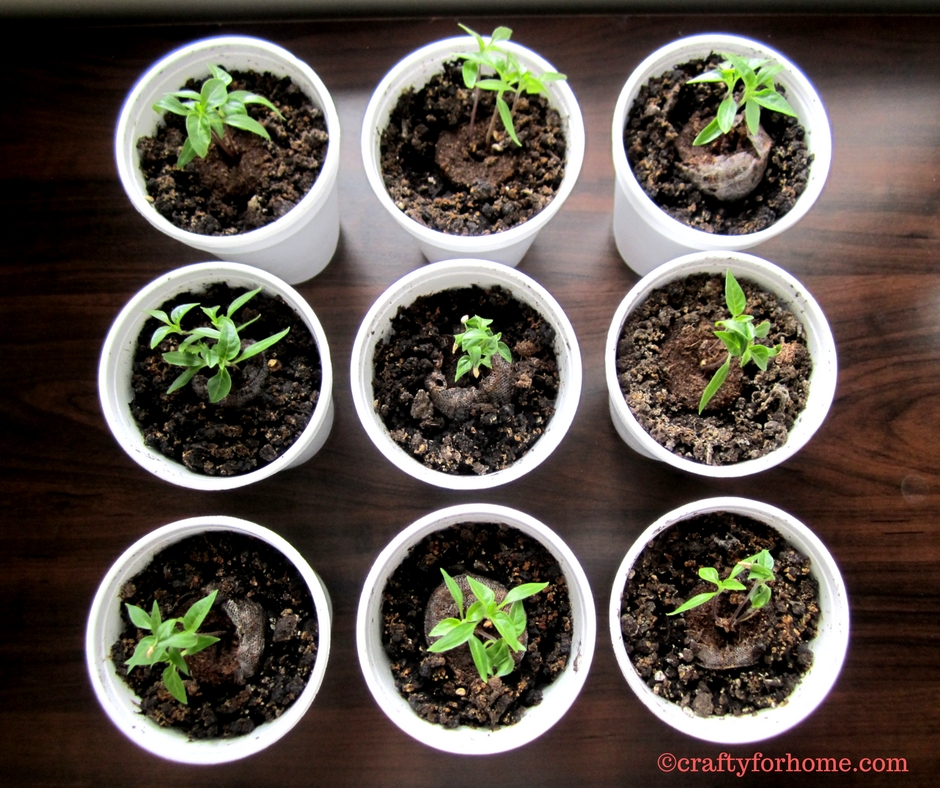
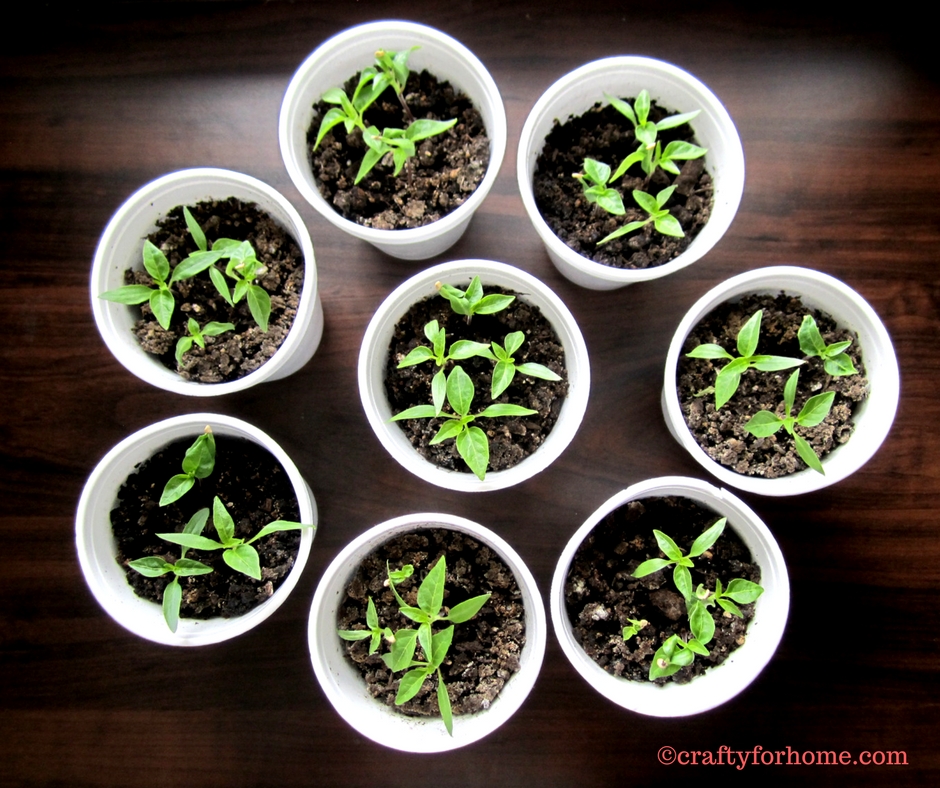
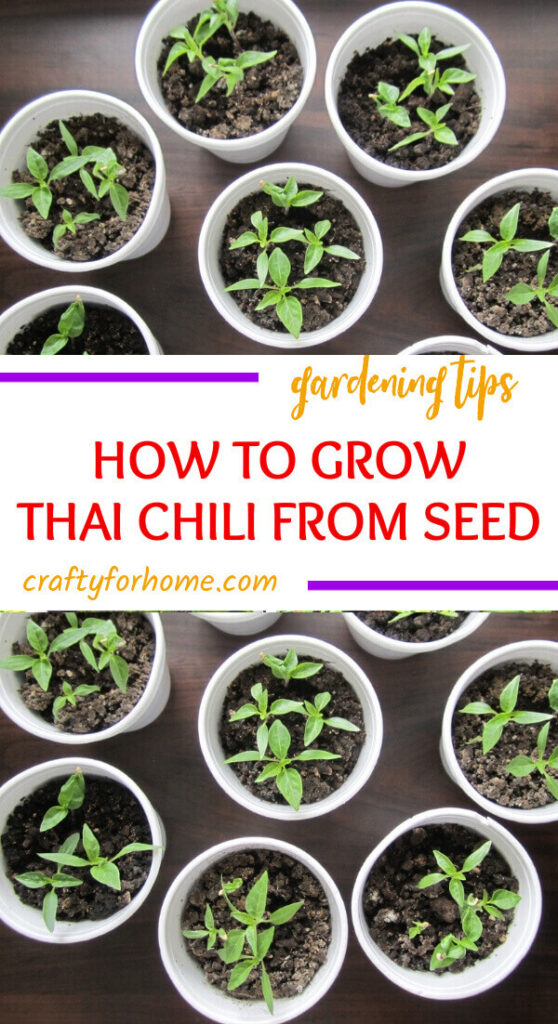
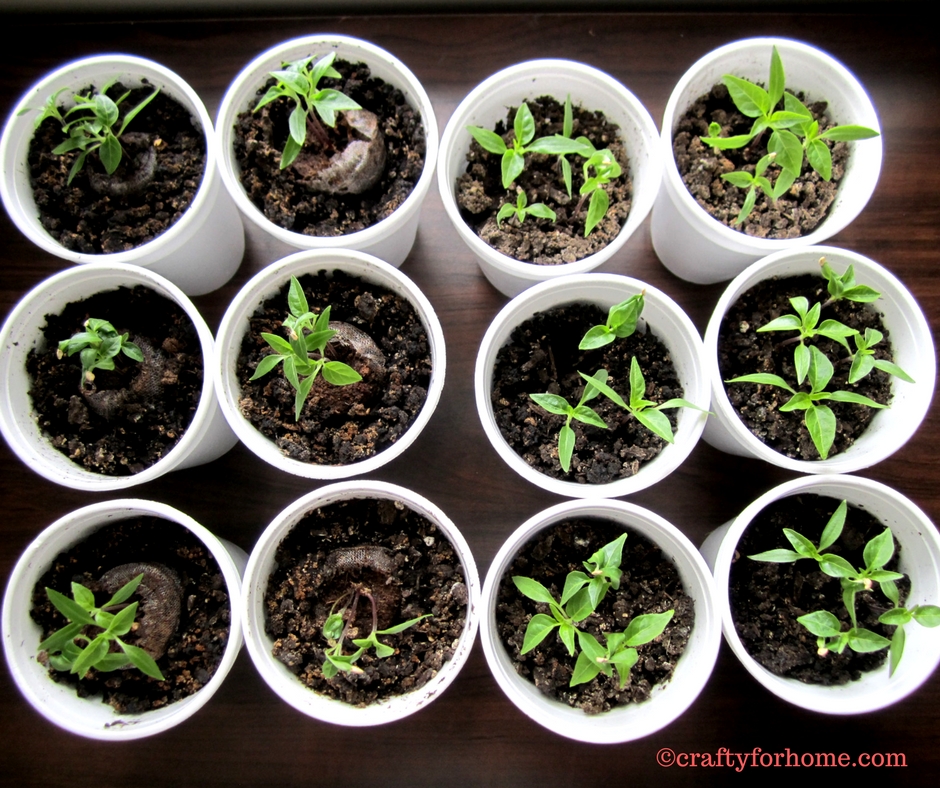 Here they are now after one month and a half growing stage. They all will have the third sets of leaves. It is no different on the plants between seed started on the peat pellet or with the potting soil.
 If you would like to just leave one of the strongest plant then pull the others that look weak, or move them to another container, so it will not overcrowd the container.
I mostly just leave them there in the container, three or four plants per container still work for me. But having only one plant per container is recommended to make the plant stronger and it will yield better.
Home gardening is fun. If it only a few plants it will not take much of our time. In fact, it can be therapeutic for us and also it is one of a great way to involve the kids into nature.
More Vegetable Gardening Tips
- Planting Celery From Grocery Produce
- 10 Vegetable You Can Plant In The Spring
- 20 Easy To Grow Vegetable From Seed
- Best Companion Plants For Tomatoes
- Best Tips For Growing Carrots
- How To Hand Pollinate Zucchini Flowers
Two different ways to plant Thai chili peppers seed indoor to get ready for gardening season.
You May Also Like
How To Root Tomato Plants From Cuttings
An easy way to grow tomatoes from cuttings and get more free tomato plants in a week without seed started involved.
How To Grow Turmeric In A Pot
Easy gardening tips on how to grow turmeric in a pot at home garden and get more fresh turmeric for free. Grow turmeric in the container if you have limited space for the garden
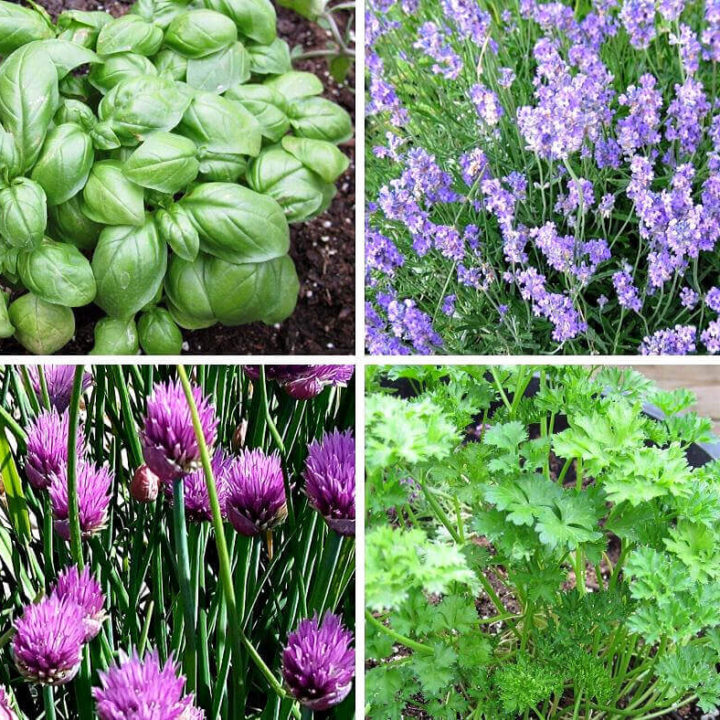
Easy Growing Herbs From Seeds
These easy to grow herbs from seed are the perfect plant to start your kitchen garden without too much time needed to maintain it.


Yes, I’ve often wondered about drainage holes. If you’re only watering a tiny amount, and the roots are as yet shallow, I guess it is not so important. Are they cups you were wanting to use up?
I find that If I make a drainage hole, there is somewhat attract tiny bug on it. They actually don’t mind without drained hole, just to make sure not make the plant drowning. For outside of course I have to make drainage hole. I disposed the cup, I usually use it up for the filler medium when planting on a tall container,
Awesomeness!! I’m planning on doing a little herb garden(inside) and this article is going to help. Not a gardener at all, so I’m not sure what to do. Thanks for the detailed methods! ?
Hi, thank you for stopping by, I do my best to explain the method details and easy to follow. Herb garden is great, I use kitchen windowsill most of the time and it worked very well.
This is great, my mother and I love gardening. We always are shovelling horse, cow and pig manure with soil mixture to create the ultimate growing medium for beautiful big vegetables.
These methods are also great for herbs, cherry tomatoes and other smaller veggies inside, those cups work a treat! Thank you for the great post Ina.
Thank you, gardening is relaxing especially when I see the fruits start to ripe, lol, make me think that I accomplish something useful! We have access to these soil mixture too, but I only use the bagged one!
I am going to try these this year! I can start them the end of January, thank you so much!
Oh you are so lucky can start garden by January!