This sewing project for Christmas is to make a Santa belt mug rug with an easy reverse applique for the Santa belt buckle and add the festivity of the holiday season.
Easy Mug Rug With Santa Belt Applique
This tutorial is for a one-sided Santa belt mug rug. There is enough space on the mug rug for a standard-size mug and a few cookies.
As an Amazon Associate I earn from qualifying purchases. This post may contain affiliate links. Please see the Disclosure Policy for details.
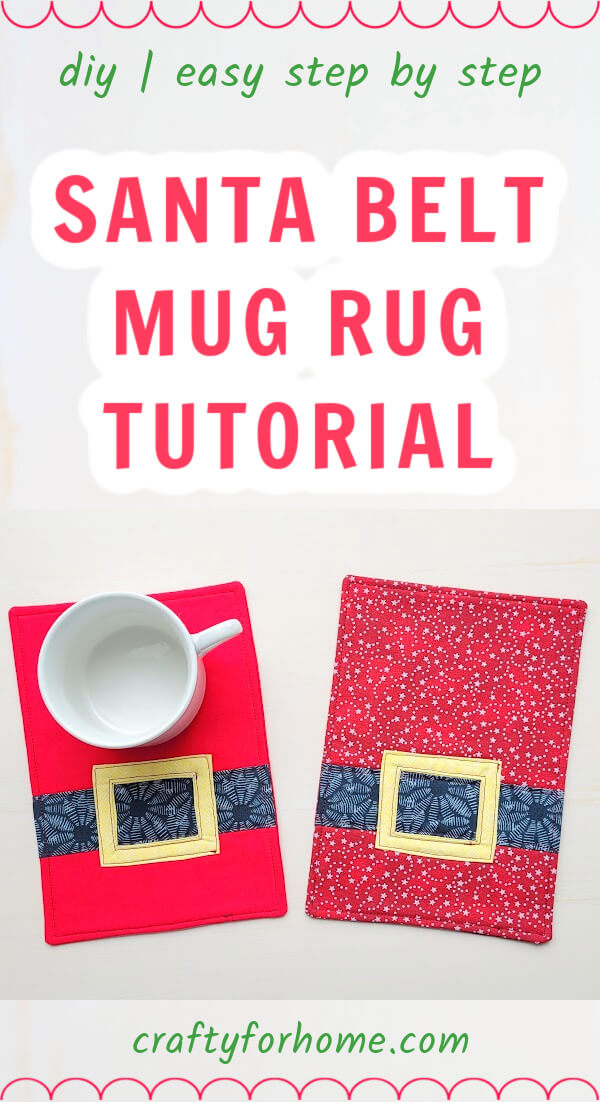
If you want it reversible or both sides have the Santa belt applique, prepare two pieces of black fabric and four pieces of yellow fabric.
Supply For Making Santa Belt Mug Rug
You can use a single or double-layer fusible fleece or batting. Use a fat quarter size for the red fabric, but you can use a layer cake fabric size, jelly roll fabric size, or scrap fabric for the black and yellow fabric.
It doesn’t have to be a plain color for each fabric. Certainly, you can use printed fabric with red, black, and yellow as the base color.
Make a template for the belt buckle reverse applique on a piece of paper 1.5″ x 2″ rectangular shape. Also, you can download the template from the list below.
- 2 pieces of 6.5″ x 9″ red fabric
- 1 piece of 3″ x 6.5″ black fabric
- 2 pieces of 3″ x 3.5″ yellow fabric
- 1 piece of 6.5″ x 9″ fusible fleece or quilt batting
- The reverse applique template for the Santa belt buckle. Link is here to download the template.
- Disappeared ink fabric marker. My favorite one is using the dual-purpose fabric marker
- Pin or quilting clips
- Thread
- Ruler
- Scissors
- Sewing machine
- Ironing machine
Santa Belt Mug Rug With Reverse Applique Tutorial
The video tutorial is also available. Watch the Santa Belt Mug Rug video tutorial on the Crafty For Home channel on YouTube, and subscribe for more videos.
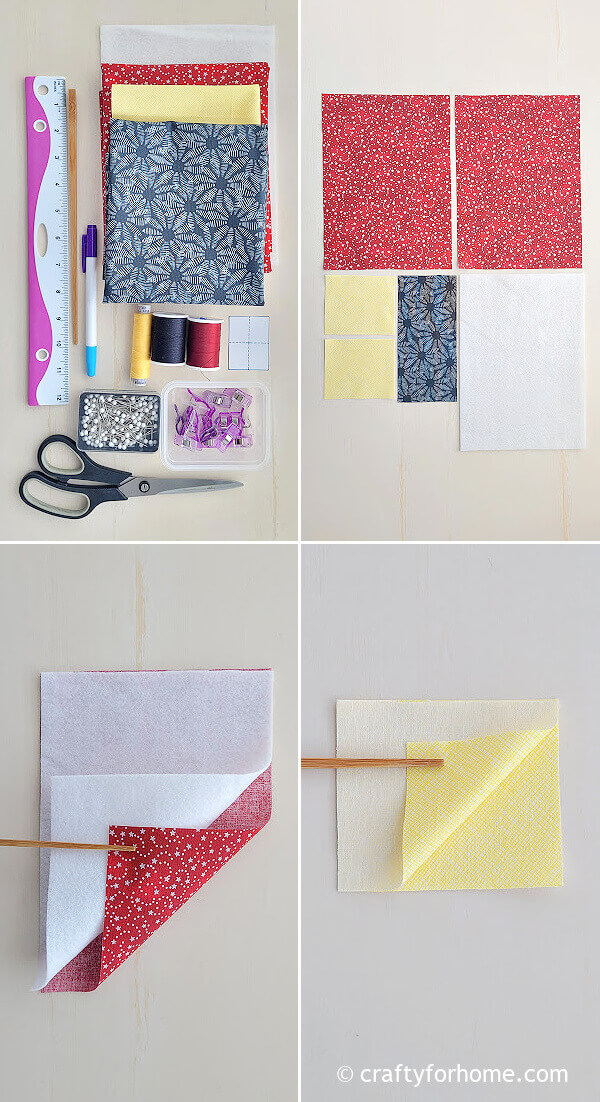
Prepare the material as mentioned.
Fuse the fusible fleece on the wrong side of one red fabric.
For the belt buckle
Put together both yellow fabrics with the right side facing each other.
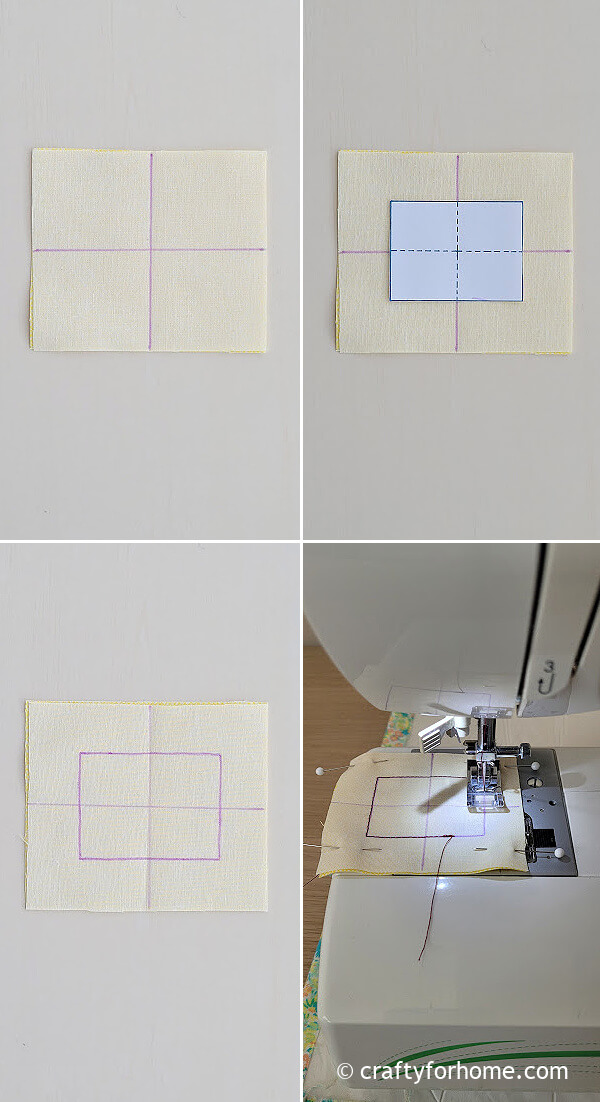
Fold the fabric in half on both sides and mark the folding spots.
Draw the line to connect each folding spot across each other like a plus symbol.
Put the reverse applique template on the yellow fabric to match the plus symbol on both the template and fabric.
Trace the rectangular reverse applique template on the fabric.
Sew along the rectangular line.
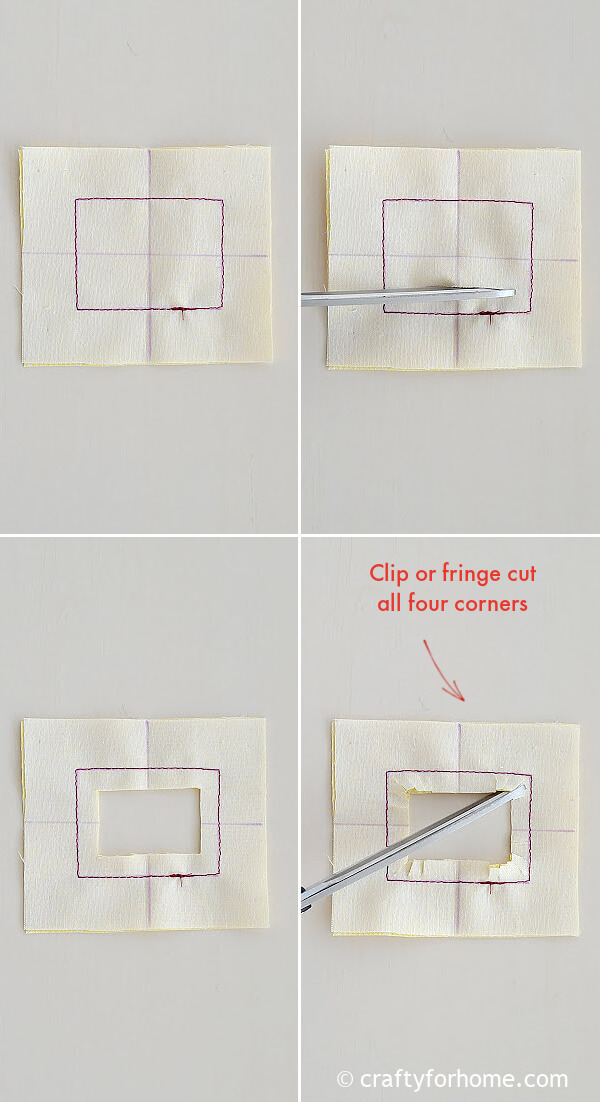
Trim the fabric inside the rectangular around 0.25″ from the stitching line.
Clip or fringe cut the extra fabric on all four corners inside the rectangular stitch.
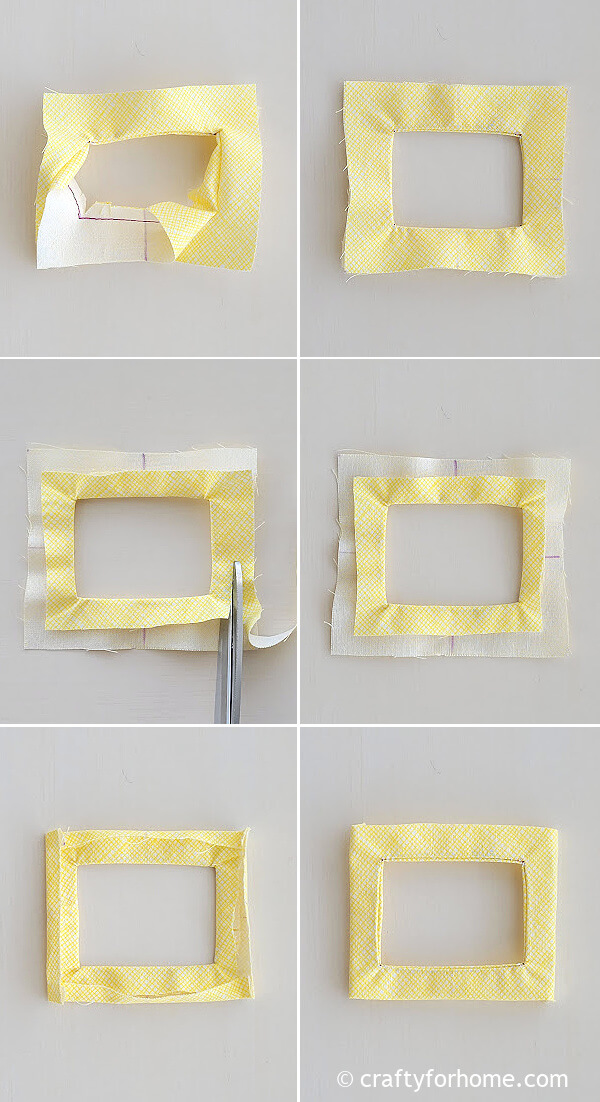
Turn one of the yellow fabrics right side out through the rectangular opening.
Press it with the ironing machine.
Trim one of the yellow fabrics 0.25″ along the edge.
Fold all the edges of the larger yellow fabric inward and press it with the ironing machine so no raw edge is visible.
For the belt strap
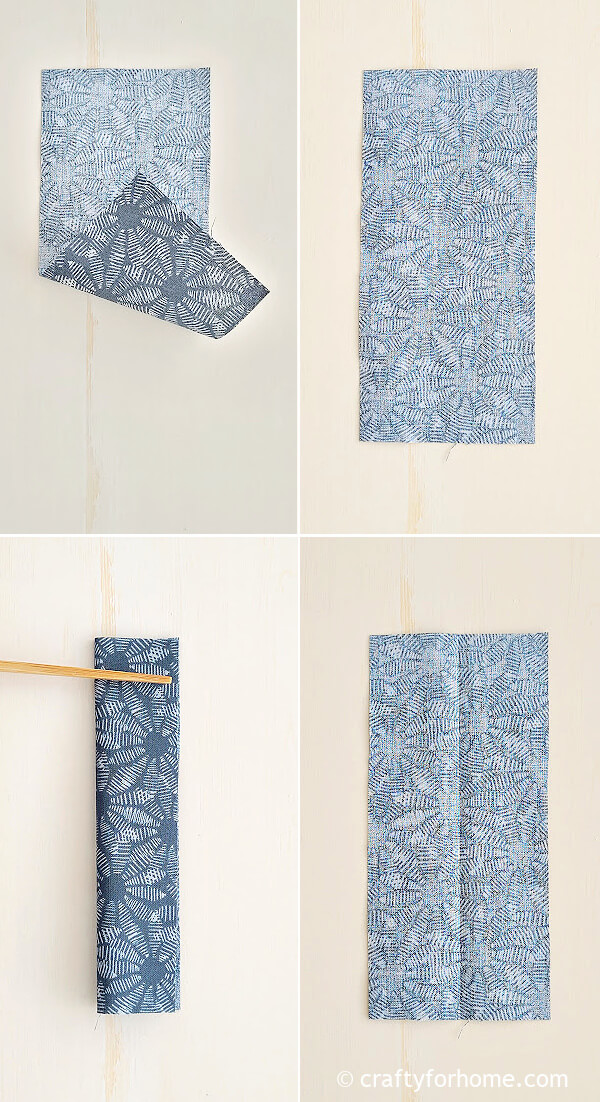
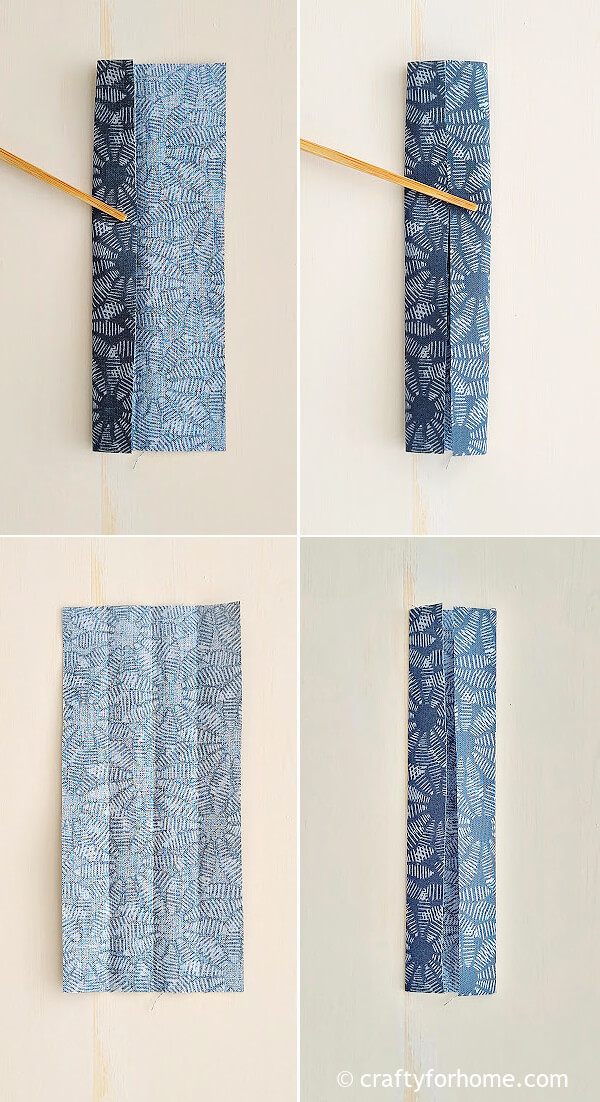
With the wrong side of the black fabric facing up, fold the fabric in half lengthwise, then fold both raw edges along the length inward and press it with the ironing machine.
Pin the black fabric or the strap to the right side of the red fabric with the fused fusible fleece 2.5″ from one of the shorter edges.
Top stitch along the hem of the strap.
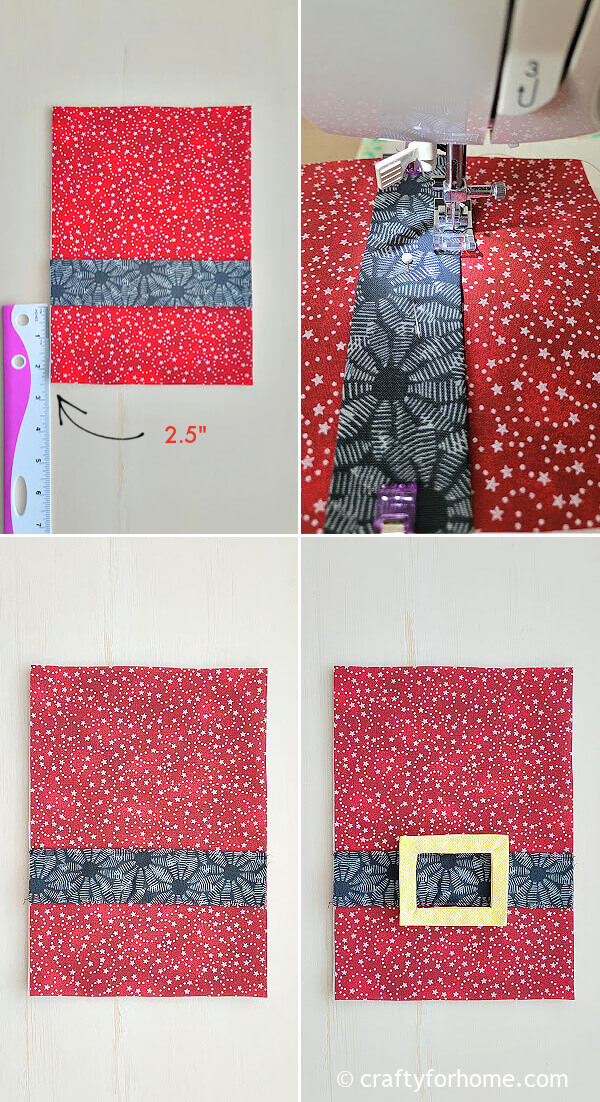
Mark the middle of the belt strap.
Pin the yellow belt buckle fabric right in the center.
Sew around both edges of the yellow belt buckle fabric.
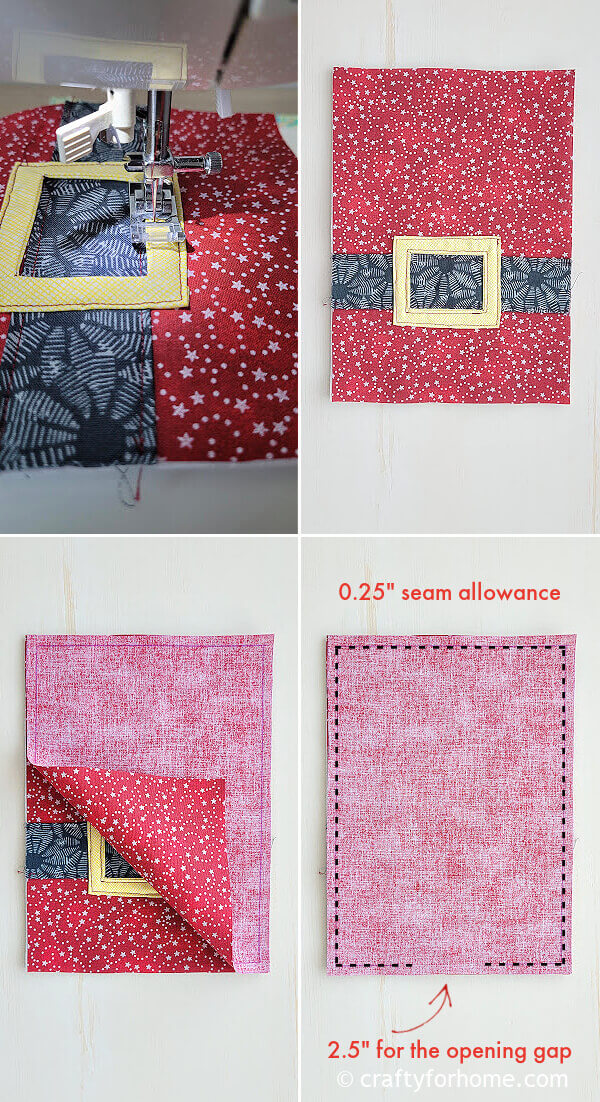
Pin together both red fabric with the right side facing each other.
Sew along the edge of the red fabric with a 0.25″ seam allowance, and skip 2.5″ for the opening gap.
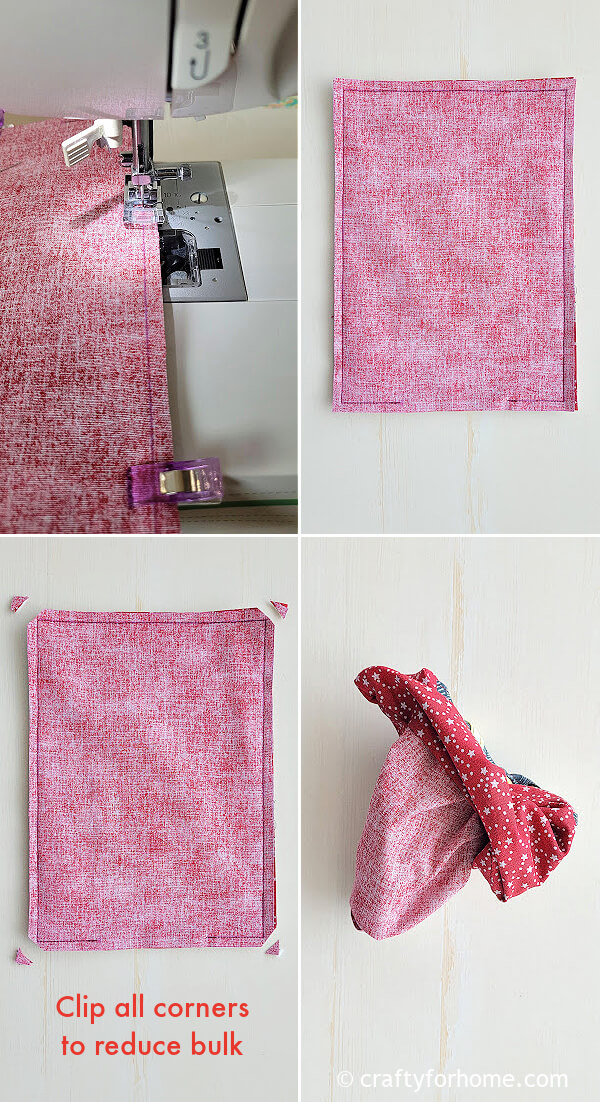
Clip all four corners to reduce bulk.
Turn the material right side out, and push each corner with a chopstick.
Fold the opening inward and press it with the ironing machine.
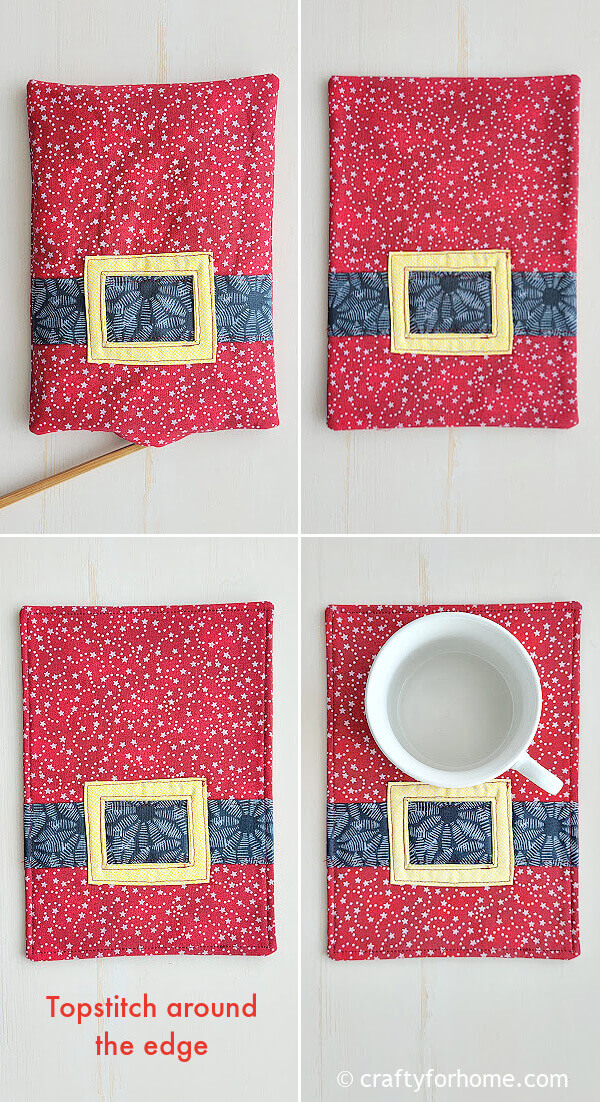
Topstitch along the edge and close the opening at the same time.
The Santa belt mug rug is ready to use now.
Get The PDF
If it is more convenient to have the printable version of this tutorial for the project, you can purchase the Printable PDF Format of Santa Belt Mug Rug Template And Sewing Tutorial here. The e-book has the template and complete tutorials with pictures included. There are no ads or video displays on the PDF so that you can print it, and it will be available for you anytime you need the tutorial for your next project. Click on the e-book cover image above to purchase.
Use this red accent gift wrapping to wrap this easy mug rug for a homemade gift idea. The Santa belt is one of the gift-wrapping decorations on the list.
Use scrap fabrics to create this adorable Santa belt mug rug. #Christmasmugrug #sewingforChristmas Share on XMore easy project for Christmas
- Easy Fabric Ornament
- Ornament Mug Rug
- Fabric For Gift Wrapping Ideas
- Yarn For Gift Wrapping Ideas
- Brown Paper For Gift Wrap
Easy DIY Santa Belt Mug Rug For Christmas Time Decoration
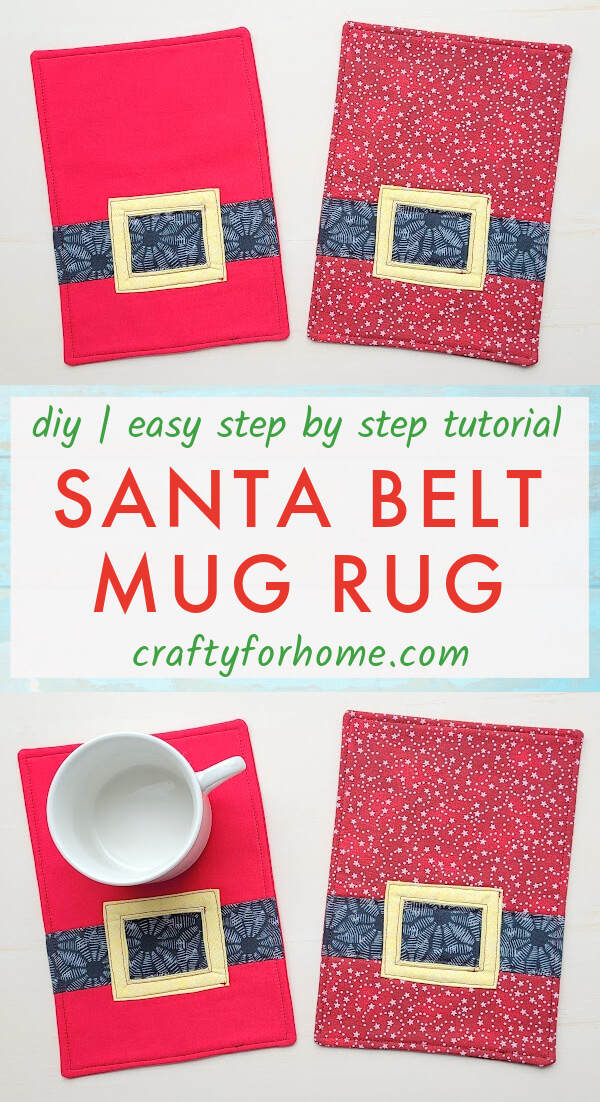
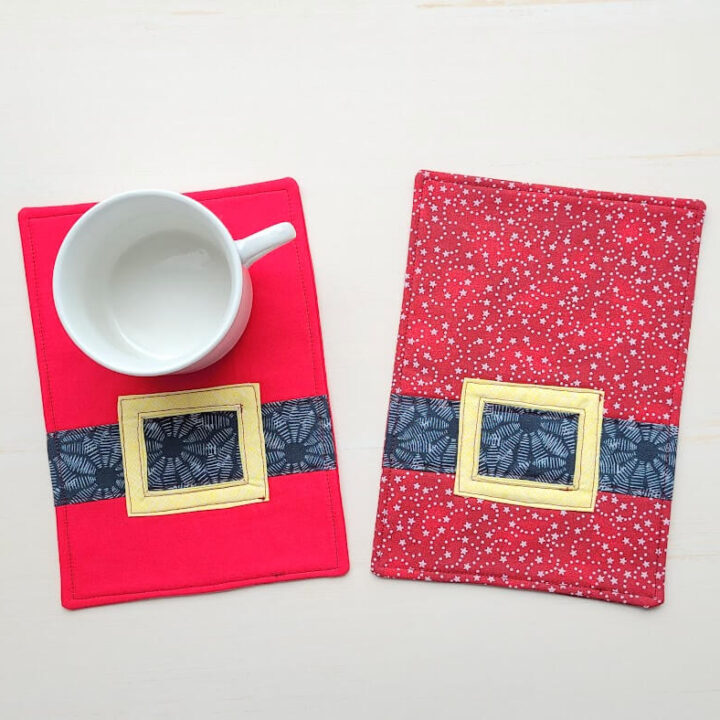
Santa Belt Mug Rug With Reverse Applique
This sewing project for Christmas is to make a Santa belt mug rug with an easy reverse applique for the Santa belt buckle and add the festivity of the holiday season.
Materials
- 2 pieces of 6.5" x 9" red fabric
- 1 piece of 3" x 6.5" black fabric
- 2 pieces of 3" x 3.5" yellow fabric
- 1 piece of 6.5" x 9" fusible fleece or batting
- The reverse applique template for the Santa belt buckle (see note)
Tools
- Disappeared ink fabric marker
- Pin or quilting clips
- Thread
- Ruler
- Scissors
- Sewing machine
- Ironing machine
Instructions
- Fuse the fusible fleece on the wrong side of one red fabric.
- For the belt strap
With the wrong side of the black fabric facing up, fold the fabric in half lengthwise, then fold both raw edges along the length inward and press it with the ironing machine. - Pin the black fabric or the strap to the right side of the red fabric with the fused fusible fleece 2.5" from one of the shorter edges.
- Top stitch along the hem of the strap.
- For the belt buckle
Put together both yellow fabrics with the right side facing each other. - Fold the fabric in half on both sides and mark the folding spots.
- Draw the line to connect each folding spot across each other like a plus symbol.
- Put the reverse applique template on the yellow fabric to match the plus symbol on both the template and fabric.
- Trace the rectangular reverse applique template on the fabric. Sew along the rectangular line.
- Trim the fabric inside the rectangular around 0.25" from the stitching line.
- Clip or fringe cut the extra fabric on all four corners inside the rectangular stitch.
- Turn one of the yellow fabrics right side out through the rectangular opening.
Press it with the ironing machine. - Trim one of the yellow fabrics 0.25" along the edge. Fold all the edges of the larger yellow fabric inward and press it with the ironing machine so no raw edge is visible.
- For the mug rug
Mark the middle of the belt strap. Pin the yellow belt buckle fabric right in the center. - Sew around both edges of the yellow belt buckle fabric.
- Pin together both red fabric with the right side facing each other.
- Sew along the edge of the red fabric with a 0.25" seam allowance, and skip 2.5" for the opening gap. Clip all four corners to reduce bulk.
- Turn the material right side out, and push each corner with a chopstick.
- Fold the opening inward and press it with the ironing machine.
- Topstitch along the edge and close the opening at the same time. The Santa belt mug rug is ready to use now.
Notes
- Make a template for the belt buckle reverse applique on a piece of paper 1.5" x 2" rectangular shape or download the template here.
Leave a Reply