Easy sewing project for the kitchen that you can do in under an hour to make a DIY fabric bowl cozy from quilting cotton fabric.
Use This Guide To Sew Reversible Fabric Soup Bowl Cozy
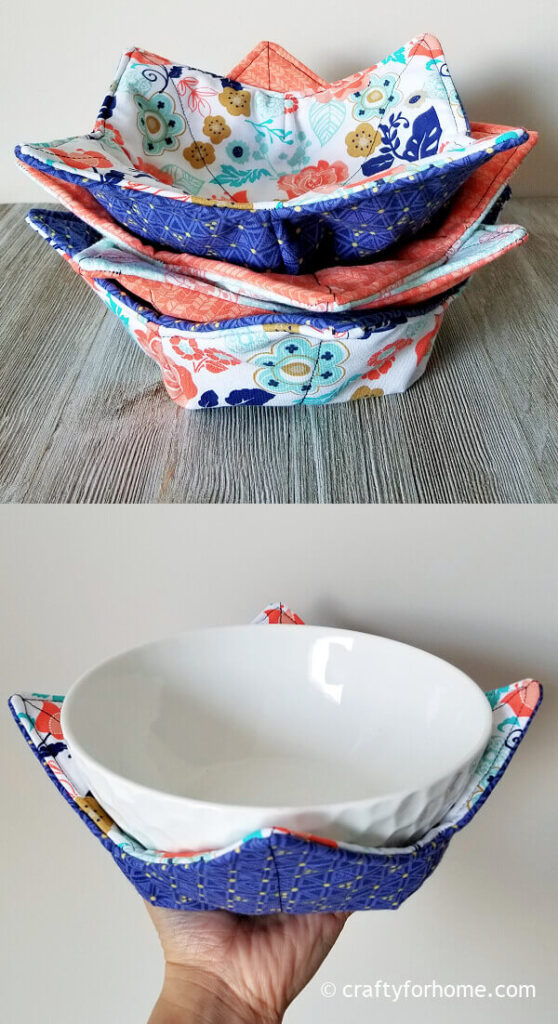
Protect your hand and finger when you are holding a bowl of hot soup or oatmeal with this bowl cozy. It has the same purpose as this ice pop cozy and coffee cozy, except the tutorial this time is for the bowl.
As an Amazon Associate I earn from qualifying purchases. This post may contain affiliate links. Please see the Disclosure Policy for details.

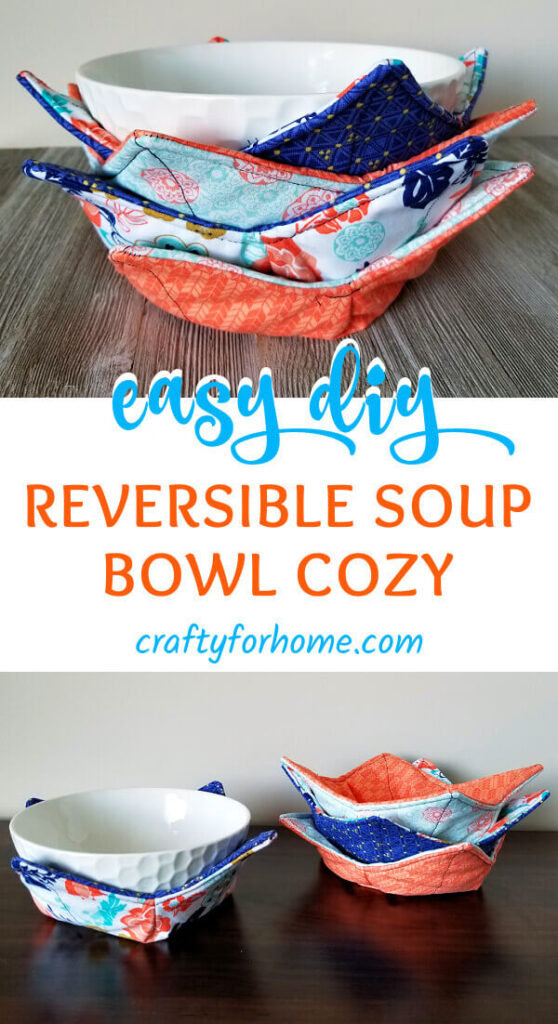
Making one or two won’t take too much time. You can make these four bowl cozies in just under an hour.
What Is Fabric Bowl Holder
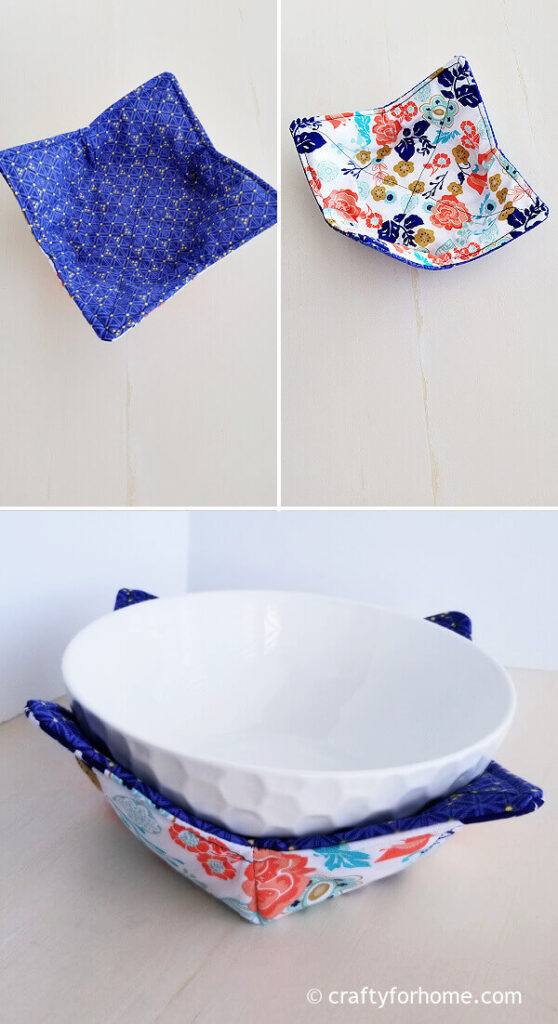
A fabric bowl holder or bowl cozy is an insulated fabric pad for the bowl that usually resembles a bowl itself to fit in it.
The fabric bowl’s cozy purpose is to keep your hand warm when you hold a bowl of ice cream or protect your hand when you have a bowl of hot soup or other hot meals.
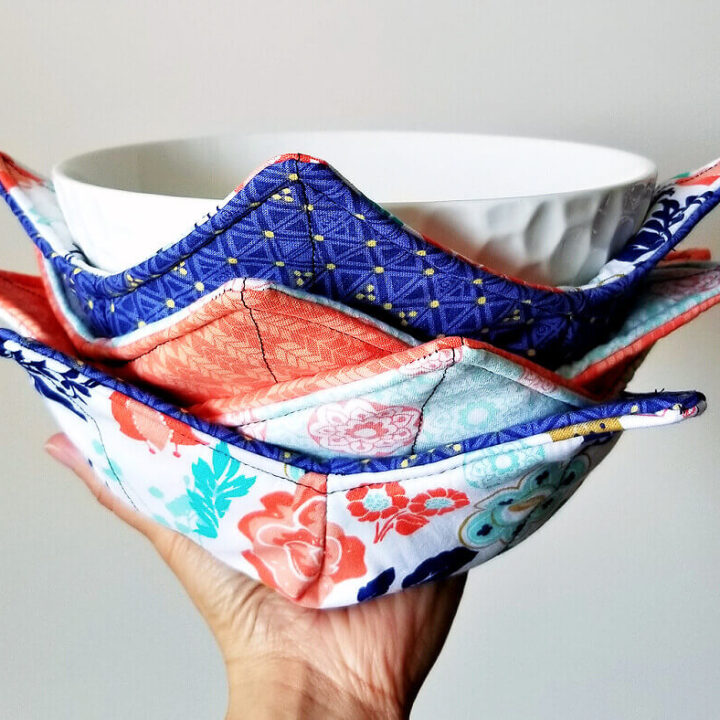
You can use a paper towel or even a clean kitchen towel for holding a bowl of hot soup. But who doesn’t love a pretty little thing that you can sew to help you around the kitchen? Also, you can customize the print and color you like.
The Best Fabric For Bowl Cozy
The best fabric type you can use for this project is 100% cotton because it is easy to work with and comes with various prints and colors.
Use 100% cotton batting for the bowl holder too. This Pellon Wrap N Zap cotton batting is perfect for this project. Avoid using iron-on batting.
Disclaimer: I don’t recommend using the bowl cozy for microwave use, as I am not sure if it is safe on your microwave or not. Any kitchen appliances might have different capabilities.
A synthetic material like polyester might get melting or possibility of catching fire from heating in the microwave. Polyblend batting and all-purpose thread contain polyester.
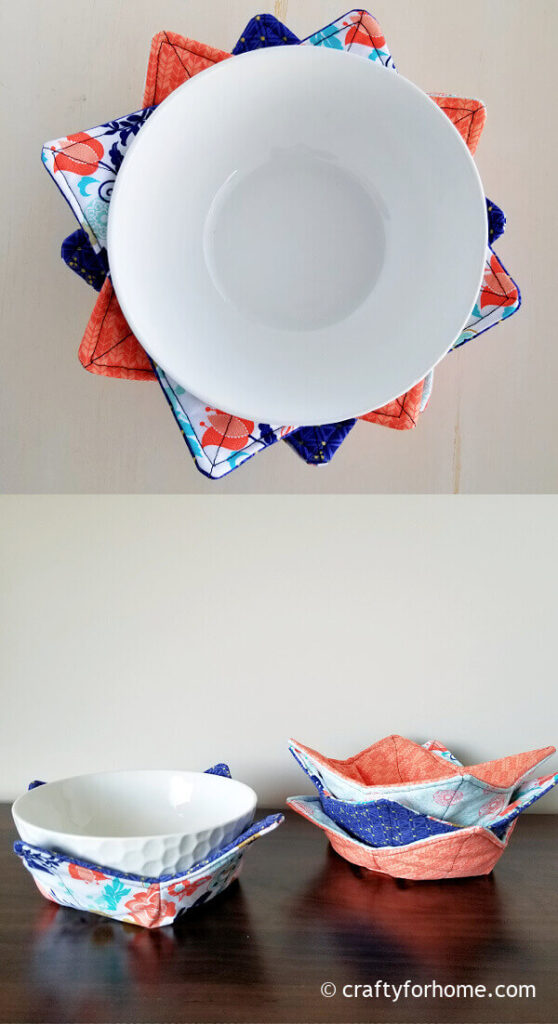
The bowl cozy is better to use for serving the bowl of hot soup or cold meal.
If you must use this bowl holder for microwaving food, you should use all 100% cotton material from fabric, batting, and thread. Any insulated batting that contains metal and metallic print fabric or thread can catch fire in the microwave.
What You Need To Make Fabric Bowl Cozy
Depending on how big the bowl you are using, you might get 6 bowl holders (up to 8 inches soup bowl) from 1-yard fabric with the same print or color on both sides.
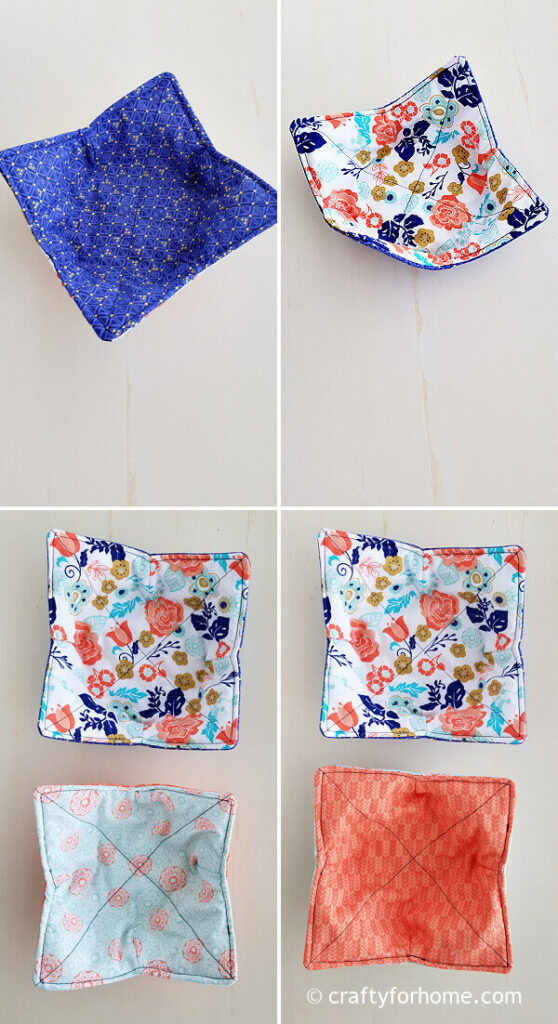
If you use a bundle of fat quarters that usually comes in 5 up to 24 sheets of fabric, you can make multiple bowl holders with different prints on both sides. You might want to prewash the fabric first to reduce shrinkage.
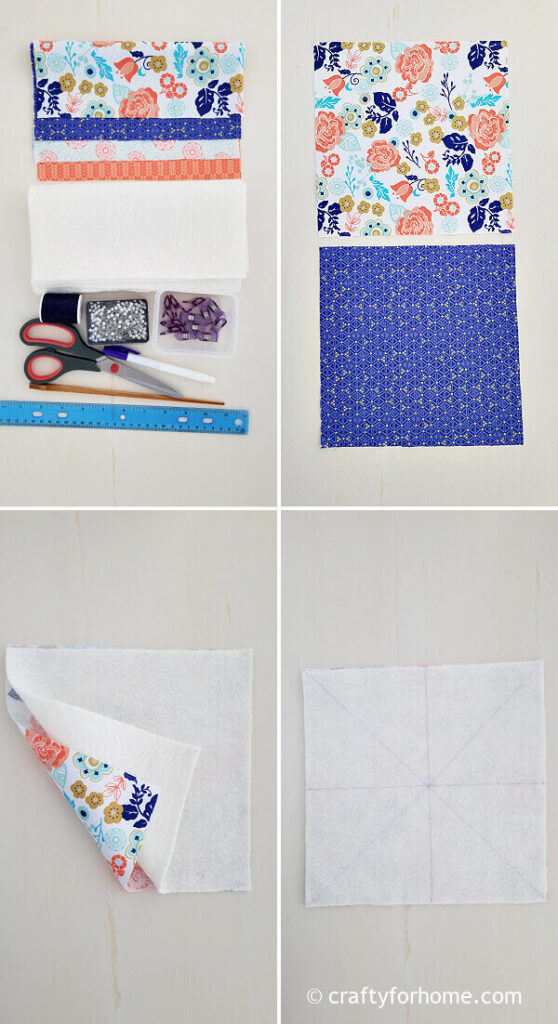
- 1 yard or fat quarter bundle of 100% cotton fabric
- 100 % cotton batting, like this Pellon Wrap N Zap cotton batting
- Disappeared ink fabric marker, I like this dual-purpose fabric marker
- 100% cotton thread
- Ruler
- Chopstick
- Pin or these quilting clips
- Sewing machine
Easy Fabric Soup Bowl Holder Tutorial
See the bowl cozy video tutorial here.
Cut 2 sheets of fabric 10 x 10 inches. Cut 2 sheets of batting 10 x 10 inches.
Put one square fabric with the wrong side facing up and put one square batting on top. Pin it together or use the clip.
Fold in half, mark the folding spot. Do the same way on the fabric and batting for the other side.
Draw diagonal lines to connect all opposite corners. Draw the line between the folding spot. Sew straight on both diagonal lines.
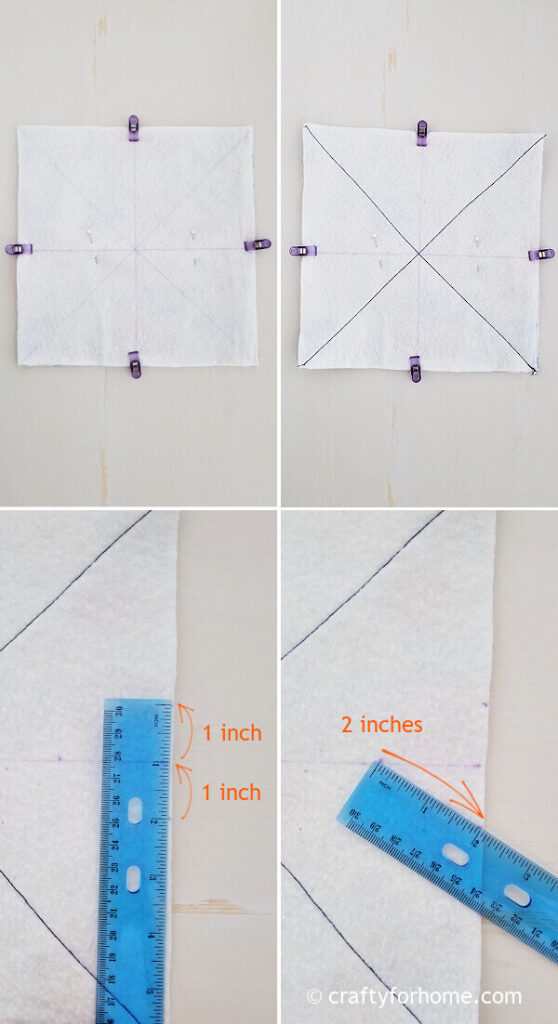
On all vertical lines on the edge of the batting, mark 1 inch both left and right from the line. Mark 2 inches inward. Connect all marking spots to create the triangle.
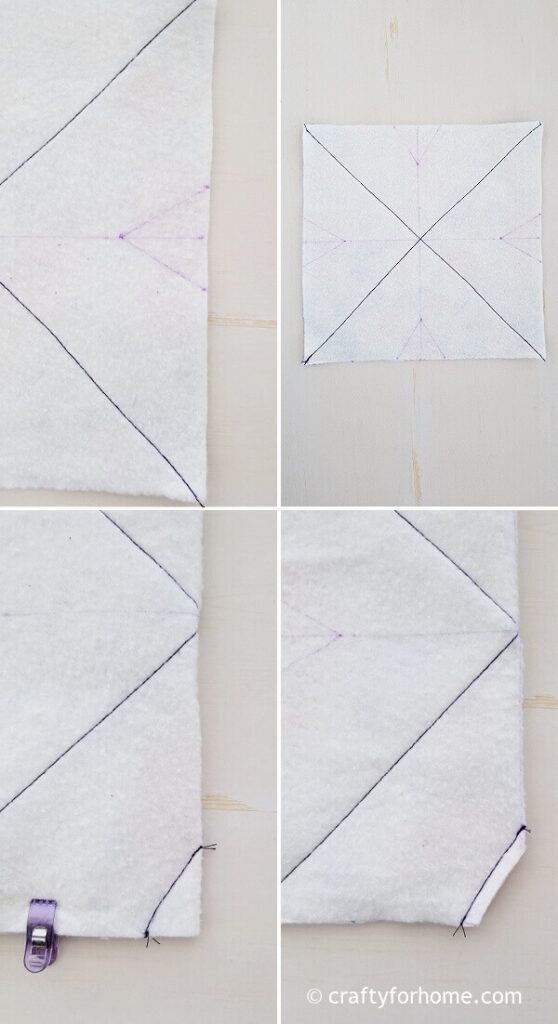
On the folding position, pin it together and sew the 2 inches line on all four sides. Trim the extra fabric around 1/2 inch from the line.
Repeat the process for the other piece of square fabric and batting.
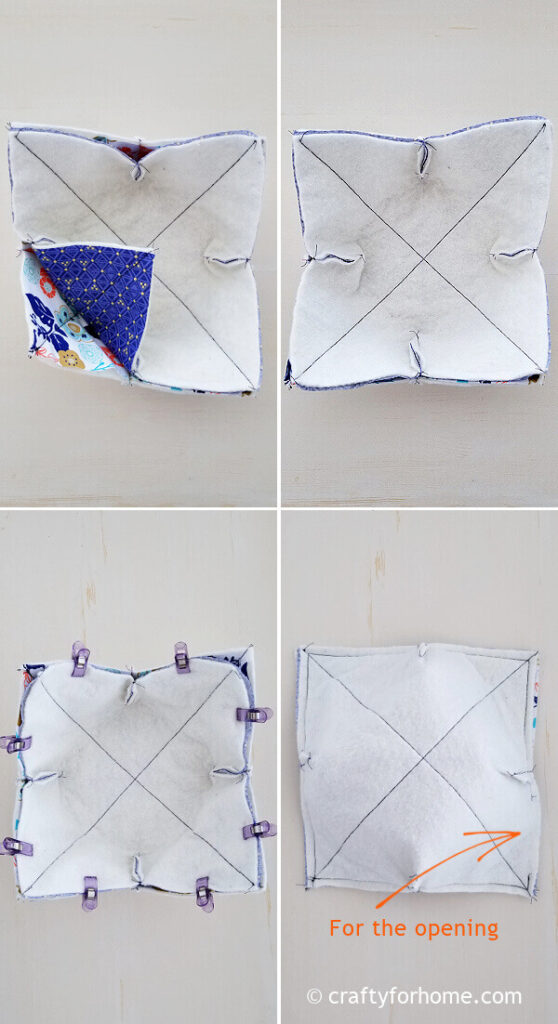
To assembly, pin together both bowl cozies with the right side of the fabric facing each other. Sew straight along the edge and skip 4 inches for the opening.
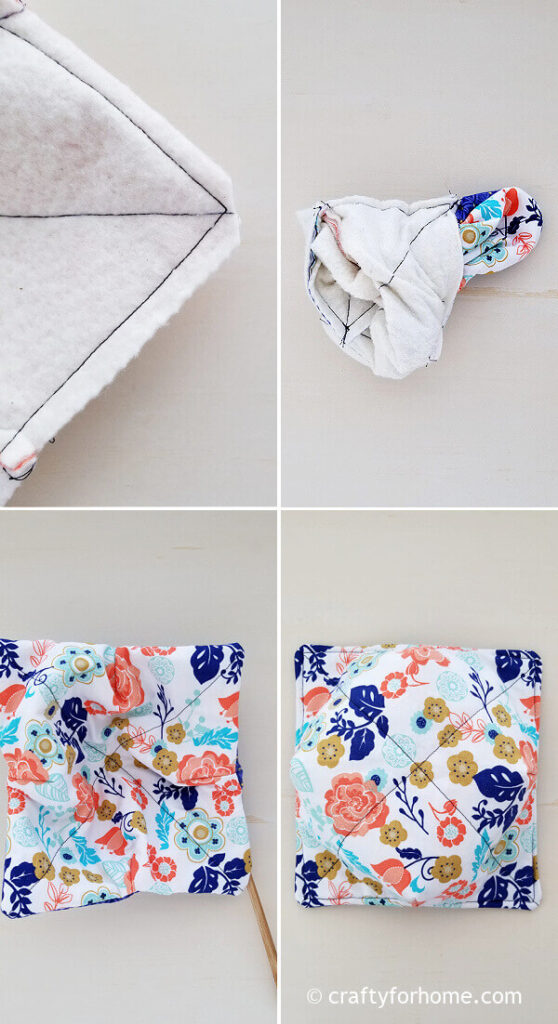
Clip all corners to reduce the bulk. Turn the bowl cozy right side out.
Use the chopstick to push each corner. Topstitch the hem and close the opening at the same time.
GET THE PDF
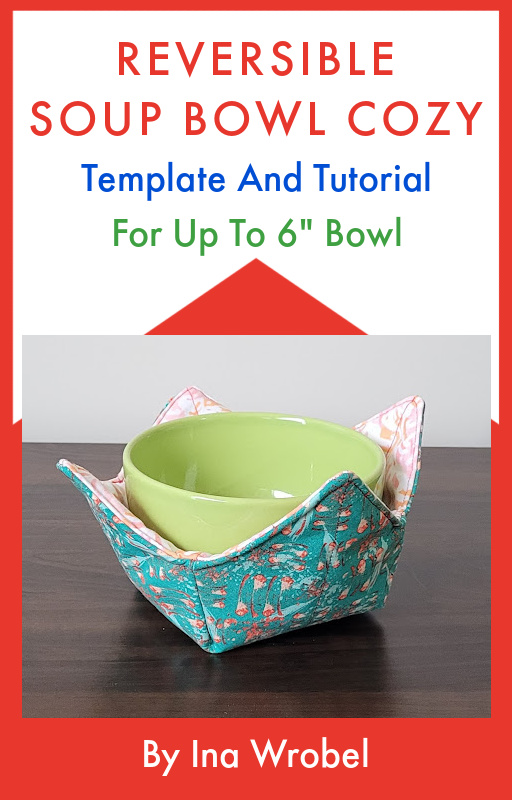
I have a Reversible Soup Bowl Cozy Template And Tutorial For Up To 6″ Bowl, which has never been published on the blog.
If it is more convenient to use the template for the project, you can purchase the PDF format ebook of Reversible Soup Bowl Cozy Template And Tutorial For Up To 6″ Bowl for only $6.75. The ebook has complete tutorials with pictures included. There is no ads or video display on the PDF so that you can print it, and it will be available for you anytime you need the tutorial for your next project. Click on the ebook cover image above to purchase.
Also, I should mention that you can use any forgotten cotton pillowcase or bedsheet for this project. It is one of the best repurpose projects into something new.
This DIY bowl holder is perfect for serving a bowl of hot soup or ice cream. #bowlcozy #bowlholder Share on XMore Easy Sewing Projects For The Kitchen
- Oval Shaped Placemat
- Easy Binding Mug Rug
- Handmade Cloth Napkins
- Easter Egg Shaped Placemat
- Easy Oval Mug Rug
- Leaf Shaped Coaster
- Ice Cream Cup Cozy
DIY Reversible Fabric Bowl Holder For Cozy Meals
How To Make Reversible Soup Bowl Cozy
Easy sewing project for the kitchen that you can do in under an hour to make a DIY fabric bowl cozy from quilting cotton fabric.
Materials
- 1 yard or fat quarter bundle of 100% cotton fabric
- 100 % cotton batting, like Pellon Wrap N Zap cotton batting
Tools
- Disappeared ink fabric marker
- 100% cotton thread
- Ruler
- Chopstick
- Pin or quilting clips
- Sewing machine
Instructions
- Cut 2 sheets of fabric 10 x 10 inches. Cut 2 sheets of batting 10 x 10 inches. Put one square fabric with the wrong side facing up and put one square batting on top. Pin it together or use the clip.
- Fold in half, mark the folding spot. Do the same way on the fabric and batting for the other side.
- Draw diagonal lines to connect all opposite corners. Draw the line between the folding spot. Sew straight on both diagonal lines.
- On all vertical lines on the edge of the batting, mark 1 inch both left and right from the line. Mark 2 inches inward. Connect all marking spots to create the triangle.
- On the folding position, pin it together and sew the 2 inches line on all four sides. Trim the extra fabric around 1/2 inch from the line. Repeat the process for the other piece of square fabric and batting.
- To assembly, pin together both bowl cozies with the right side of the fabric facing each other. Sew straight along the edge and skip 4 inches for the opening.
- Clip all corners to reduce the bulk. Turn the bowl cozy right side out.
- Use the chopstick to push each corner.
- Topstitch the hem and close the opening at the same time.
- The soup bowl cozy is ready to use.
Notes
Make sure to see the complete steps of picture tutorials in the post for more detailed instructions


I love this pattern! I was using another cozy pattern but then I came across yours & tried it today! Your pattern & instructions are easier to follow & simpler! I whipped up 2 for my pasta bowls with a little modification to fit mine! Thankyou!
Thank you so much. I am happy you like the tutorial.
My mom just made these for me. Love them!
I am glad you like it too!
Very nice instructions. Instead of placing the two prepared pieces right sides together, I place them wrong sides together. I then use a decorative stitch to secure the two layers together. After stitching, I use pinking shears and trim around the raw edges. Much quicker than turning and top stitching.
Thank you Sherry. Using the pinking shears is definitely a great idea, it’s a much quicker process! Love it!
Hi Ina! I’ve made LOTS of these for years and I really like your technique! I’ve made a couple little adaptations of my own and would like to offer them. Regarding Step 4: rather than measure and draw the triangle 4 times, I made a little cardboard triangle in that exact size needed based on the size of the cozy I’m making, marking it to show where it needs to match up with the horizontal lines marked on the batting. I lay it down, trace it and go. Fast and easy!
Regarding Step 6: I’ve learned that when turning a project right side out and stitching to close the opening, it can be challenging to keep the opening “true” to the edges. It’s often slightly crooked, buckled, the back edge isn’t captured by the needle, or it just plain looks bad. To prevent this, I add two easy little steps to the stitching process. First, as I begin, I lower the needle at the seam allowance, then pivot my piece and with tiny stitches,
backstitch perpendicularly almost to the edge. Then I stitch forward to the pivot point, switch back to normal stitch length, pivot and sew all the way around until I read my stopping point. Then I do the same thing, just in reverse. I pivot, set for tiny stitches, stitch forward almost to the edge, stop, then backstitch to the seam allowance. Sounds a tad cumbersome I know, but it takes A LOT less time to do it than explain it!! When turning the piece right-side out, simply put one forefinger at each and of the opening and GENTLY tug. You’ll get a nice straight edge that you can pin or clip and easily sew closed.
Thanks for sharing this with us!
Hi, thank you so much for taking the time to write here. I appreciate it. I love your suggestion on making the template for the dart, turning the right side out technique, and closing the opening (all of your recommendations). It sounds so easy to do and very helpful. Thank you again.
I think you might have good content, but the web frame clutters the page so much I cannot read it on my tablet or smart phone. You may want to select a different layout so that your material can be easily read without ads or link buttons obscuring content.
Hi Carol, thank you for the suggestions. Some of these buttons and links are necessary and important to run a blog. I will see what I can do to improve it better. Thank you again.
IF everything is cut and marked you can see these up quickly. But starting from uncut materials there’s no way you can do 4 in under an hour if you are measuring and marking carefully. I made 10 sets of these. I did find shortcuts along the way but still…
Hi Jolene, thank you for the suggestion. Yes, you are right. It would take over an hour to make four bowl cozies. With one bowl cozy, it will be around 25 minutes. I am glad you like the tutorial. Have a wonderful day.
I love these for heating up soup.
I’m glad you like it. The soup cozy is so useful for meal time.