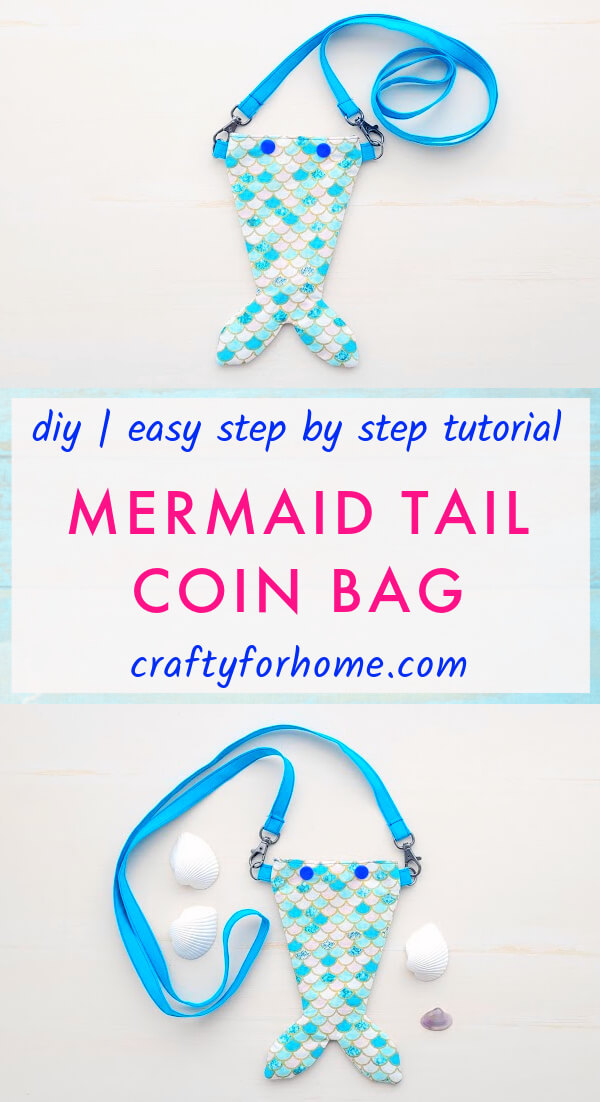
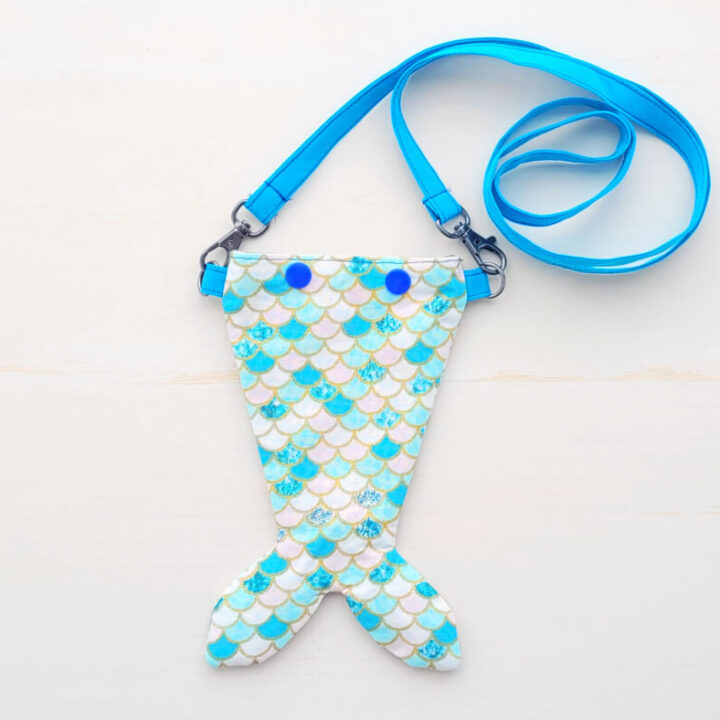
This sewing tutorial is for making a mermaid tail bag with snap buttons and a long strap for a crossbody bag that holds enough space for coins, treats, and all mini treasures.
Mermaid Tail Purse
This mermaid tail craft idea came after I watched the lovely mermaid movie. It inspired me to make the mermaid tail coin purse.
As an Amazon Associate I earn from qualifying purchases. This post may contain affiliate links. Please see the Disclosure Policy for details.
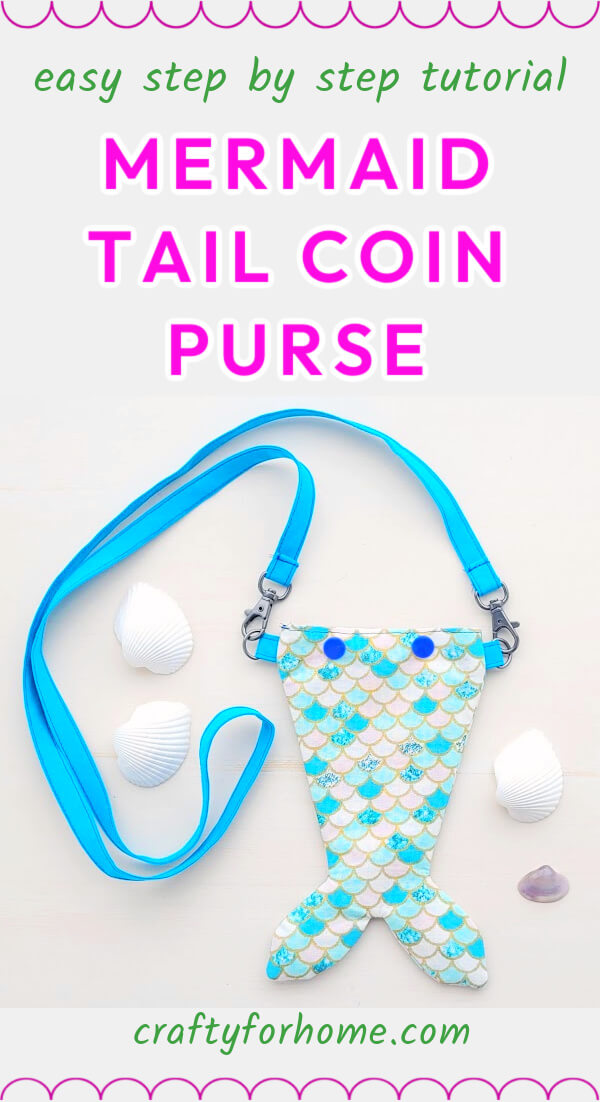
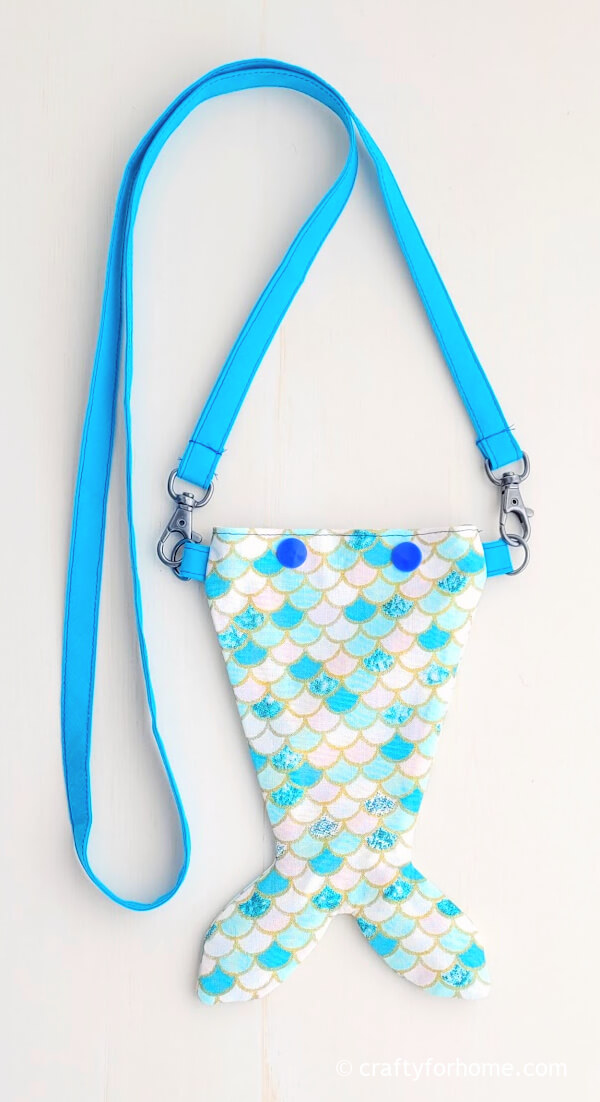
Then I found this lovely fish-scale fabric print for the project. Use any dainty prints you like if you can’t find the fish-scale print fabric, like small flower prints, trellis prints, zig-zag prints, sea creature prints, or plain solid colour fabric.
The mermaid tail shape will pop more with the small print fabric since this is a small purse with enough room for coins, small necessary items like keys, chapstick, hand sanitizer, or candies.
Supply For Making A Mermaid Tail Bag
The bag strap is from a 0.5″ wide double-fold bias tape, so you don’t have to make straps from scratch. The bias tape is already folded and fits with the 0.5″ D ring.
Use 5″ x 8″ paper to make the pattern for a mermaid tail as a template. You can make a perfect symmetrical tail shape using a simple tool and measurement.
I use two pair of plastic snap buttons for the fastener. If the snap button is unavailable, you can replace that with a hook and loop like Velcro.
- 4 sheets of 5″ x 8″ rectangle fabrics
- 2 sheets of 5″ x 8″ iron-on fusible interfacing
- 2 of 0.5″ swivel lobster clasps with 0.5″ D ring
- 2 pairs of snap buttons
- 52″ of 0.5″ wide double-fold bias tape
- 1 piece of 5″ x 8″ paper to make the mermaid tail template
- Snap button pliers
- Half circle protractor
- Disappeared ink fabric marker, I like this double-purpose fabric marker
- Quilting clips or pins
- Thread
- Chopstick
- Scissors
- Sewing machine
- Ironing machine
Mermaid Tail Bag Tutorial
The video tutorial is also available. You can watch the Mermaid Tail Crossbody Coin Purse video tutorial on my YouTube channel and subscribe for more videos.
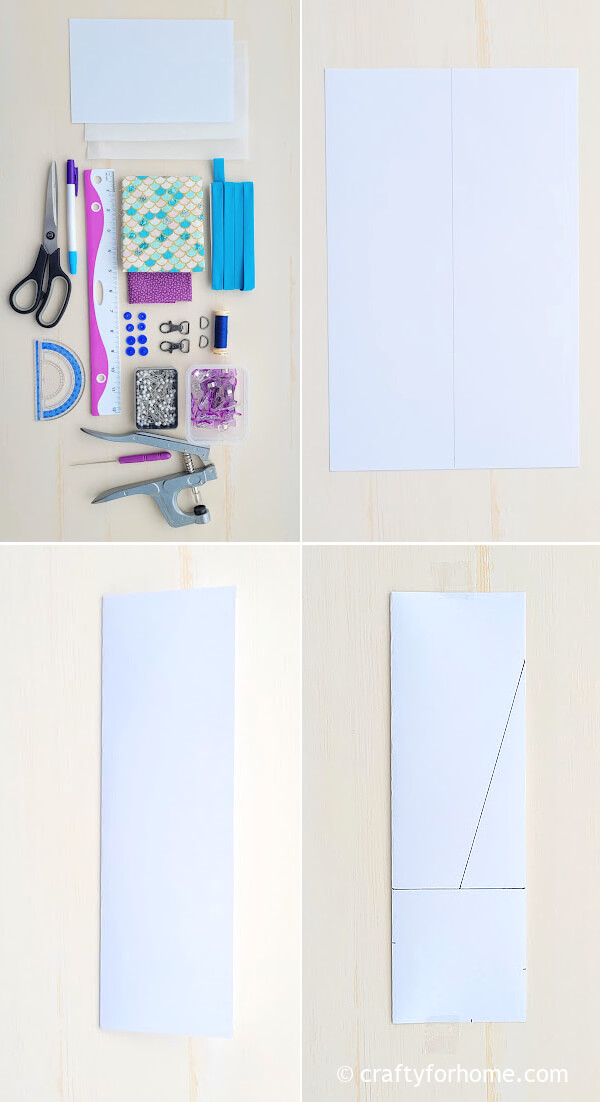
First, make the mermaid tail bag pattern. Fold the paper in half lengthwise. Use the measurement as shown in the image below.
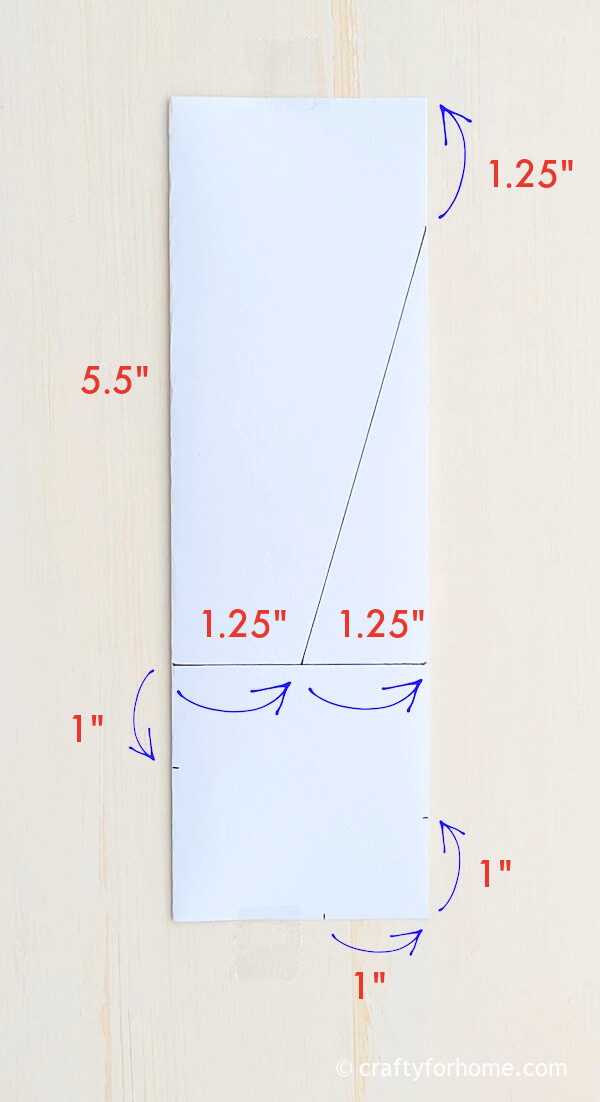
On the cutting edge (not the folded edge), mark the spot 1.25″ on one side from the short side (top right corner).
Measure on the folded and cutting edge 5.5″, then connect the opposite spot. Divide the connected line in half and mark the middle spot. Draw an angled line from that center spot to the 1.25″ spot in the top right corner.
Mark the spot 1″ down from the 5.5″ spot on the folded edge, then 1″ left and up from the bottom right corner.
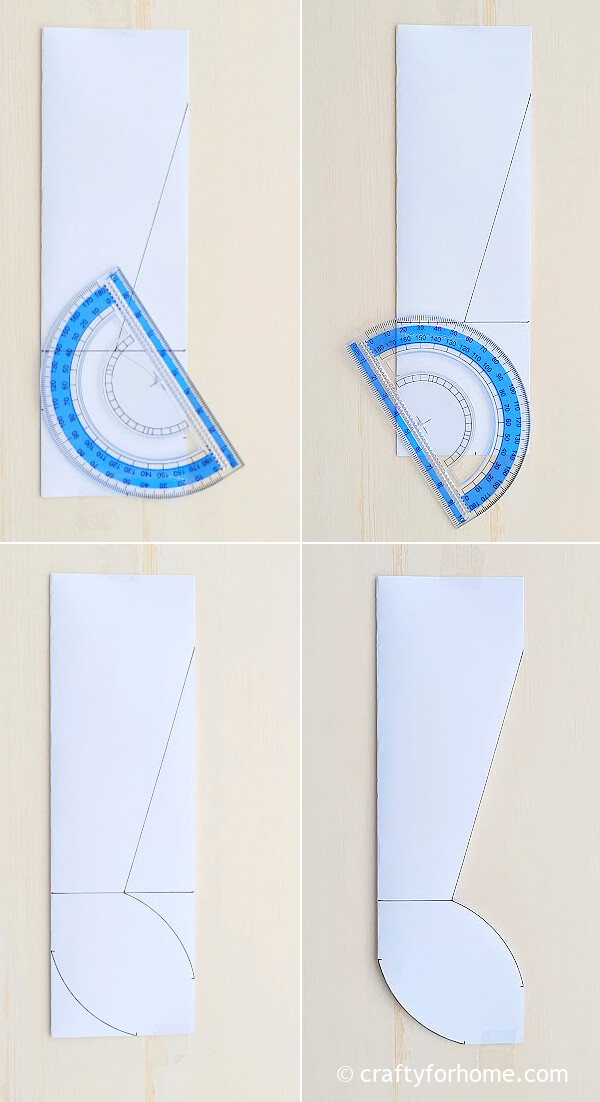
Use the protractor to make the tail by drawing lines from the middle spot to the 1″ up of the bottom right corner and from the 1″ down the 5.5″ spot of the folded edge to the 1″ left of the bottom right corner.
Cut the paper along the curve lines and angle lines. Open the folded paper, and now you have a mermaid tail template.
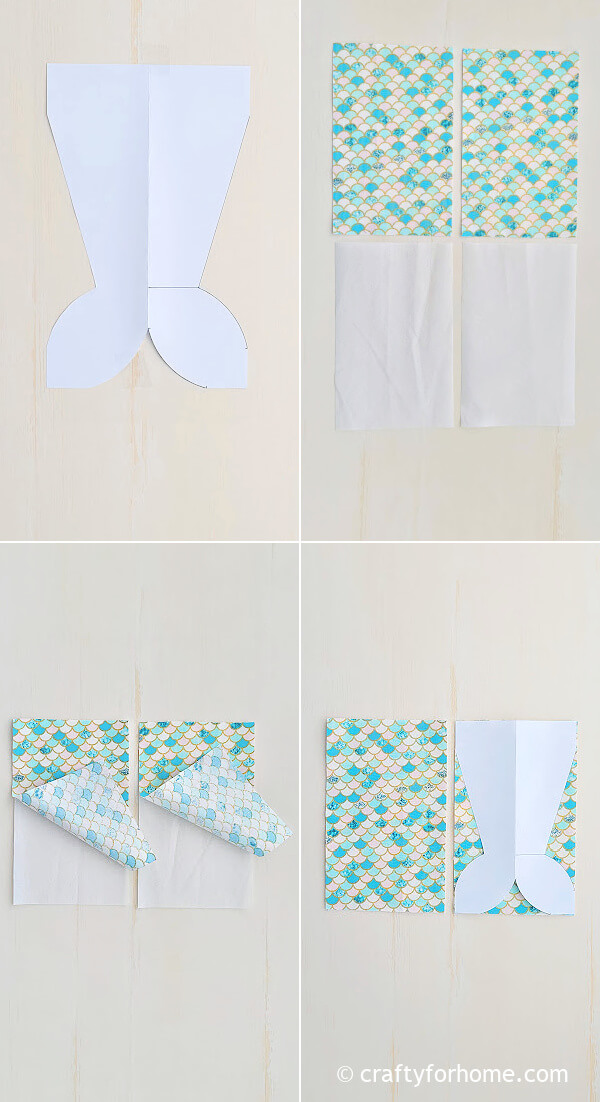
Put the fusible interfacing on the wrong side of each fabric for the outer layer. You can iron on the fusible interfacing now before proceeding to the next step.
Trace the mermaid template on the fabric.
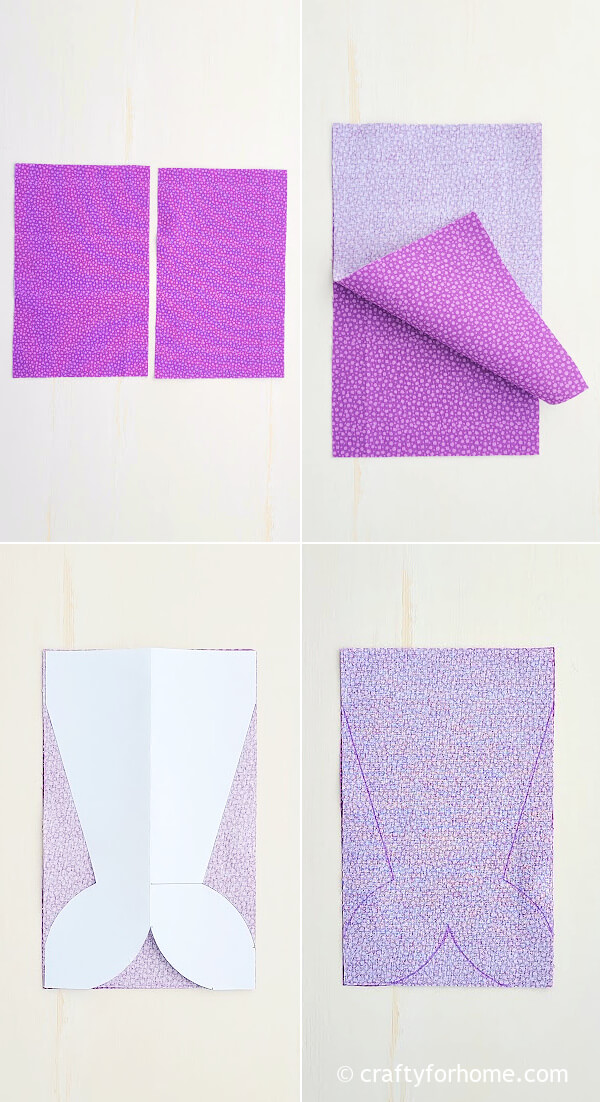
Pin both fabrics for the inner layer, with the right side facing each other.
Trace the mermaid tail template on the fabric.
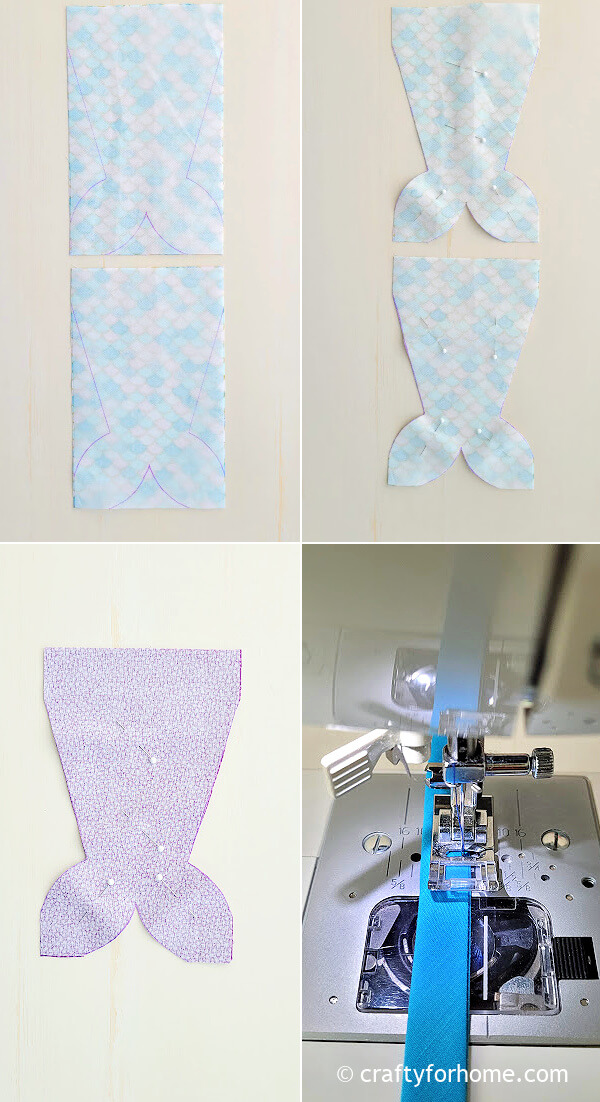
Cut the traced mermaid tail on all fabric pieces. Topstitch the bias tape on both sides.
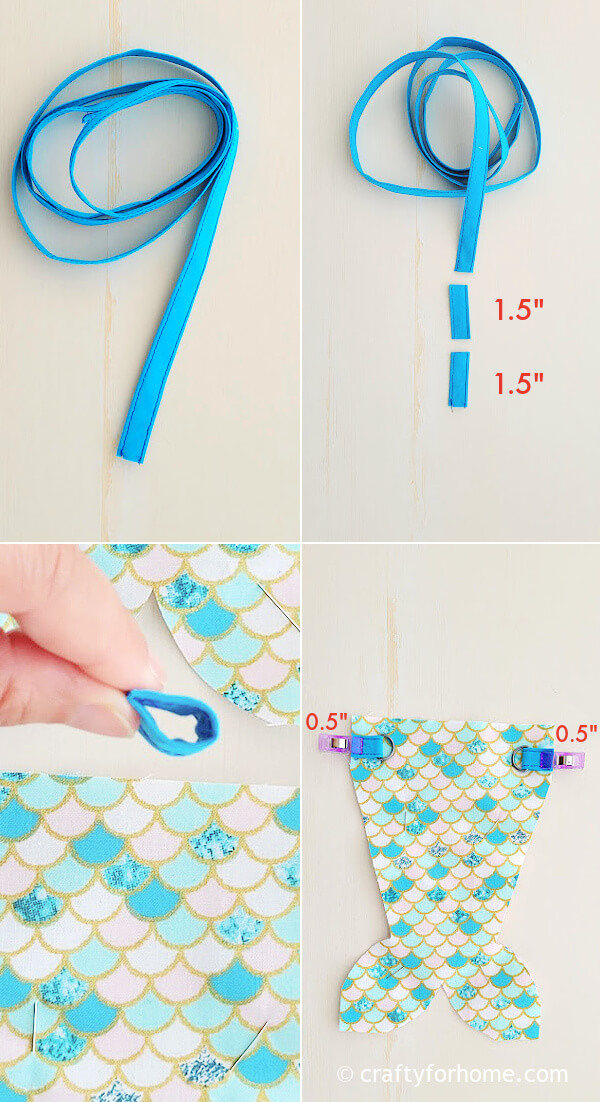
Cut two pieces of bias tape 1.5″ each for the D-ring tabs.
Loop the D-ring on both bias tape tabs.
Put the D-ring tab on the right side of the outer fabric 0.5″ down from the top edge corner left and right. Use the pin or quilting clips to keep the tabs in place.
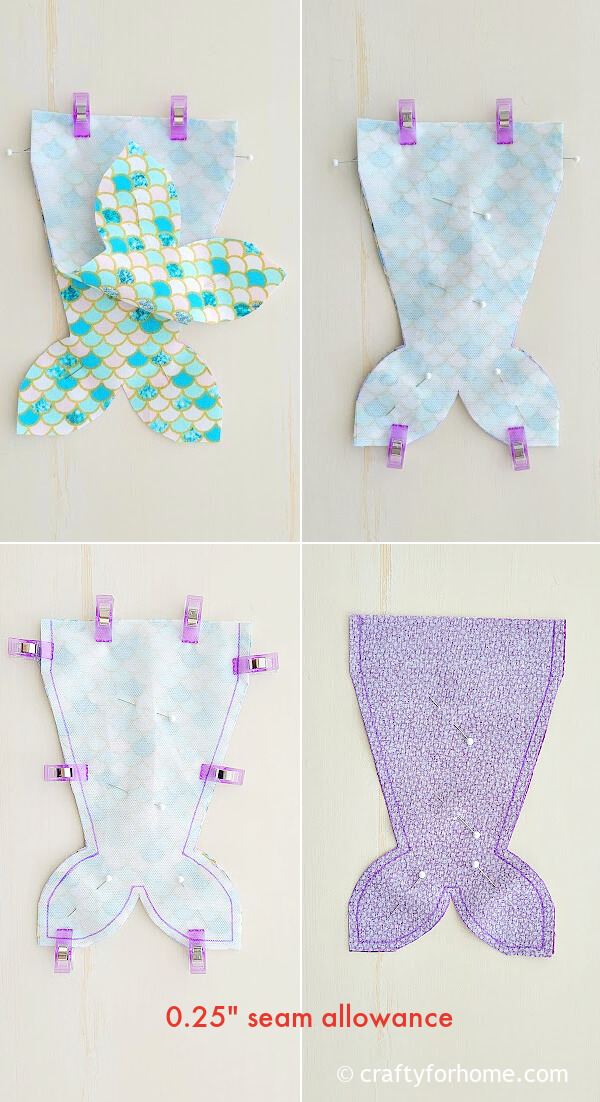
Put the other layer of outer fabric on top so the right side of both fabrics faces each other.
Draw the line 0.25″ along the edge of the outer layer for the seam allowance, then sew along the line, but keep the top side open.
Draw the line 0.25″ along the edge of the inner layer for the seam allowance, then sew along the line, but keep the top side open.
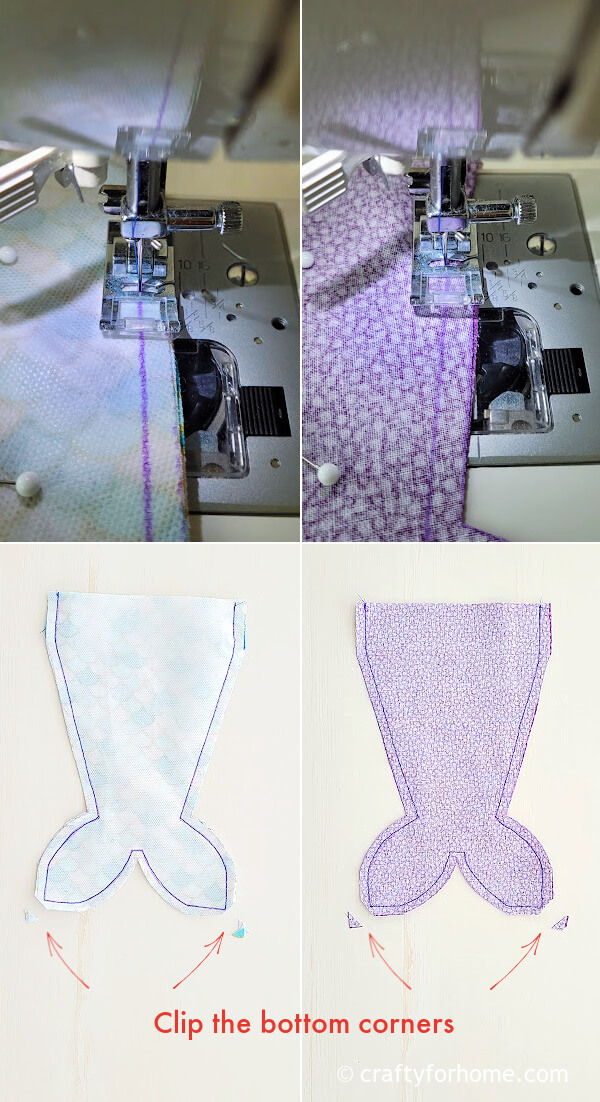
Clip the bottom corner of the mermaid tail tip to reduce bulk.
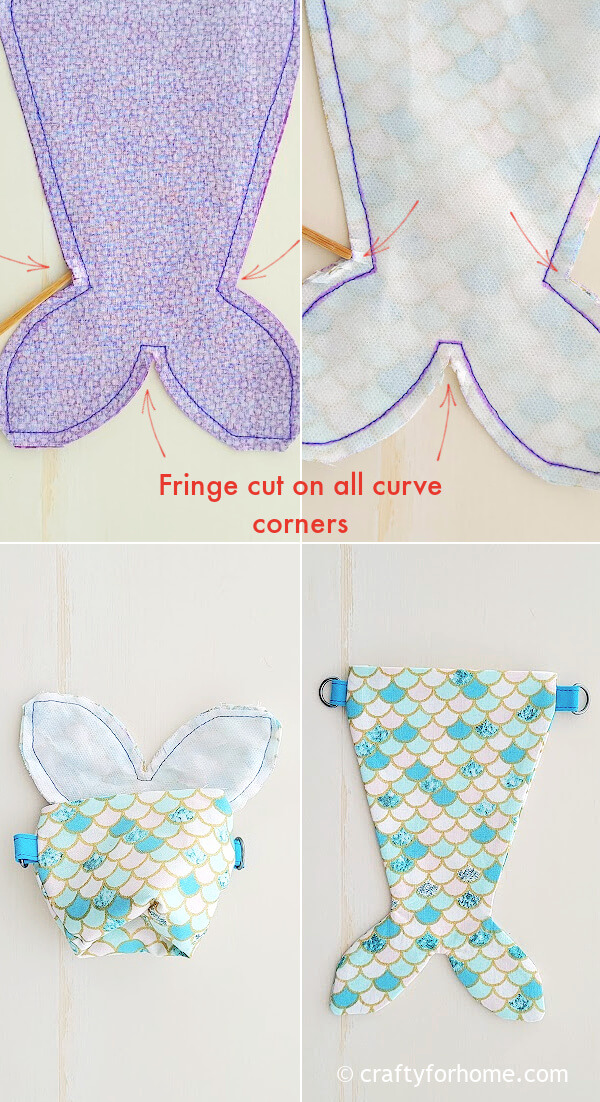
Clip or fringe cut on the three curve corners of each fabric layer.
Turn the outer fabric right side out. Push the bottom corners with a chopstick.
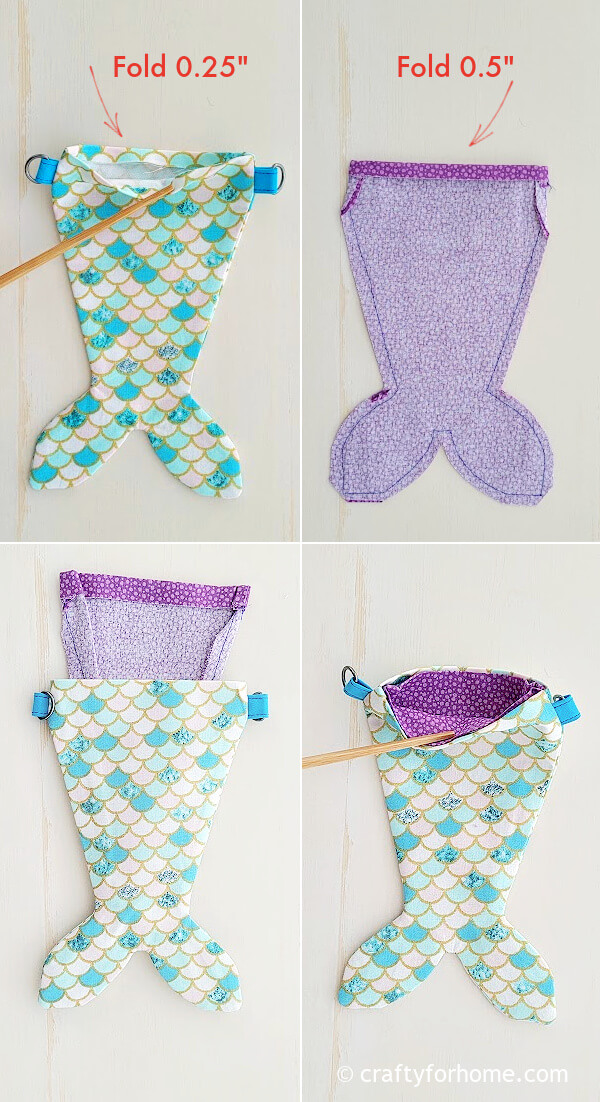
Fold the open top side of the outer fabric 0.25″ inward, then press it with the ironing machine.
Fold the open top side of the inner fabric 0.5″, then press it with the ironing machine.
Insert the inner fabric pouch into the outer one so the wrong side of both fabrics faces each other.
Align the top of both fabric layers, and use the chopstick to push and align the bottom tail.
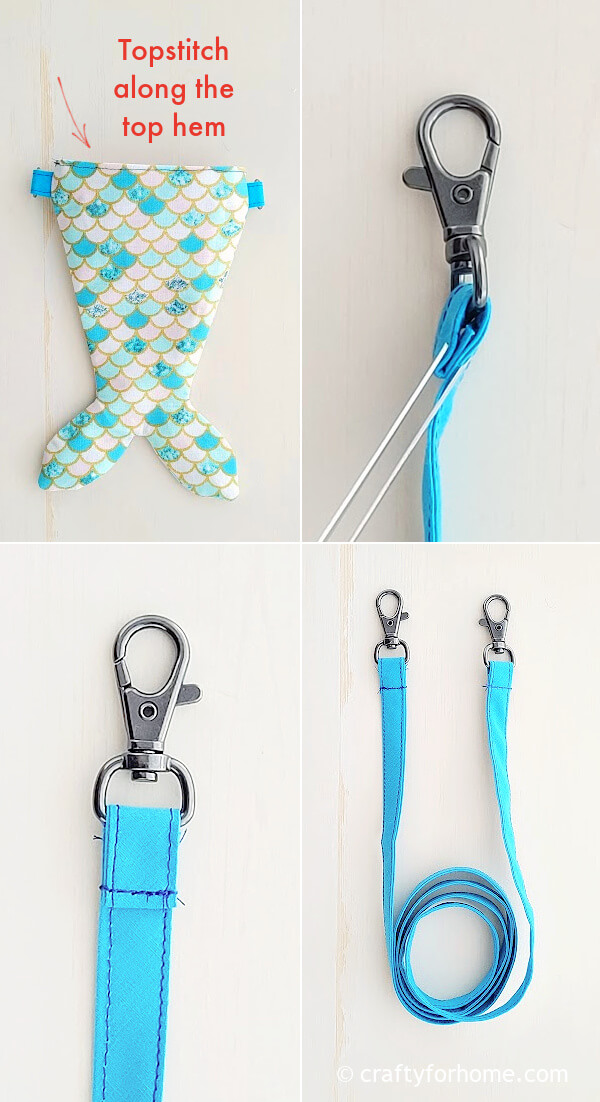
Topstitch along the hem on the top.
Loop one end of bias tape for the bag strap to the swivel lobster clasp ring, then fold the bias tape end and sew along the folded line. Repeat the process for the other end of the bias tape and the swivel lobster clasp.
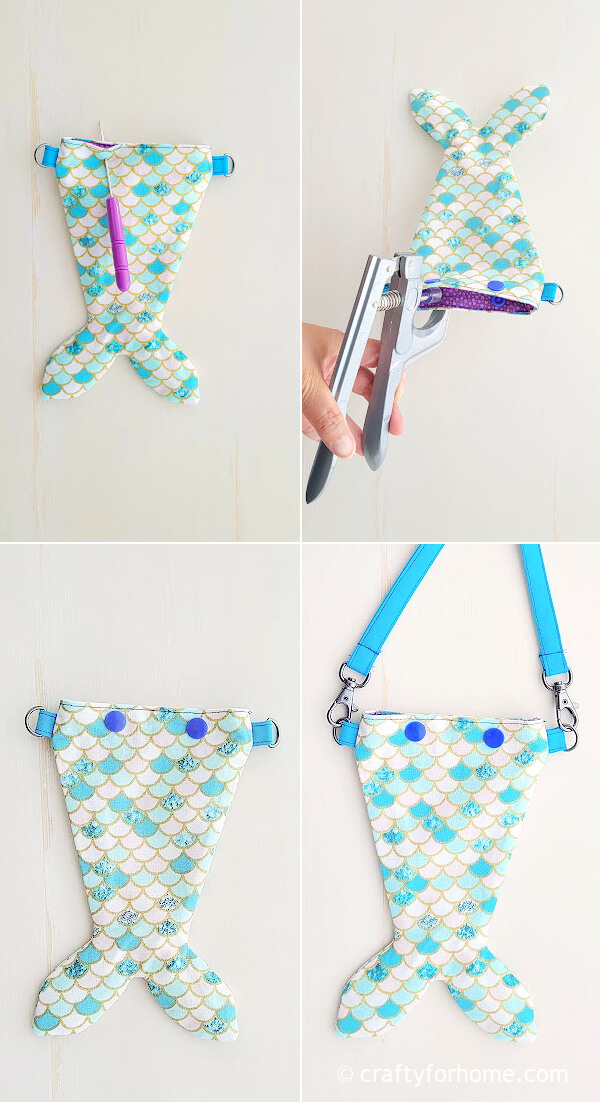
Attach both pair of snap buttons. Attach the swivel lobster clasp to the D-ring.
Now the mermaid tail purse is ready to use.
Mermaid Coin Purse
The purse has enough space to keep small objects like coins or any necessary small items you need to carry. It won’t fit to hold a cellphone on it. This mermaid coin purse is a perfect size for tween-age accessories.
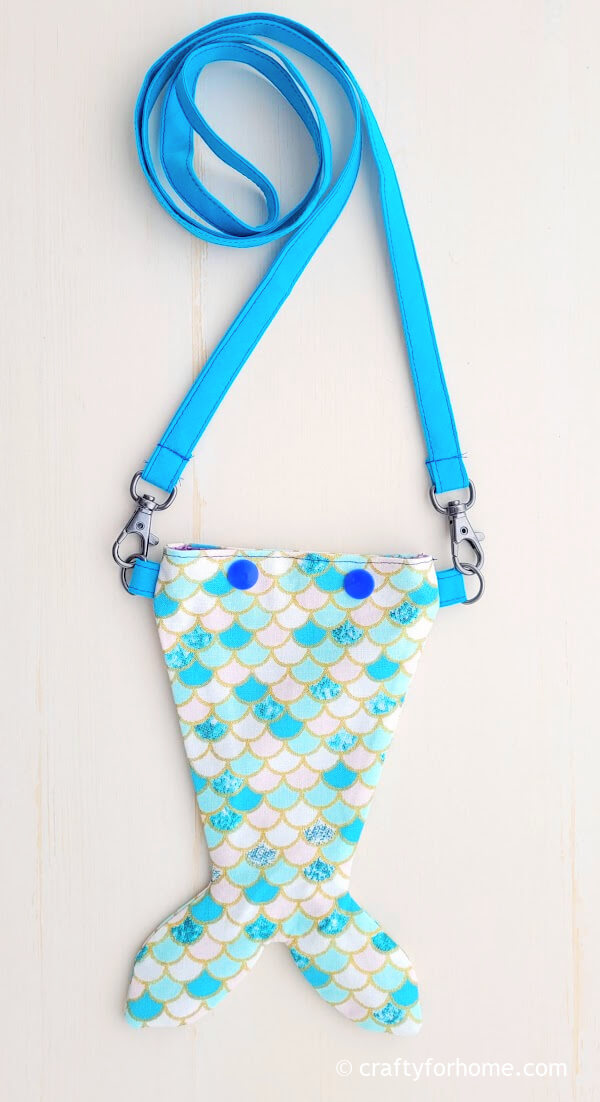
The strap is long enough until around the hip area. If you want a short strap instead, you can trim the bias tape into your length preference.
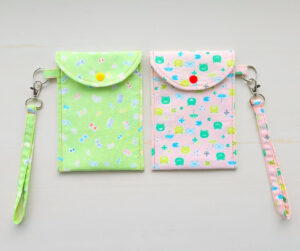
Or use this ruffled wristlet for the strap, and turn the crossbody purse into a wristlet bag.
Get the PDF
If it is more convenient to have the printable version of this tutorial for the project, you can purchase the Printable PDF Format of Mermaid Tail Coin Bag Template And Sewing Tutorial here. The e-book has the template and complete tutorials with pictures included. There are no ads or video displays on the PDF so that you can print it, and it will be available for you anytime you need the tutorial for your next project. Click on the e-book cover image above to purchase.
Make a mermaid tail bag for a coin purse idea. #easybag #sewingbag Share on XMore Of Easy Sewing Tutorial For Bags And Pouch
- Easter Bunny Treat Bags
- Reversible Beach Bag
- Candy Corn Treat Bag
- Reversible Bottle Tote Bag
- Teal Halloween Treat Bag
DIY Mermaid Tail Crossbody Bag With Snap Buttons
Mermaid Tail Bag Sewing Tutorial
This sewing tutorial is for making a mermaid tail bag with snap buttons and a long strap for a crossbody bag that holds enough space for coins, treats, and all mini treasures.
Materials
- 4 sheets of 5" x 8" rectangle fabrics
- 2 sheets of 5" x 8" iron-on interfacing
- 2 of 0.5" swivel lobster clasps with D-ring
- 2 pairs of snap buttons
- 52" of 0.5" wide double-fold bias tape
- 1 piece of 5" x 8" paper to make the mermaid tail template
- Snap button pliers
- Half circle protractor
Tools
- Disappeared ink fabric marker
- Quilting clips or pins
- Thread
- Scissors
- Sewing machine
- Ironing machine
Instructions
- First, make the mermaid tail bag pattern. Fold the paper in half lengthwise.
- On the cutting edge (not the folded edge), mark the spot 1.25" on one side from the short side of the top right corner.
- Measure on the folded and cutting edge 5.5", then connect the opposite spot. Divide the connected line in half and mark the middle spot. Draw an angled line from that center spot to the 1.25" spot in the top right corner.

- Mark the spot 1" down from the 5.5" spot on the folded edge, then 1" left and up from the bottom right corner.
- Use the protractor to make the tail by drawing lines from the middle spot to the 1" up of the bottom right corner and from the 1" down the 5.5" spot of the folded edge to the 1" left of the bottom right corner.
- Cut the paper along the curve lines and angle lines. Open the folded paper, and now you have a mermaid tail template.
- Put the interfacing on the wrong side of each fabric for the outer layer. You can iron on the interfacing now before proceeding to the next step.
Trace the mermaid template on the fabric. - Pin both fabrics for the inner layer, with the right side facing each other.
Trace the mermaid tail template on the fabric. - Cut the traced mermaid tail on all fabric pieces.
- Topstitch the bias tape on both sides.
- Cut two pieces of bias tape 1.5" each for the D-ring tabs.
- Loop the D-ring on both bias tape tabs.
- Put the D-ring tab on the right side of the outer fabric 0.5" down from the top corner left and right. Use the pin or quilting clips to keep the tabs in place.
- Put the other layer of outer fabric on top so the right side of both fabrics faces each other.
- Draw the line 0.25" along the edge of the outer layer for the seam allowance, then sew along the line, but keep the top side open.
- Draw the line 0.25" along the edge of the inner layer for the seam allowance, then sew along the line, but keep the top side open.
- Clip the bottom corner of the mermaid tail tip to reduce bulk.
- Clip or fringe cut on the three curve corners of each fabric layer.
- Turn the outer fabric right side out. Push the bottom corners with a chopstick.
- Fold the open top side of the outer fabric 0.25" inward, then press it with the ironing machine.
- Fold the open top side of the inner fabric 0.5", then press it with the ironing machine.
- Insert the inner fabric pouch into the outer one so the wrong side of both fabrics faces each other.
- Align the top of both fabric layers, and use the chopstick to push and align the bottom tail.
- Topstitch along the hem on the top.
- Attach both pair of snap buttons.
- Loop one end of bias tape for the bag strap to the swivel lobster clasp ring, then fold the bias tape end and sew along the folded line. Repeat the process for the other end of the bias tape and the swivel lobster clasp.
- Attach the swivel lobster clasp to the D-ring.
- Now the mermaid tail purse is ready to use.
Notes
- See the blog post for the picture tutorial for more detailed instructions.
- Use the hook and loop fastener if the snap button is unavailable.



Leave a Reply