Use this sewing tutorial to make sunglasses pouch from scrap fabric with a snap-button closure and have the option to add a keychain tab.
Snap Button Closure Sunglasses Case
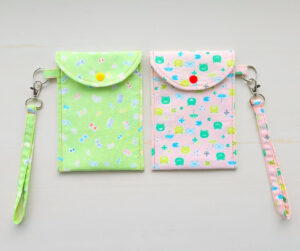
This DIY sunglasses pouch keeps sunglasses from getting scratched. Just snap the button closed, toss the pouch into the purse or beach bag, and be ready to enjoy the beach or picnic in the park.
As an Amazon Associate I earn from qualifying purchases. This post may contain affiliate links. Please see the Disclosure Policy for details.
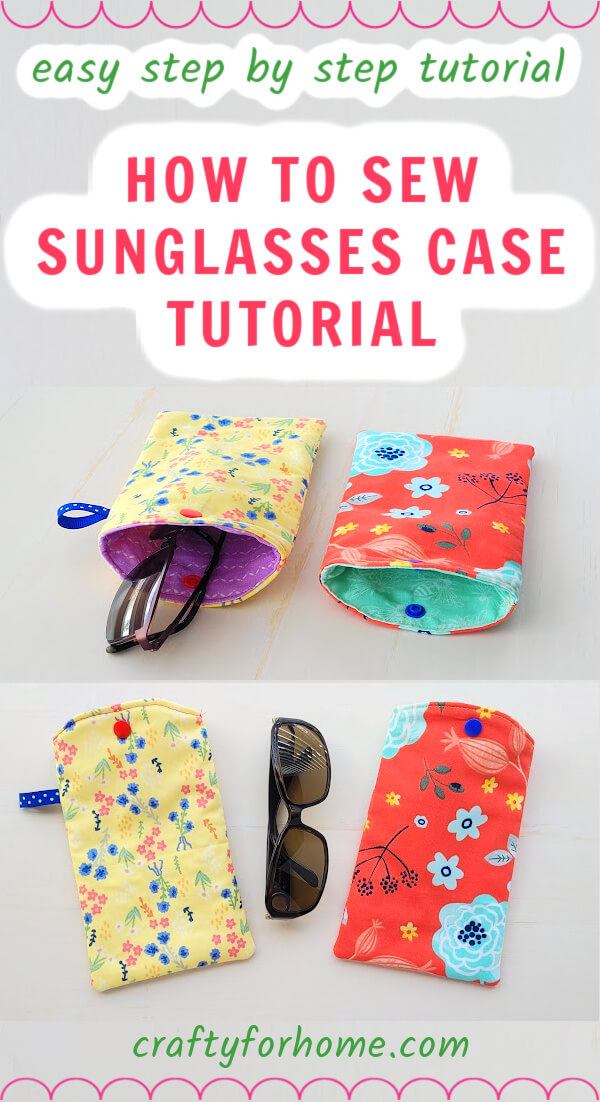
It is also great for storing sunglasses in the car before being put in the compartment box.
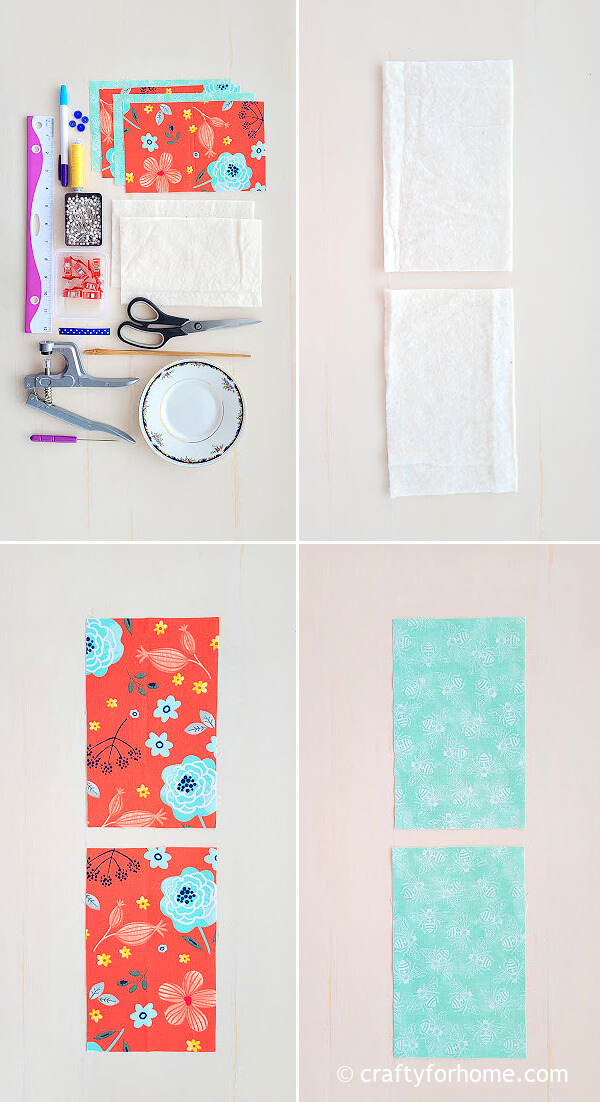
Supply To Make Sunglasses Pouch With Snap Button Closure
The sunglasses case is made from scrap fabric. The red fabric is from the tissue box cover, and the yellow flowery fabric is the leftover from the ice cream cozy.
You will get four sunglasses cases if you use the fat quarter fabric. If you use two pieces of layer-cake size fabric, you will get one sunglasses case.
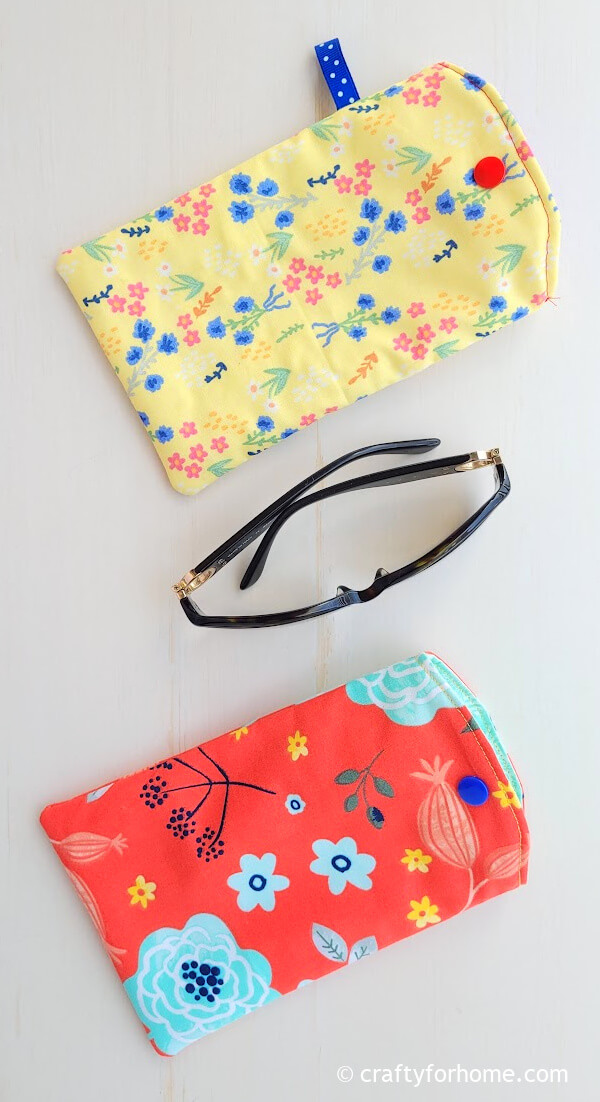
The keychain tab is optional. You can use a grosgrain ribbon for the tab and a keyring with a swivel lobster clasp to attach the pouch to the purse.
To make your own sunglasses case pattern, use the small plate or protractor to shape the half circle on one of the short sides.
- 2 pieces of 8″ x 5″ fabric for the outer layer
- 2 pieces of 8″ x 5″ fabric for the inner layer or lining
- 2 pieces of 8″ x 5″ batting or fusible fleece
- Snap button and plier kit
- Disappeared ink marker, I use this dual-purpose fabric marker
- 2″ grosgrain ribbon (optional)
- Keyring and swivel lobster clasp (optional)
- Pins or quilting clips
- Small plate (6″ diameter) or protractor
- Ruler
- Chopstick
- Thread
- Sewing machine
- Ironing machine
Sunglasses Case Sewing Tutorial
The video tutorial is also available. Click the link here to watch the Sunglasses Pouch video tutorial on my YouTube channel and subscribe for more videos.
On one of the short sides, mark the fabric and batting 1.75″ left and right from both corners and 0.75″ down from both corners.
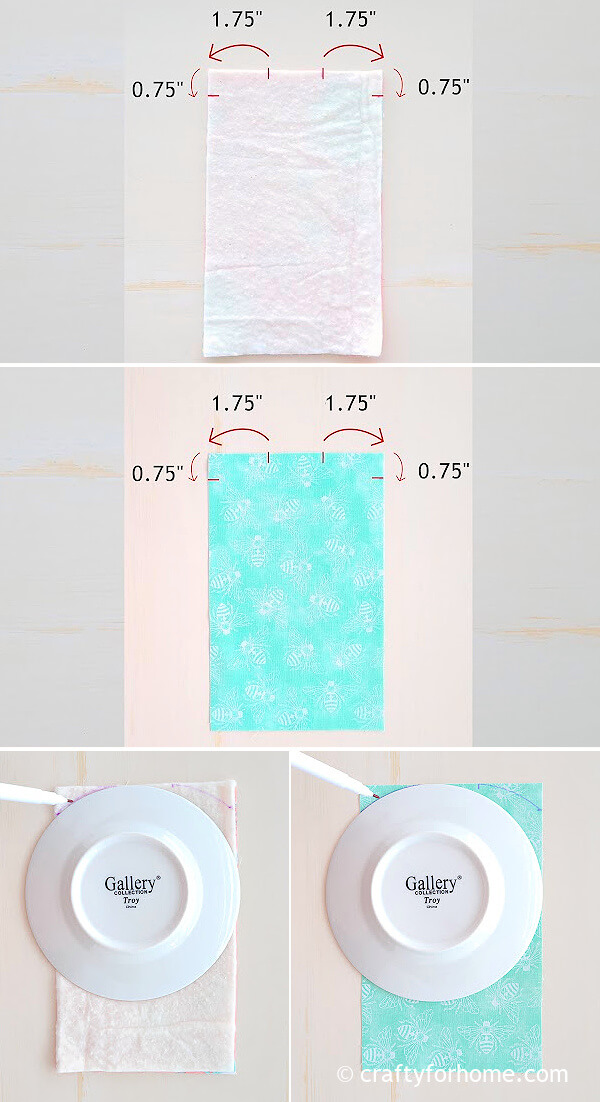
Using a small plate, draw a curved line connecting each mark on the left and right corners of the inner fabric layer, outer layer, and batting.
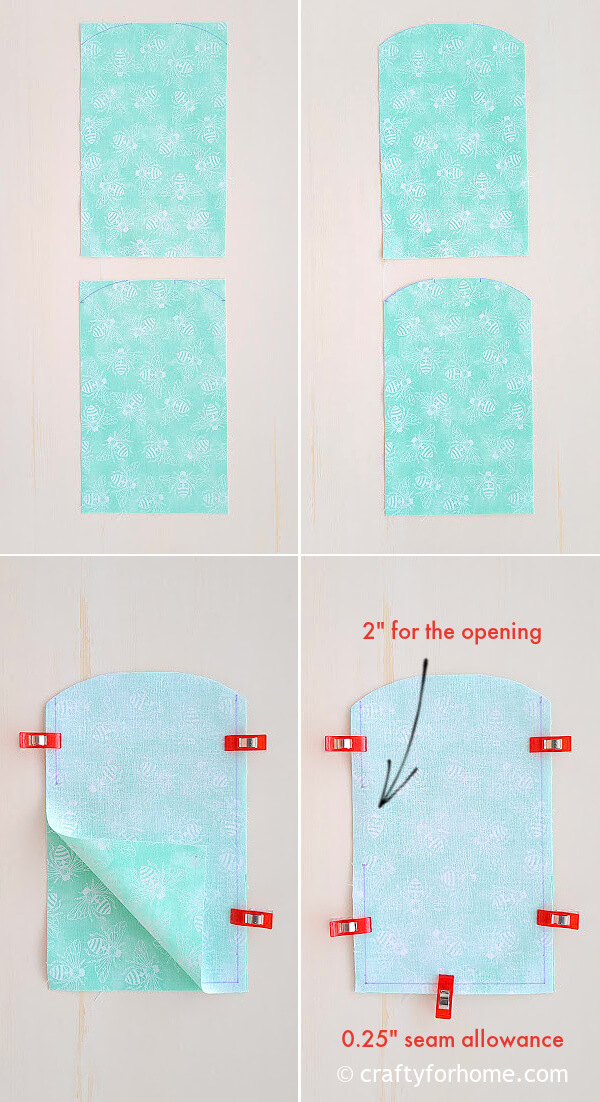
Trim the inner fabric layers along both curved lines. Pin together both fabrics for the inner layer, with the right side facing each other.
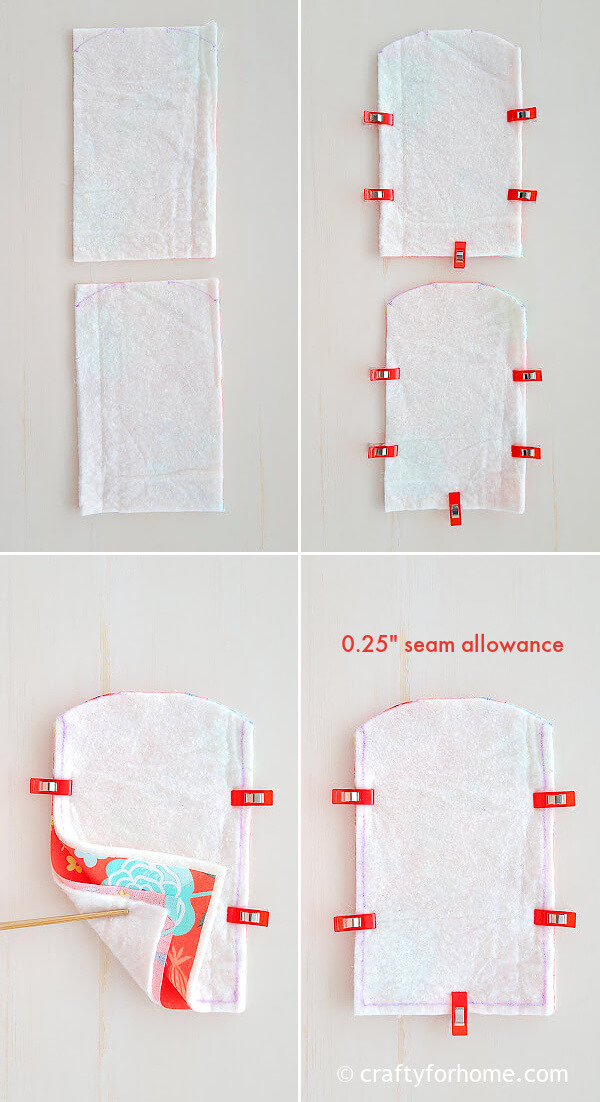
Pin each outer fabric layer with each batting piece. Trim the material along both curved lines. Pin together both fabrics and battings for the outer layer, with the right side of both fabrics facing each other.
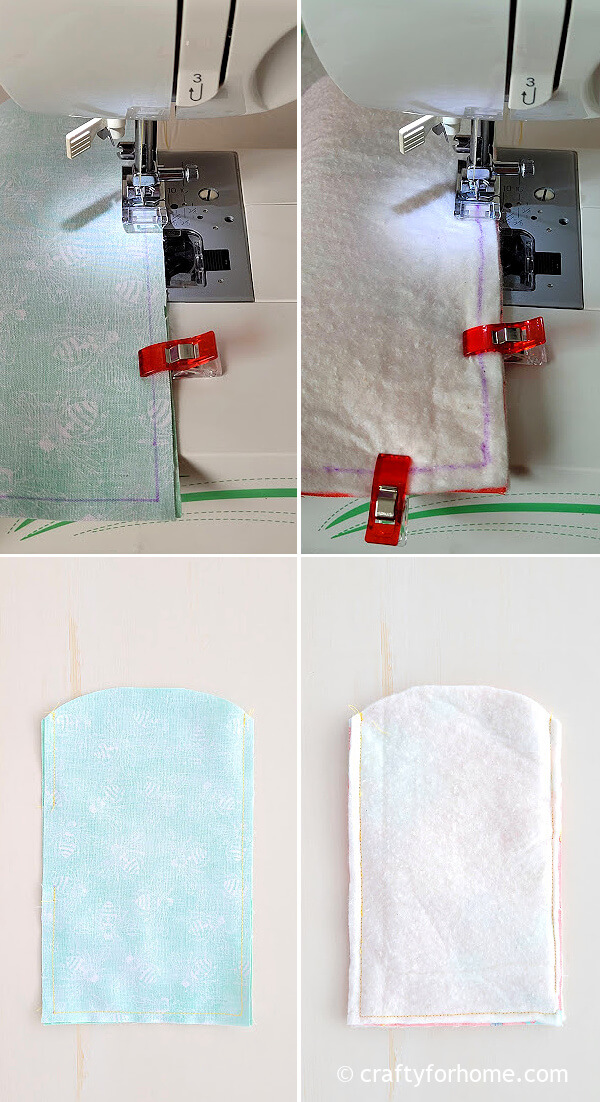
Sew along the side and bottom edge with a 0.25″ seam allowance. Leave the top curved side open. Skip 2″ for the opening gap on one side of the inner layer.
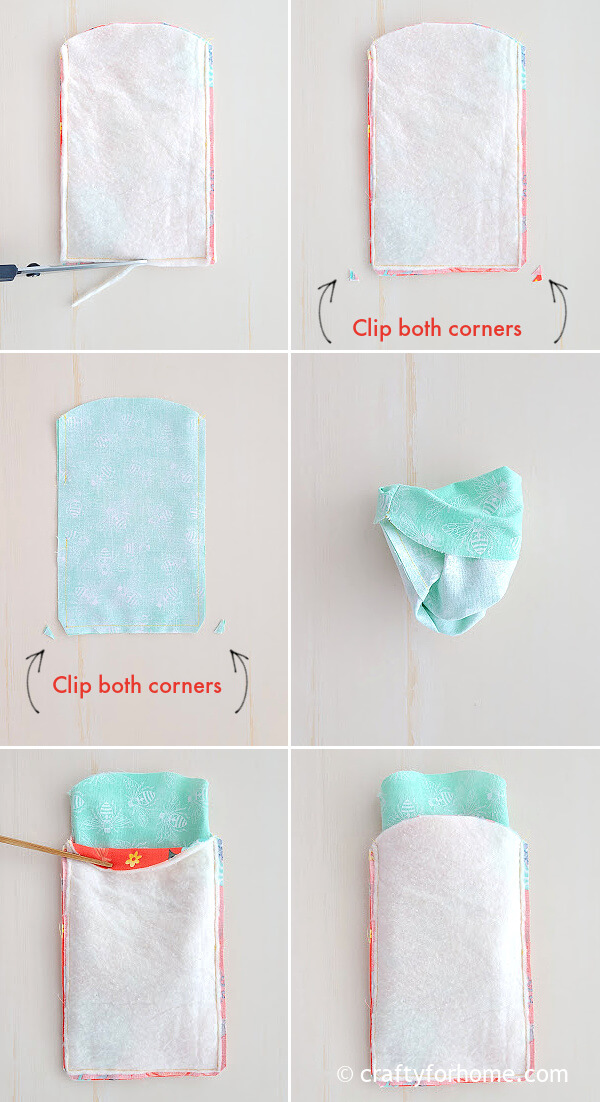
Trim the extra batting on the outer layer from the stitching line. Clip the bottom corners of the inner and outer fabric layer to reduce bulk.
Turn the inner fabric layer on the right side out. Push each corner with a chopstick.
Insert the lining or the inner layer into the outer layer, with the top curved side and the side seam aligned between both layers and the right sides of both fabrics facing each other.
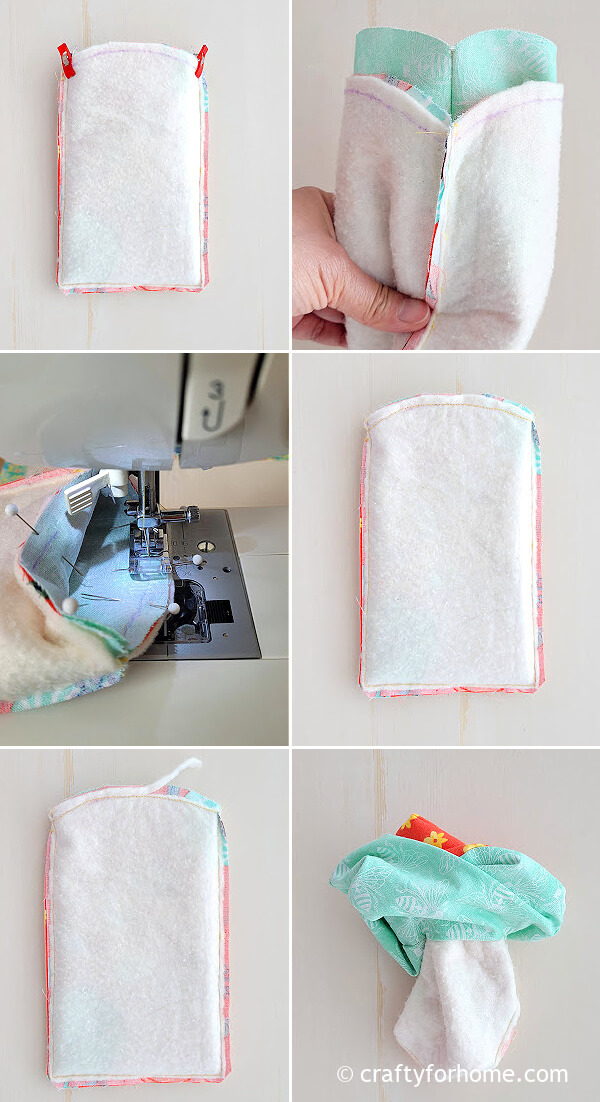
Sew along the curved edge on both sides. Trim the extra batting on the top curved edge from the stitched line. Turn the pouch right side out through the opening gap.
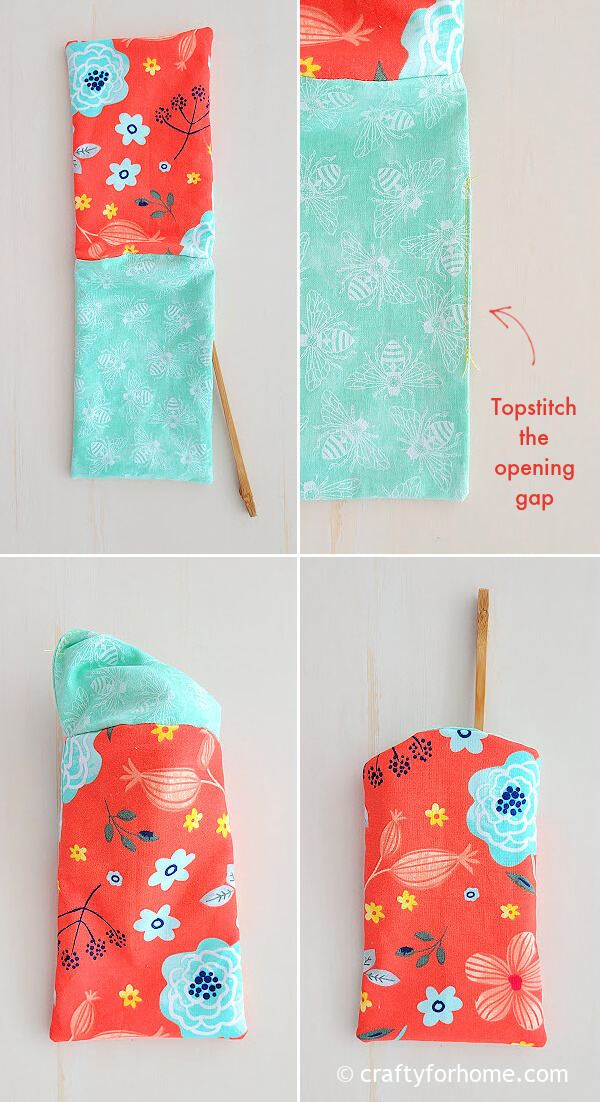
Push each corner of the outer layer with a chopstick. Top stitch the opening gap on the inner fabric layer to close it. Push the inner layer into the pouch.
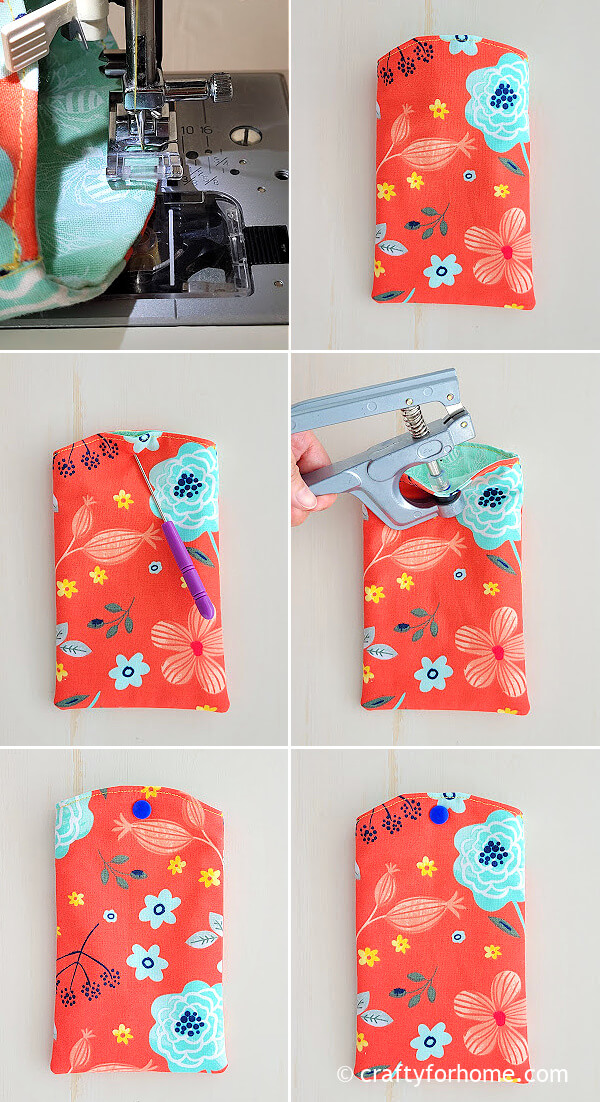
Press the pouch with an ironing machine. Top stitch the top curved edge.
Mark a spot for a snap button right in the middle of the pouch 0.5″ below the curved top edge. Attach the snap button.
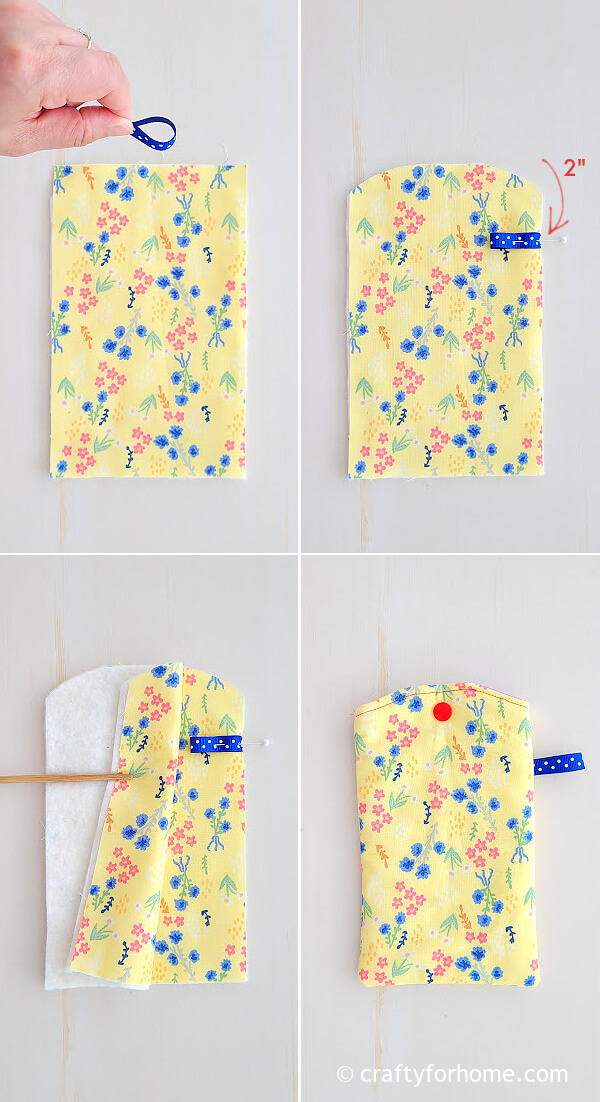
To add a ribbon for the keychain tab, pin the ribbon 2″ down from the top on the edge of the right sides of one outer fabric layer, with the raw edge of the ribbon aligned with the fabric edge. Sew the pouch the same way as the pouch without the keychain tab until it is finished. Attach the keyring and swivel lobster clasp to the tab if using.
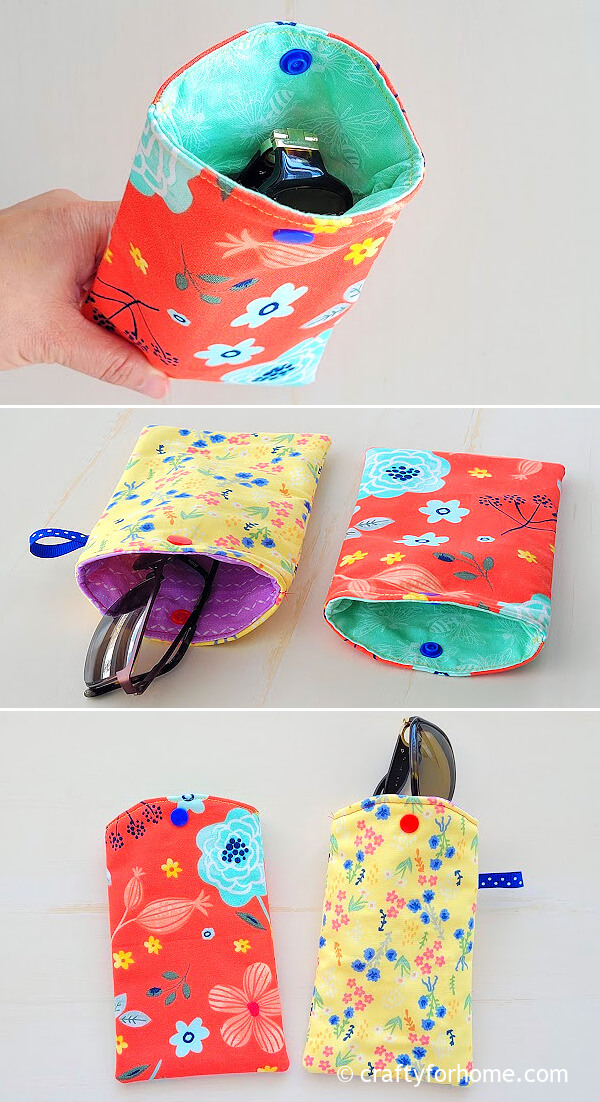
Use a small hook-and-loop fastener like Velcro or a button with a buttonhole to replace the snap button.
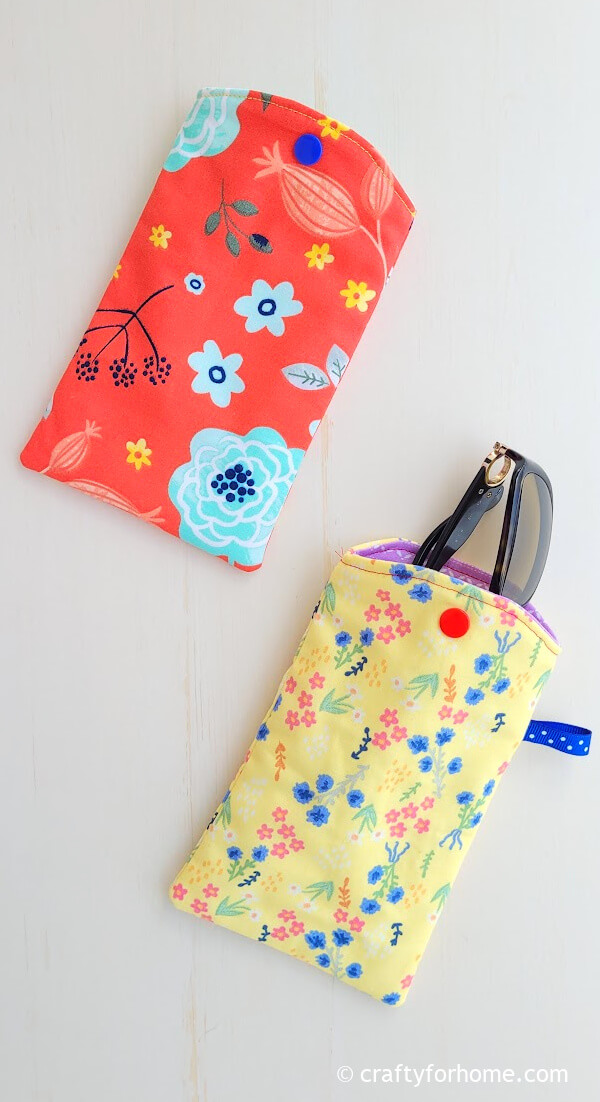
The final size for this fabric glasses case is around 7″ x 4.25″. It is also big enough as a cellphone pouch for specific cellphone sizes.
This pouch for sunglasses case is made from scrap fabric. #glassespouch #sunglasses Share on XMore Sewing Projects for Summer
- Reversible Beach Bag
- How To Make Freezie Pop Cozy
- Pineapple Mug Rug
- Reversible Library Tote Bag With Pocket
- Beverage Holder Cozy
DIY Sunglasses Pouch With Snap Button
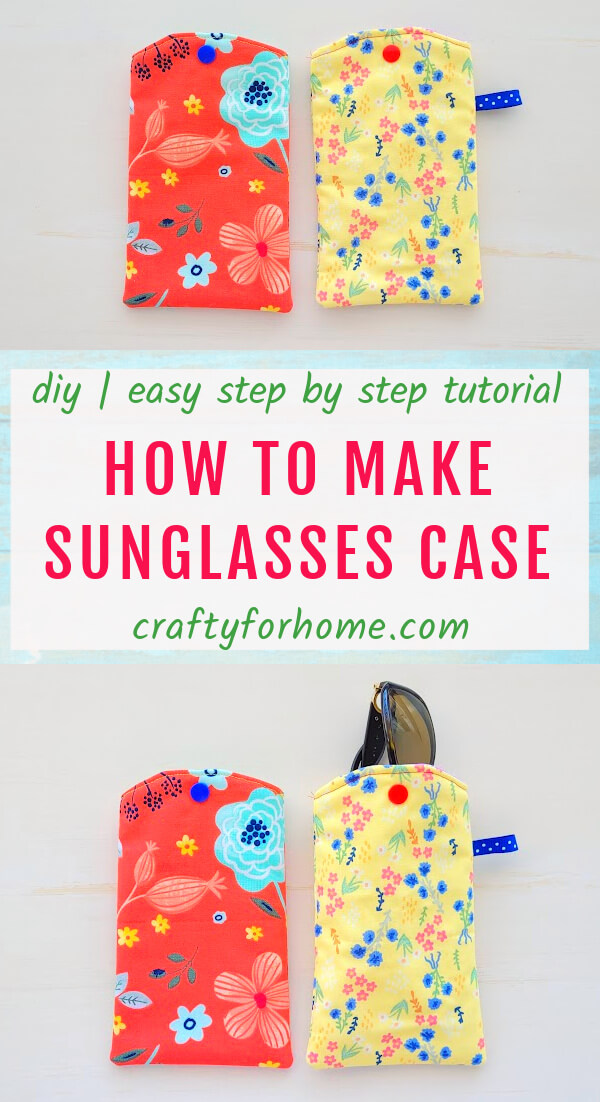
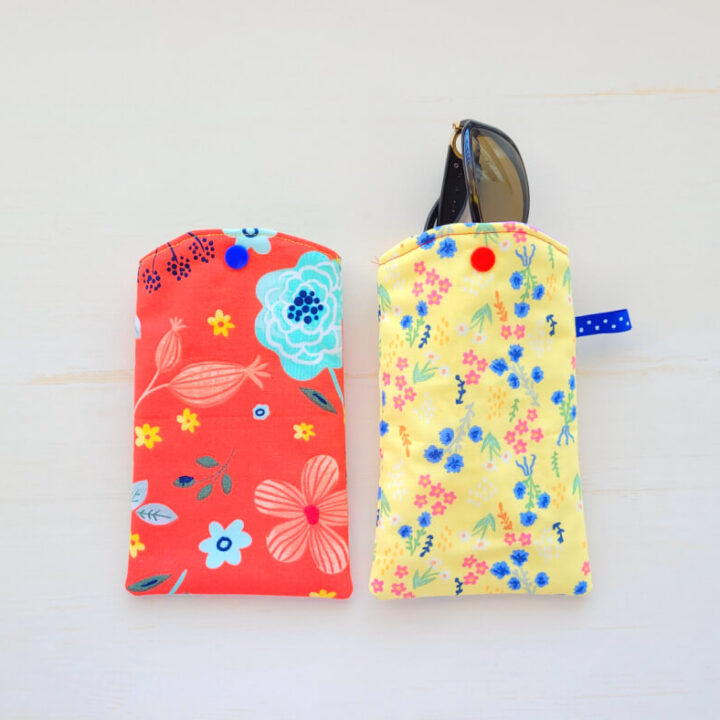
Sunglasses Pouch Sewing Tutorial
Use this sewing tutorial to make sunglasses pouches from scrap fabric with a snap-button closure and have the option to add a keychain tab.
Materials
- 2 pieces of 8" x 5" fabric for the outer layer
- 2 pieces of 8" x 5" fabric for the inner layer or lining
- 2 pieces of 8" x 5" batting or fusible fleece
- Snap button and plier kit
- 2" grosgrain ribbon (optional)
- Keyring and swivel lobster clasp (optional)
Tools
- Disappeared ink marker
- Small plate (6" diameter) or protractor
- Ruler
- Chopstick
- Thread
- Sewing machine
- Ironing machine
Instructions
- On one of the short sides, mark the fabric and batting 1.75" left and right from both corners and 0.75" down from both corners.
- Using a small plate, draw a curved line connecting each mark on the left and right corners of the inner fabric layer, outer layer, and batting.
- Pin together both fabrics for the inner layer, with the right side facing each other. Trim the inner fabric layers along both curved lines. Sew along the side and bottom edge with a 0.25" seam allowance. Leave the top curved side open. Skip 2" for the opening gap on one side of the inner layer.
- Pin each outer fabric layer with each batting piece. Pin together both fabrics and battings for the outer layer, with the right side of both fabrics facing each other. Trim the material along both curved lines. Sew along each layer's side and bottom edge with a 0.25" seam allowance. Leave the top curved side open.
- Trim the extra batting on the outer layer from the stitching line. Clip the bottom corners of the inner and outer fabric layer to reduce bulk.
- Turn the inner fabric layer right side out. Push each corner with a chopstick.
- Insert the lining or the inner layer into the outer layer, with the top curved side and the side seam aligned between both layers and the right sides of both fabrics facing each other.
- Trim the extra batting on the top curved edge from the stitched line. Turn the pouch right side out through the opening gap.
- Push each corner of the outer layer with a chopstick. Top stitch the opening gap on the inner fabric layer to close it.
- Push the inner layer into the pouch. Press the pouch with an ironing machine. Top stitch the top curved edge.
- Mark a spot for a snap button right in the middle of the pouch 0.5" below the curved top edge. Attach the snap button.
- To add a ribbon for the keychain tab, pin the ribbon 2" down from the top on the edge of the right sides of one outer fabric layer, with the raw edge of the ribbon aligned with the fabric edge. Sew the pouch the same way as the pouch without the keychain tab until it is finished.
- Attach the keyring and swivel lobster clasp to the tab if using.
Notes
- The final size for this fabric sunglasses case is around 7" x 4.25".
- It is also big enough as a cellphone pouch for specific cellphone sizes.
Leave a Reply