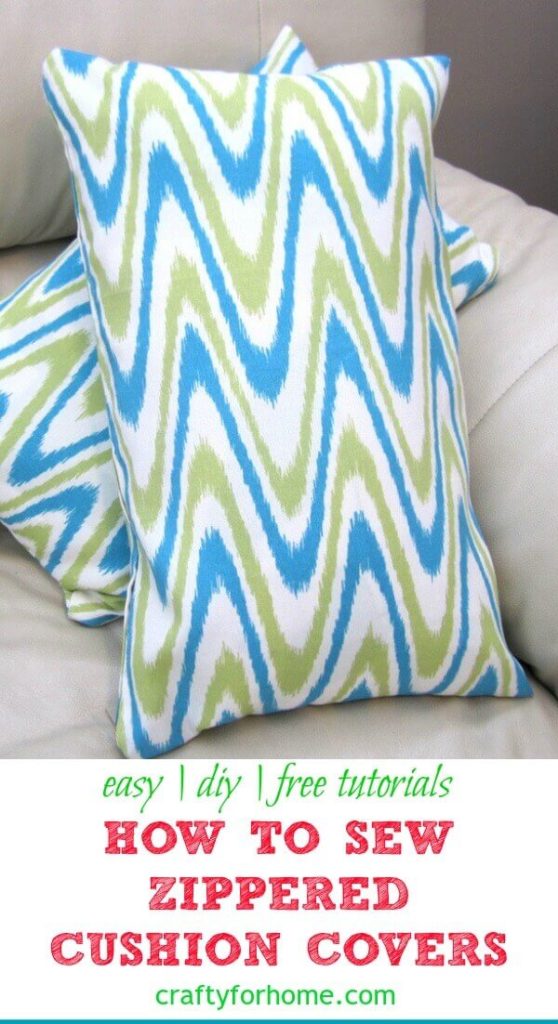
Learn how to sew zippered cushion cover with this simple and easy-to-follow sewing tutorial to update your living room decor in under an hour.
Use this helpful guide for sewing zipper on cushion covers.
The decorative cushion is an excellent addition to home decor. It can add a dramatic and beautiful view in every room. Big or small size of pillows will need special care if you use it a lot.
If you are like me who has kids that busy with paints and marker, somehow they managed to smear the paint on the cushion covers and yes I am on the mission to clean it.
As an Amazon Associate I earn from qualifying purchases. This post may contain affiliate links. Please see the Disclosure Policy for details.
With constant cleaning like all the time then it eventually needs to be replaced. The insert is perfectly fine. We can use it over and over again.
What we can do here other than cleaning it, replace the covers with different pattern or color for a new look. Replacing the cushion covers is an easy craft project for a beginner.
If you would like to do the most straightforward way here is how to change cushion cover in 10 minutes.
Here I share you how to make a zippered cushion cover. Please don’t be intimidated by the zipper. Sewing it is effortless.
What You Need To Make Zippered Cushion Covers
- Fabric, I use medium weight outdoor decor fabric, it is durable and stain resistant. Please use any fabric type and pattern you like. Even cotton quilt weight is excellent for this.
- Fabric marker, this is an erasable and washable marker, it won’t leave a mark on the fabric.
- Scissors or rotary cutter.
- Ruler or cutting mat.
- Pin.
- Zipper, I use the 22-inch zipper for this project.
- Thread.
- Seam ripper.
- Sewing machine with zipper foot.
- Serger (optional) or pinking shears.
How To Sew Zippered Cushion Covers
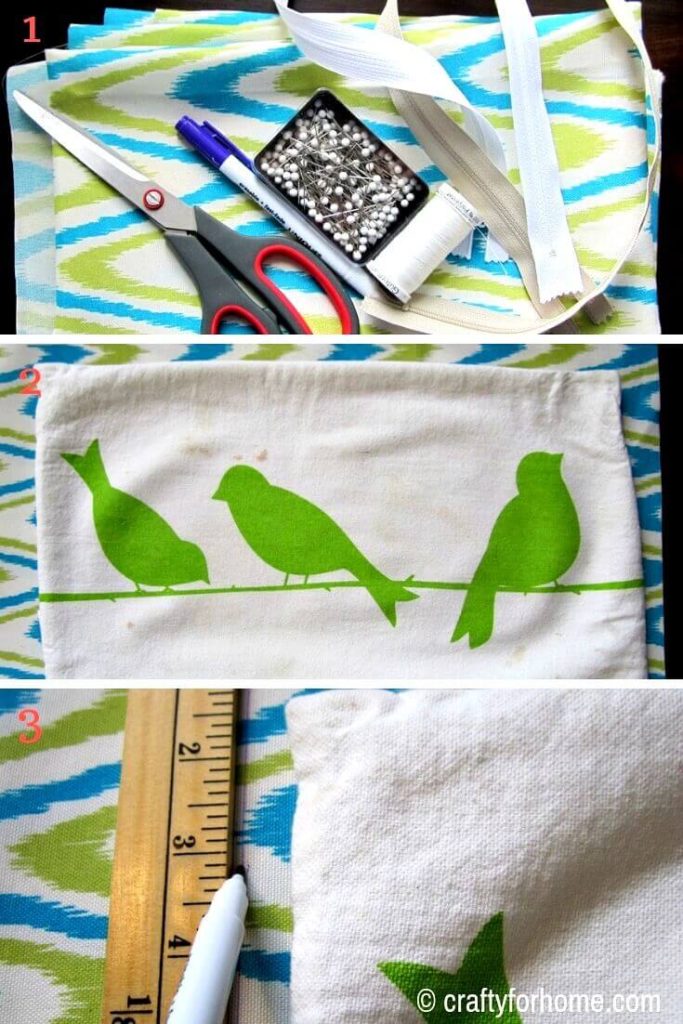
- The cushion I am going to replaced is 18-inch x 11-inch. You start with tracing the original cover on the new fabric. Fold the fabric to make it enough for one cover. Trace the cushion cover, use the ruler and fabric marker to mark it. (image no. 1, 2, 3)
- When you cut the fabric, it will look like this one below. You only need one piece of cut fabric instead of two-pieces for one cover. The orange dot is for the zipper placement.
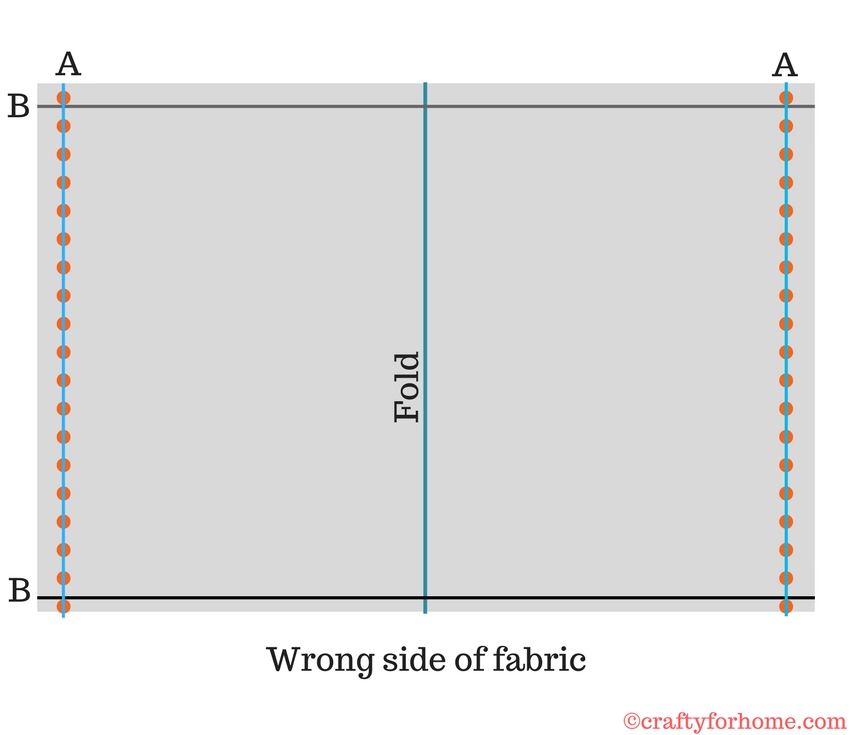
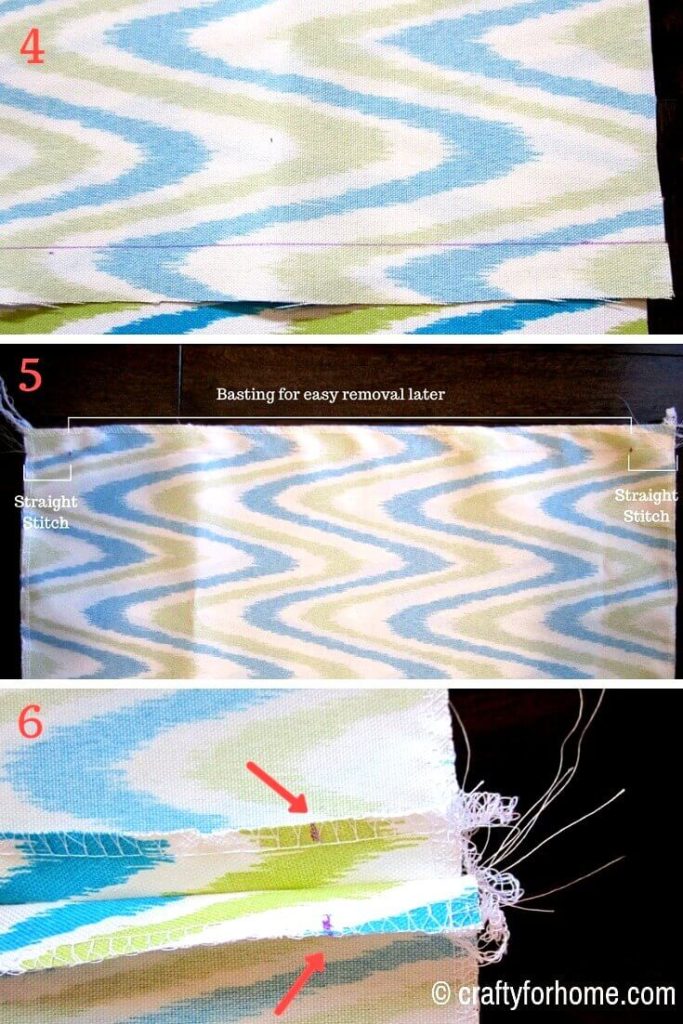
- Draw a straight line for the zipper placement. Draw two marks for the start and the end of the zipper. Use the serger or zigzag stitch around the edge of the fabric to prevent fraying. Fold the fabric in half on the wrong side, A to A just like on the pattern above. Straight stitch until the marked dot then back stitch, continue to basting until the next marked dot, back stitch then a straight stitch. The basting here is for easy removal once sew the zipper done. (image no. 4, 5, 6)
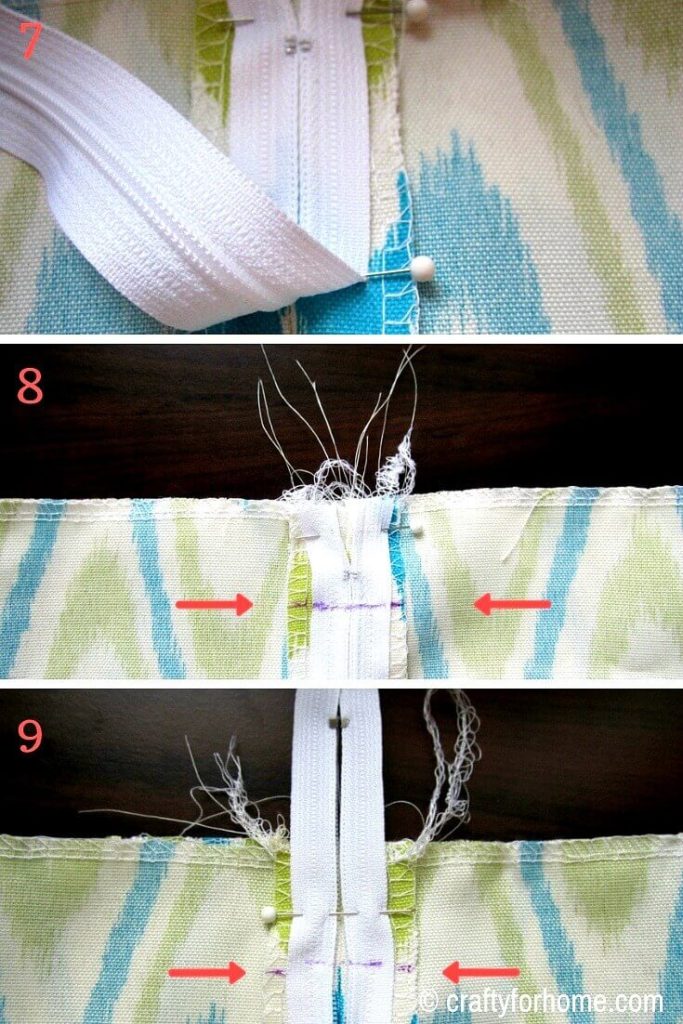
- Put the zipper right in the middle. Pin the zipper before sewing it. (image no. 7)
- Start to sew the zipper with straight stitch starting from the marked dot. Use the zipper foot to do this. Continue sewing until the marked dot again for both sides of the zipper. (image no. 8, 9)
- The result will look like this in the picture below. There will be extra zipper left hanging off the fabric if you use the size longer than the cushion length size. You can keep it that way or just cut it off for a neat looking result. (image no.9)
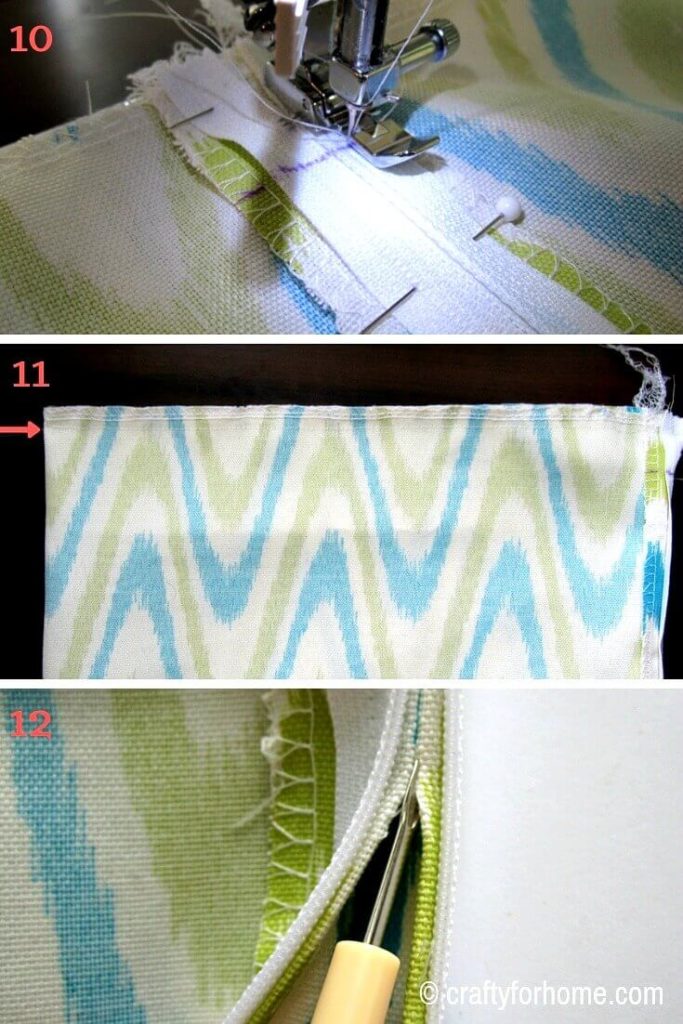
- Straight stitch on the line marked B (on the pattern above) for both sides. (as show on image no.11)
- Use the seam ripper to remove the basting. Clean any extra threads hanged off any corner. (image no.12)
- Turn the fabric inside out. You will see how it looks like where the zipper start and the zipper end. (image no.13)
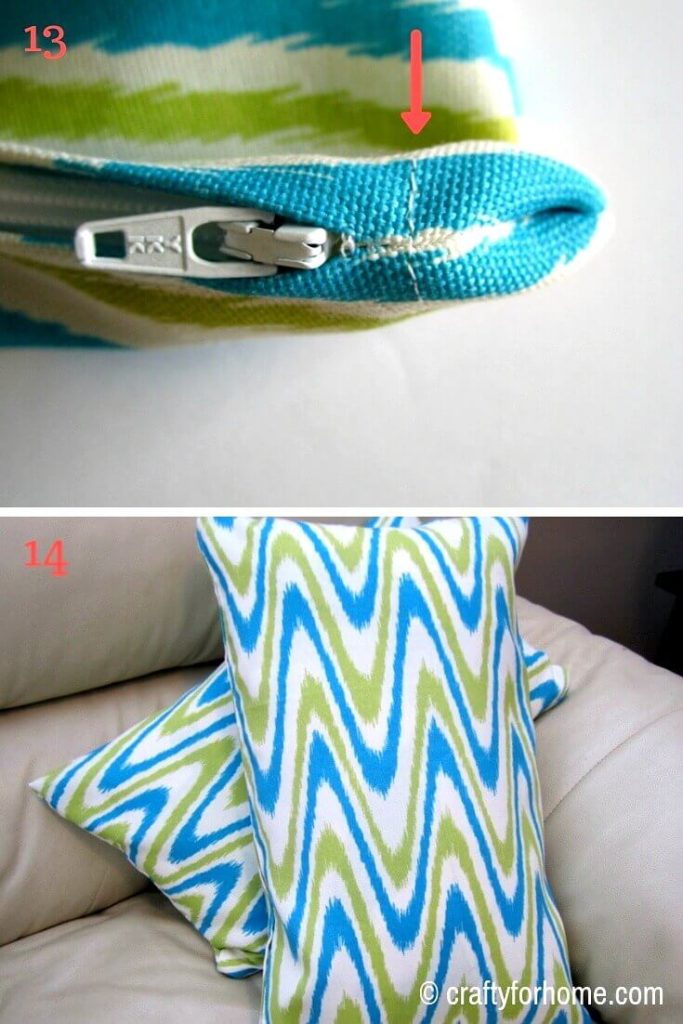
Put the cushion insert into your new covers. Now admire it, enjoy it, be proud of it that you can sew zipper by yourself without fear.
Here is how my cushions with the new looks. Not too bad, in fact, I start making more lists to update some of my decorative cushion covers.
I use it lots for the seating area on the porch too, so this is a great way to freshen up the porch with the new looks. Did I mention that I also use this fabric print to make Reversible Beach Bag?
The image below (13) is how the zipper looks like from the outside of the cushion.
More sewing project for beginner
- Sew Easy Handmade Mitered Corner Napkins
- How To Sew Freezie Cozy
- Easy Felt Envelope
- Handmade Cloth Napkins: Easy Tutorials
- Easy Ribbon Lanyard

Do you like simple craft project for the house? What is your favorite way to brighten up the room without spending a fortune for it?
Okay, I recently got a sewing machine and am so scared to use it on anything real. I would love to do a project like this. I am so intimidated. Any tips for a total newbie?
Just keep trying with some scrape fabric, I was like that too, and slowly start making simple project like some square stuff ( easy and straight stitch), I start with making square pillowcase without zipper, or simple napkins, these things are simple enough, reading some simple tutorials on internet definitely help!
I’m impressed. I always think that zippers are too challenging but I would love to change the couch pillow cushions for the seasons.
Thank you, that would be an awesome project, please do it, you will be impress with the result, new pillow covers will make the room looks different than usual in a good way!
WOW! You made it seem really easy. Maybe I could attempt this?!
Thank you, it is getting easier and easier with this method, I tried so many tutorials how to sew zipper, and this is the best one so far!
Oh my goodness what a totally cute and adorable craft idea!!!!!! I love this!
Thank you, the new fabric color is totally make this craft looks better once its done. hehe
I love the fabrics you selected! And as a pattern maker and former fashion designer, I appreciate your clear and concise instructions. Great blog!
Thank you very much, I have to show the tutorial as clear as possible, and simple enough to follow even for a beginner. I love the pattern too, it is fresh and fun pattern!
I love DIY and crafting! these are easy to follow instructions. Love the fabric one too too!
Thank you, glad to know that the instructions are easy to follow, me too!
So pretty! A perfect project for spring!
My old sewing machine broke and I need to find a sewing machine soon. I keep waiting for a good sale!
Thank you, spring time usually has some good sales in fabric store or online!