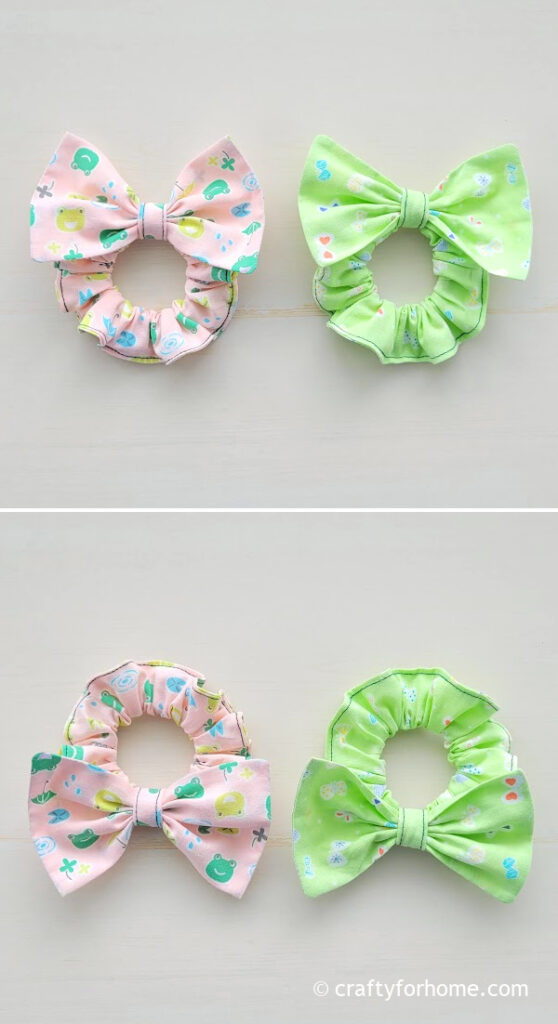
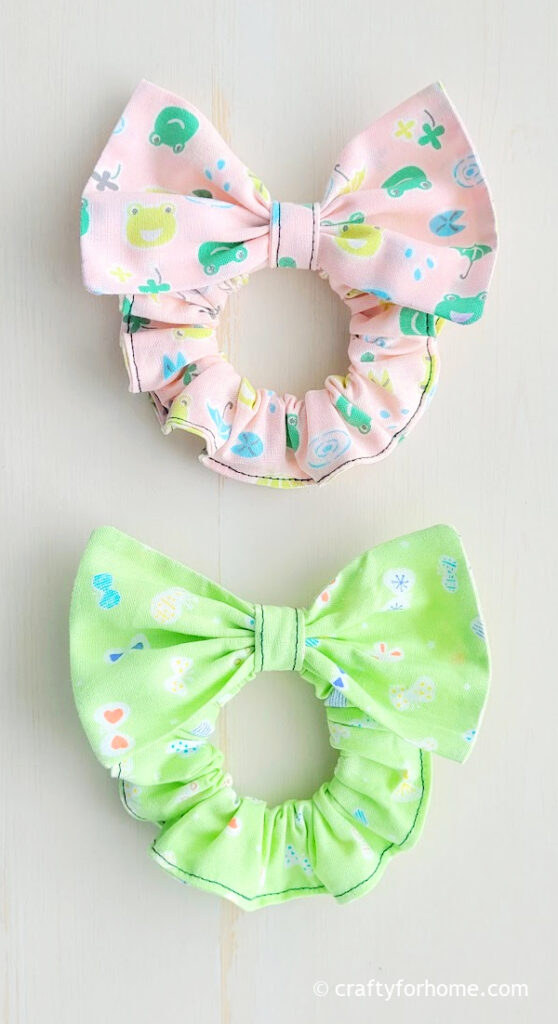
Use a hair tie instead of elastic to make this easy bow scrunchie. This bow tie scrunchie tutorial is easy to follow and is one of the quick sewing projects.
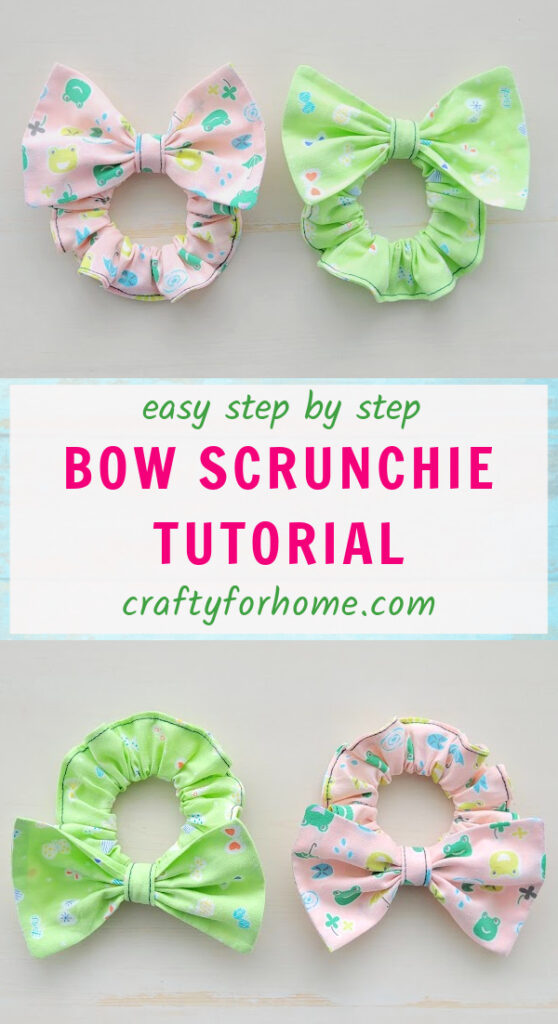
Easy Bow Tie Scrunchie
Scrunchie is a popular thing that is back in fashion today! It is simple to make and useful for everyday wear.
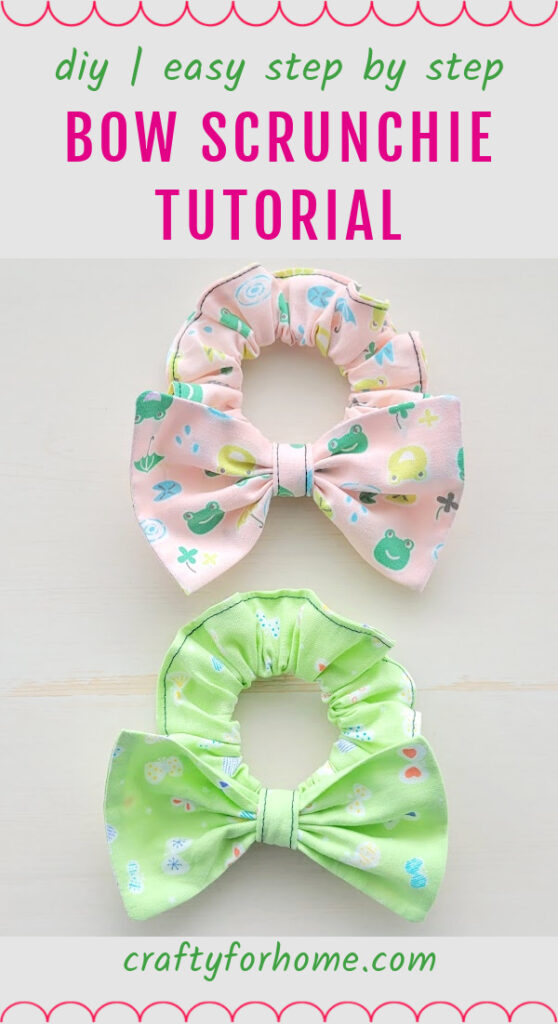
This scrunchie tutorial is a modified version of this super-easy hair scrunchie, and it is easy to customize the scrunchie or the bow tie size by changing the fabric measurement.
Supply To Make Hair Bow Scrunchie
This fabric is the leftover from this phone pouch wristlet, making it a great sewing project to use up fabric scraps.
- 1 pcs of 3″ x 18″
- 1 pcs of 5″ x 6″ for the bow
- 1 pcs of 2″ x 3″ for the bow tie strip
- 1 hair tie
- Pin or quilting clips
- Disappeared ink fabric marker, I use dual-purpose fabric marker
- Thread
- Ruler
- Scissors
- Sewing machine
- Clothes iron
How To Sew A Bow Scrunchie
The video tutorial for the bow scrunchie is also available. Click on this link to watch the Bow Tie Scrunchie video tutorial on my YouTube channel, and subscribe for more videos.
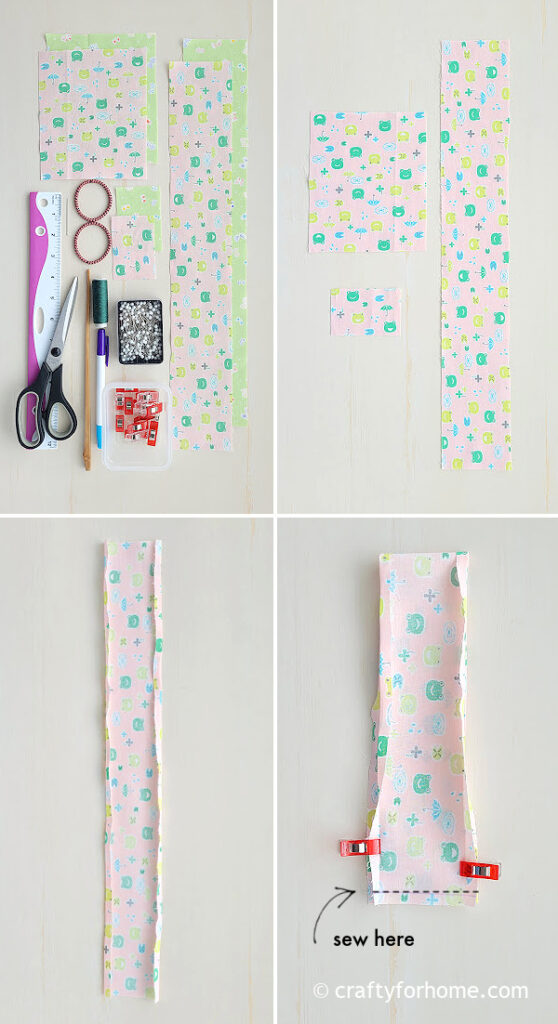
On the larger piece of fabric for the scrunchie, with the wrong side facing up, fold both long edges 0.25″ inward and press it with a cloth iron.
With the right side of the fabric facing up, fold the fabric in half shortwise, then pin both short edges together.
Sew along the short edge with a 0.25″ seam allowance.
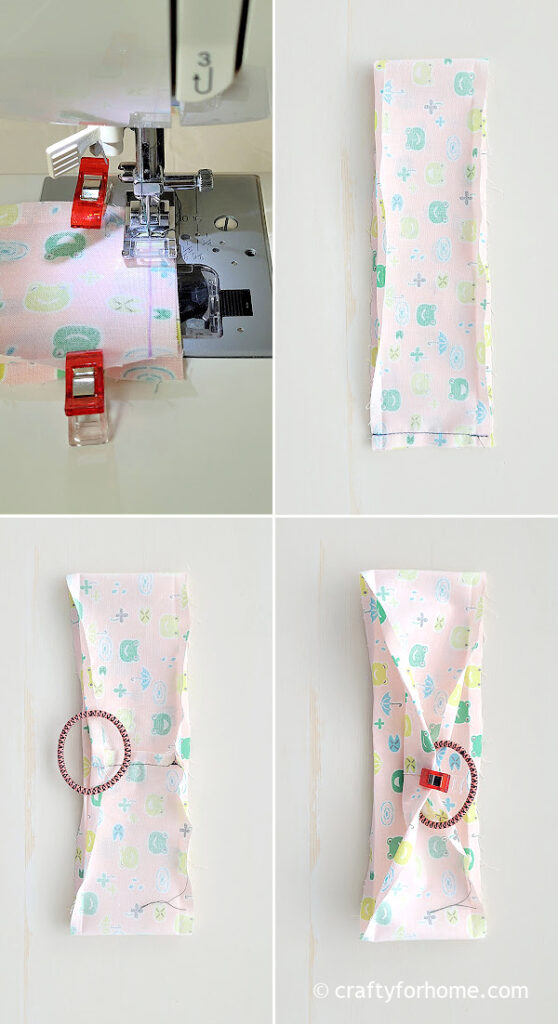
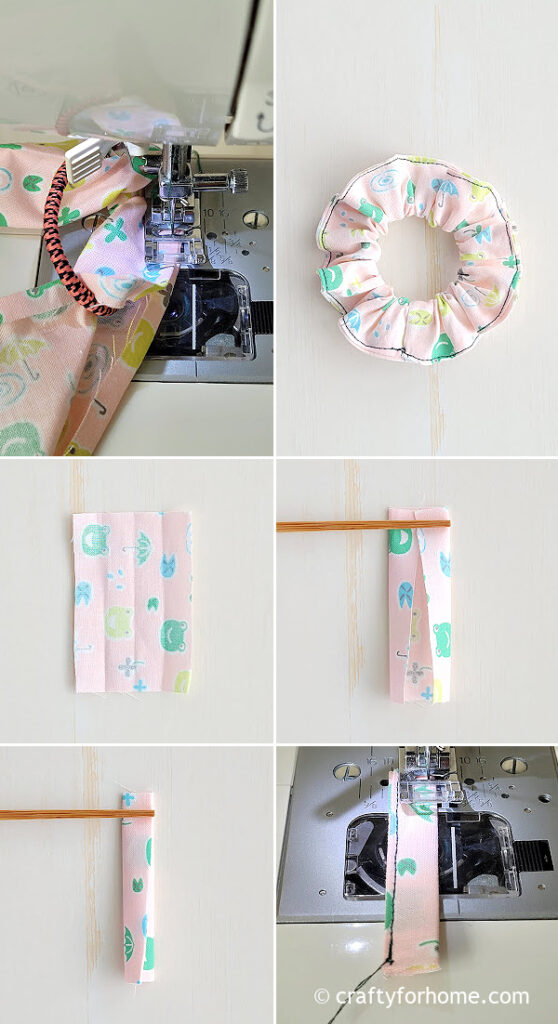
Put the hair tie between the folds, then pin both folded long edges. Sew along the folded long edge.
For the bow strip, with the wrong side facing up, fold the fabric for the bow strip in half lengthwise, open it, then fold both long edges toward the center folded line, then fold it again so that both edges align. Topstitch along both edges
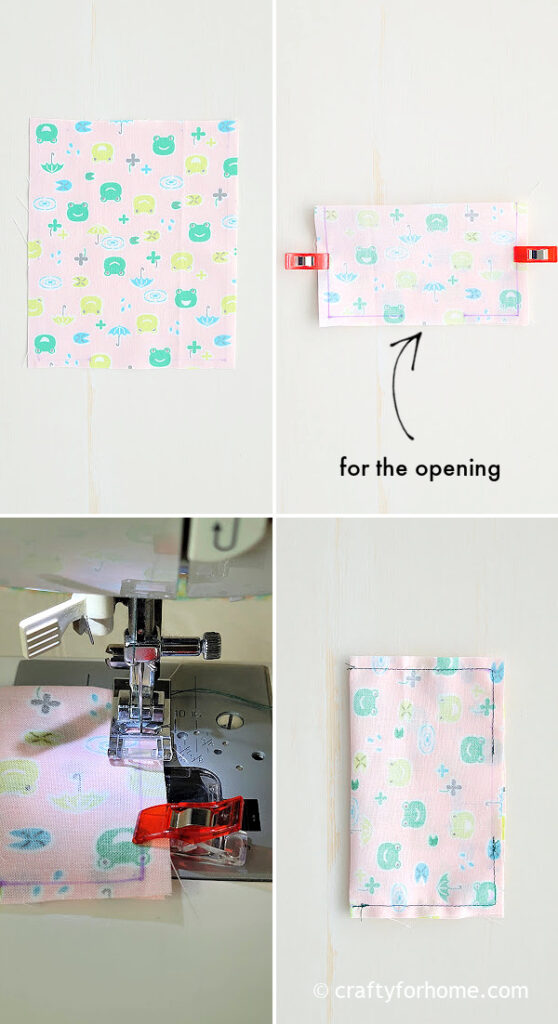
For the bow, with the right side facing up, fold it in half with both short edges aligned. Sew along the frayed edge with a 0.25″ seam allowance and skip 1.5″ in the center for the opening gap.
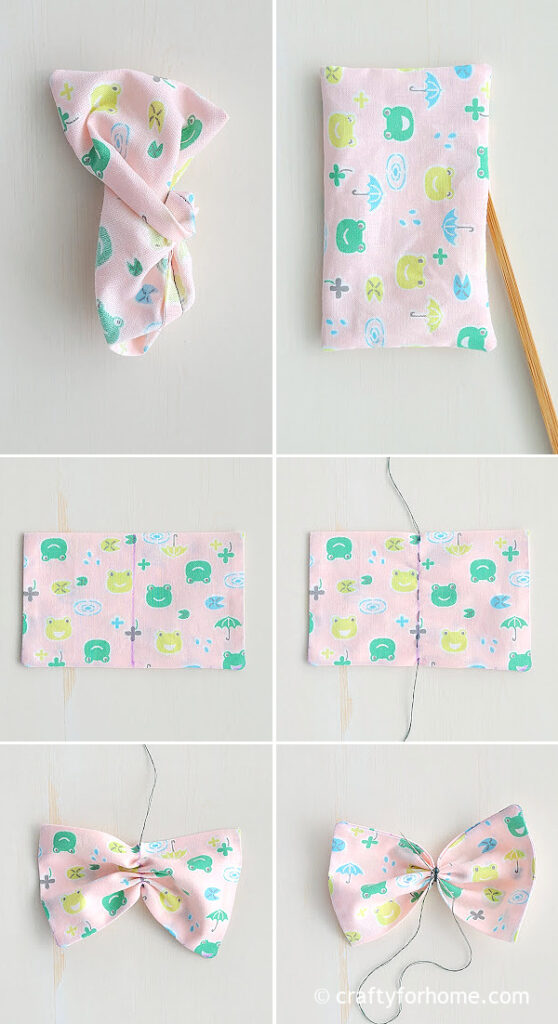
Turn the fabric right side out. Use a chopstick to push each corner. Fold the opening inward and press the fabric with a clothes iron.
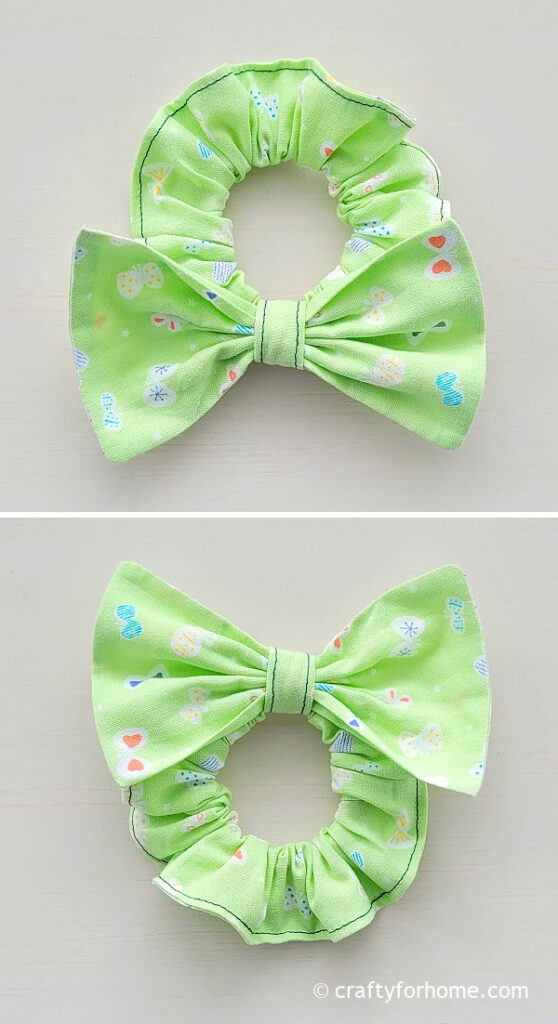
Fold the fabric for the bow in half, marking the folding spot on both edges. Draw a line connecting both spots. Straight stitch along the line using a hand-sewing needle.
Pull the thread and loop it around the center to create a bow. Put the bow on the scrunchie, then the strip
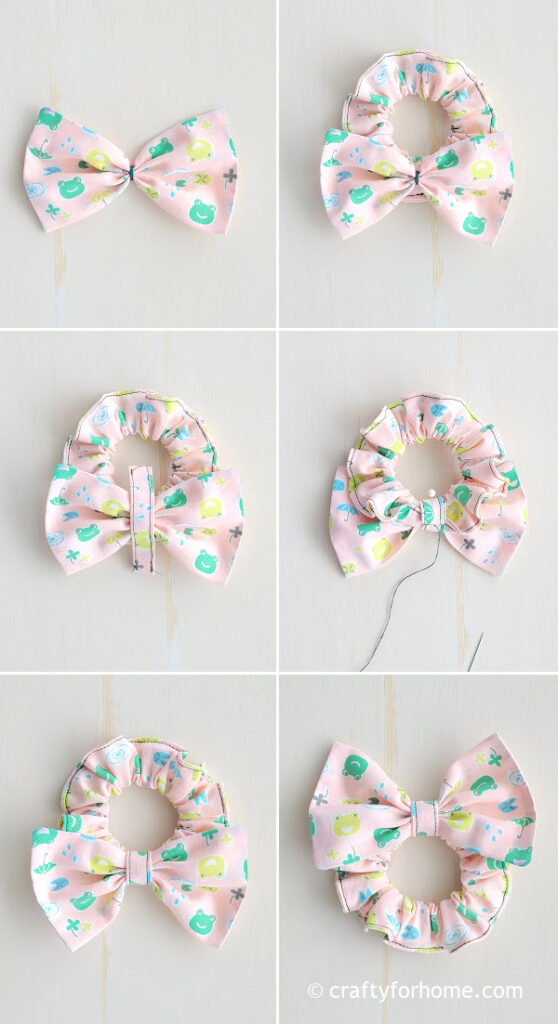
Fold one end of the strip so the raw edge is inside the fold. Sew the strip using a hand-sewing needle with a ladder stitch. You can stitch it through the scrunchie.
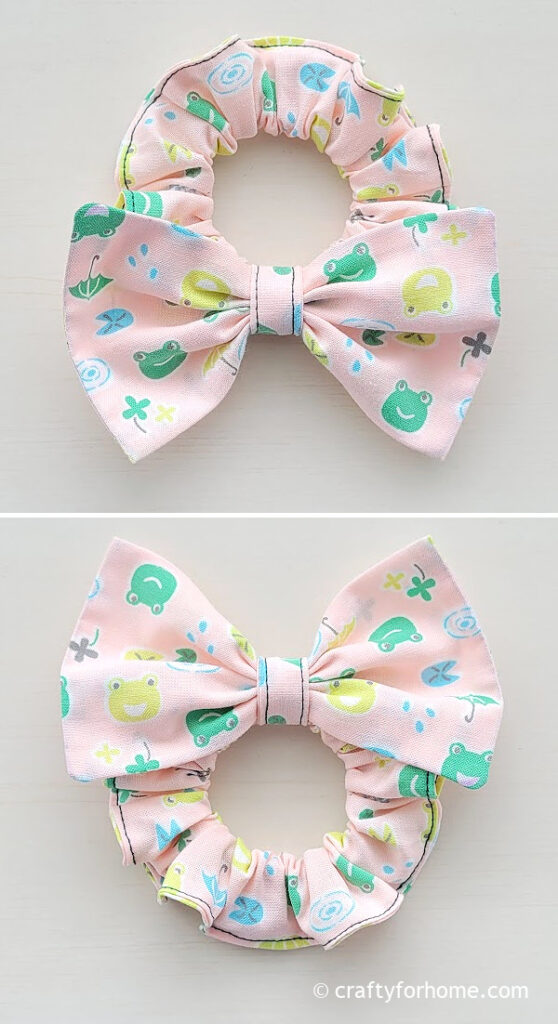
The bow scrunchie is ready to use now.
How To Use Bow Tie Scrunchie
There are various ways to use bow tie scrunchie to achieve different styles of everyday hairstyles.
Ponytail or single braid hairstyle
Make a regular ponytail by gathering whole hair strands, then tie it with a scrunchie with the bow tie on the top. You might want to do one or a few loops of scrunchie, depending on the thickness of the ponytail.
Hair bun
Create a hair bun, high bun or lower one, and tie it with a hair elastic and hair pins if needed. Attach the bow scrunchie to the hair bun with the bow tie option on the top or the bottom.
Pigtail or twin tails
Customize the fabric measurement to make smaller bow scrunchies to tie the twin-tails or twin-braid hairstyle.
There are more ways to use bow scrunchie other than the ones mentioned above. It is also great for birthday party favors, gift ideas, or craft market booth displays.
This scrunchie has a bow tie with a hair tie instead of elastic. #bowscrunchie #scrunchietutorial Share on XMore Sewing Projects From Fabric Scraps
- Fabric Heart Yo-Yo Keychain
- Quarter Keeper Keychain For Shopping Cart
- Fabric Flower Four Different Styles
- Easy Fabric Gift Tags
- Sunflower Coaster Tutorial
- Chapstick Holder Keychain
Easy Sewing Project To Make DIY Bow Scrunchie From Fabric Scraps


Leave a Reply