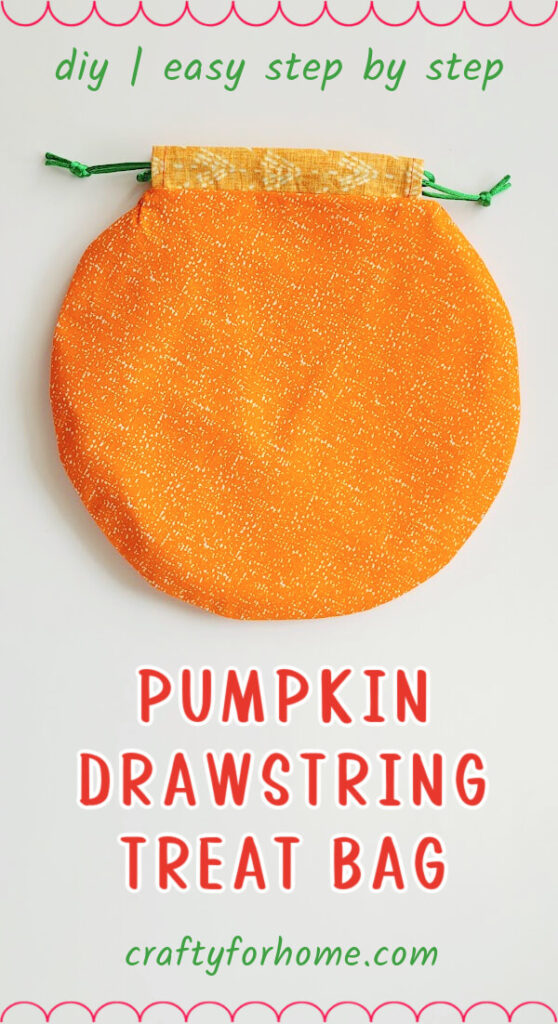
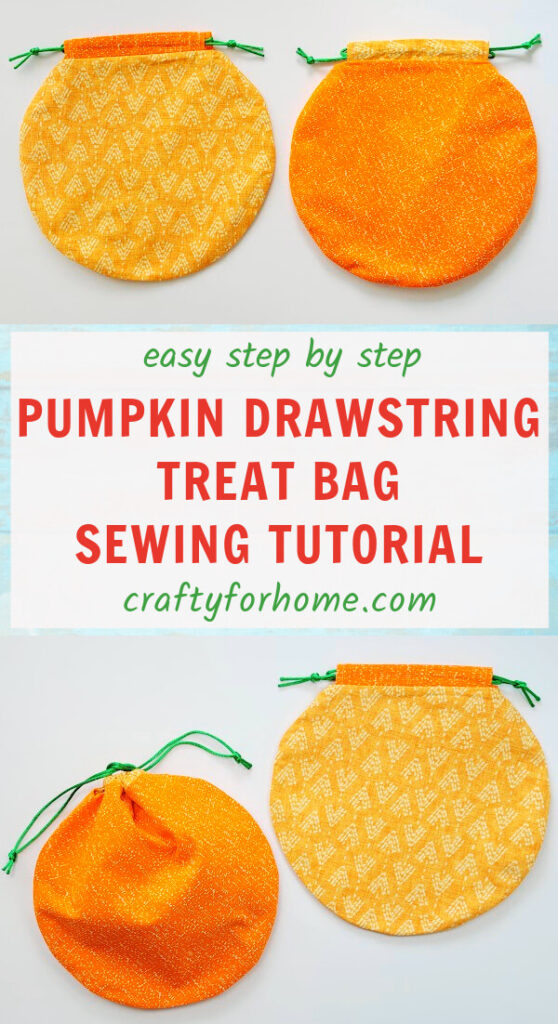
Create this easy trick-or-treat bag from orange fabric by turning it into a round drawstring bag for a fun Halloween craft idea.
DIY Halloween Treat Bag
Looking for a no-carve pumpkin craft for Halloween activity? Here is an easy one that you can use for a treat bag.
As an Amazon Associate I earn from qualifying purchases. This post may contain affiliate links. Please see the Disclosure Policy for details.
Use your favourite fabric prints and colours so that you can use the round drawstring bag year-round after Halloween.
Supplies To Make Round Drawstring Bag
For the round treat bag pattern, use a compass on paper or a 10″ diameter circular item. I trace a 10″ diameter circle of a salad bowl rim on the fabric.
Use decorative string, cord, braided yarn, ribbon, or a narrow green fabric strip for the drawstring.
- 2 pieces of 10″ diameter orange fabric for the outer layer
- 2 pieces of 10″ diameter fabric for the lining
- 2 pieces of 2″ x 6.5″ fabric for string casing
- 2 pieces of 18″ decorative string or cord
- Disappeared ink fabric marker, I use this dual-purpose fabric marker
- Quilting clips or pins
- Thread
- Chopstick
- Safety pins
- Lighter
- Scissors
- Sewing machine
- Clothes iron
Round Drawstring Bag Tutorial
The video tutorial is also available. Click on this link to watch the Pumpkin Round Drawstring Treat Bag video tutorial on my YouTube channel and subscribe for more videos.
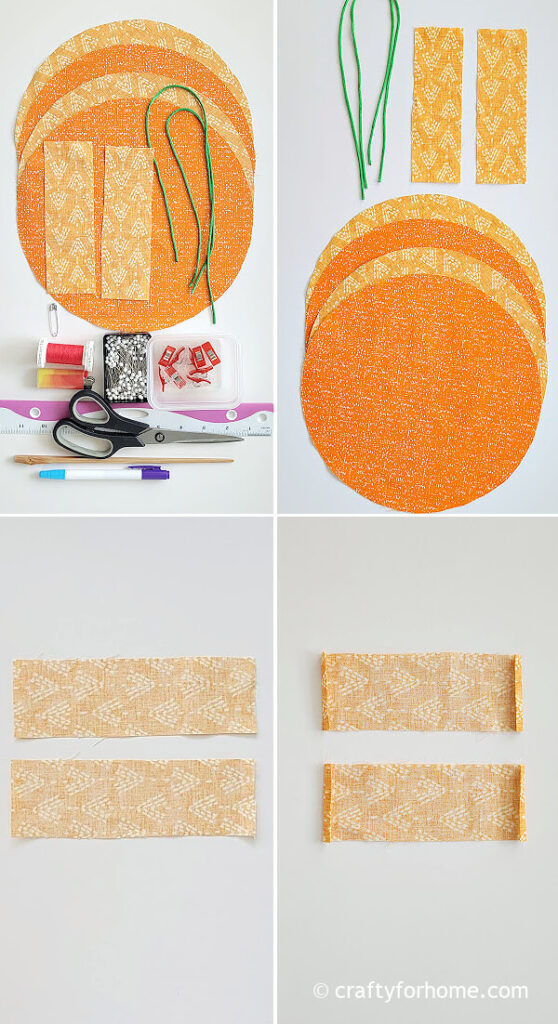
Fold both short edges of the fabric strips twice, then topstitch them.
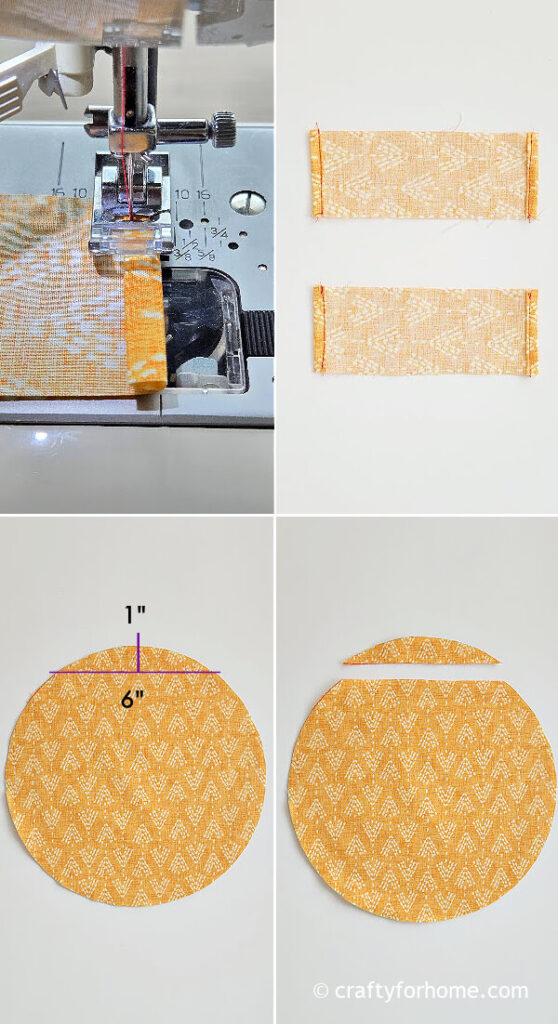
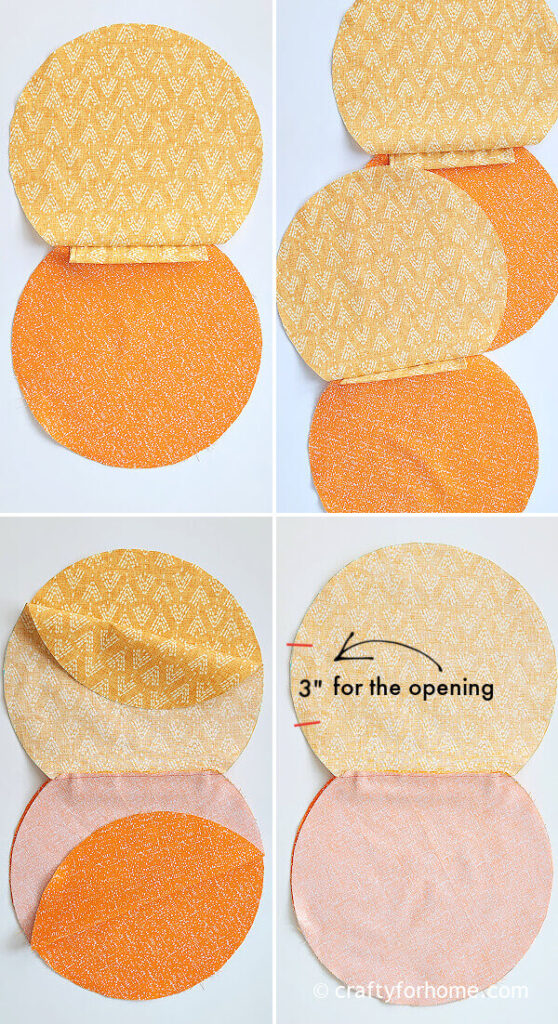
Pin the outer fabric and lining together. Measure 1″ from the edge toward the center of the fabric, then measure 6″ across from the left circular edge to the right.
Trim the round fabric on the measured line.
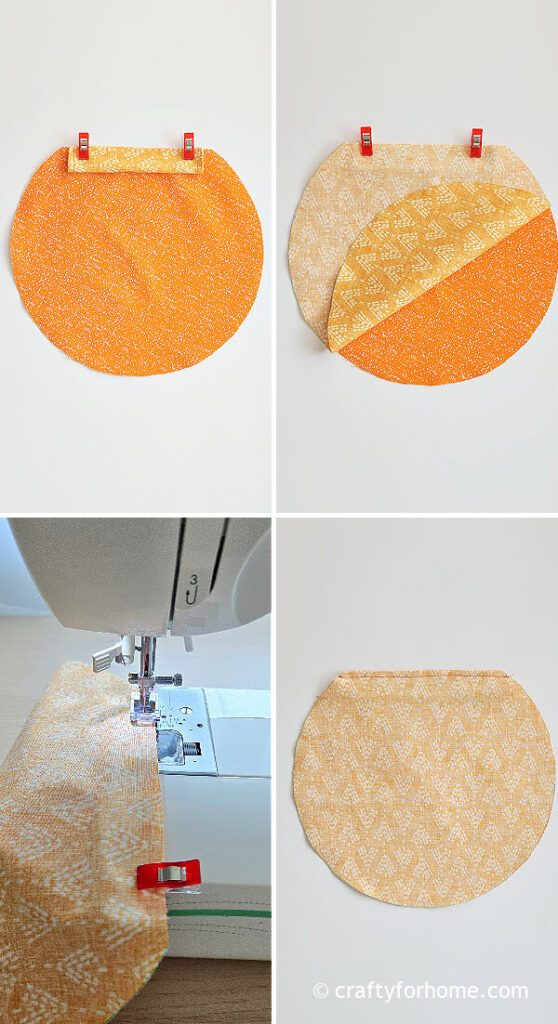
With the right side of the outer fabric facing up, fold the fabric strip lengthwise so that the wrong side of the fabric is inside, then pin it to the straight edge of the outer fabric.
With the right side of the lining fabric facing down, pin all materials by aligning the straight and circular edges.
Sew along the straight edge with 0.25″ seam allowance.
Repeat the process of the other fabric pieces.
Pin both assembled fabrics together by aligning the circular edges.
Sew along the edge and skip 3″ on the lining fabric for the opening gap.
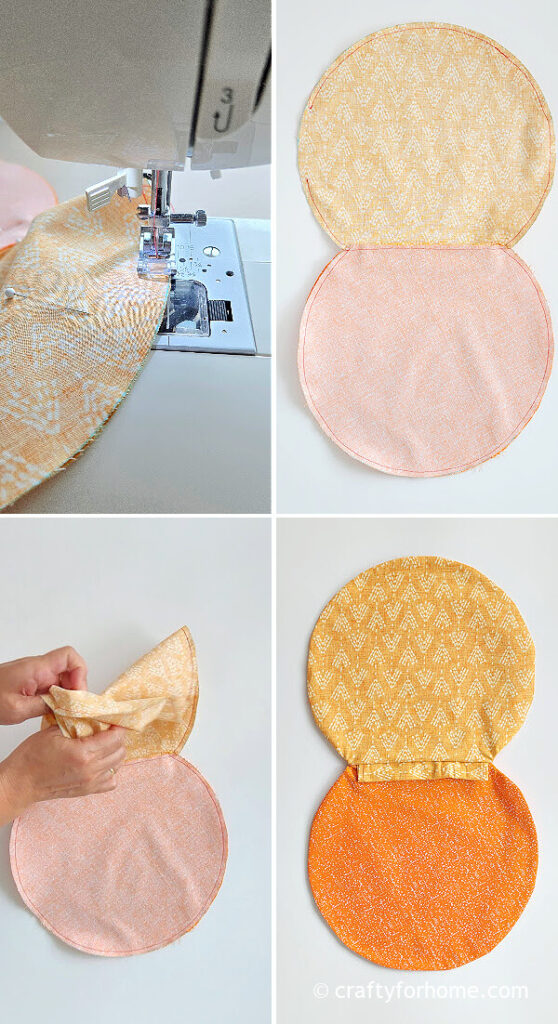
Turn the fabric right side out through the opening.
Push the circular seam edge with a chopstick.
Press the pouch with a clothes iron.
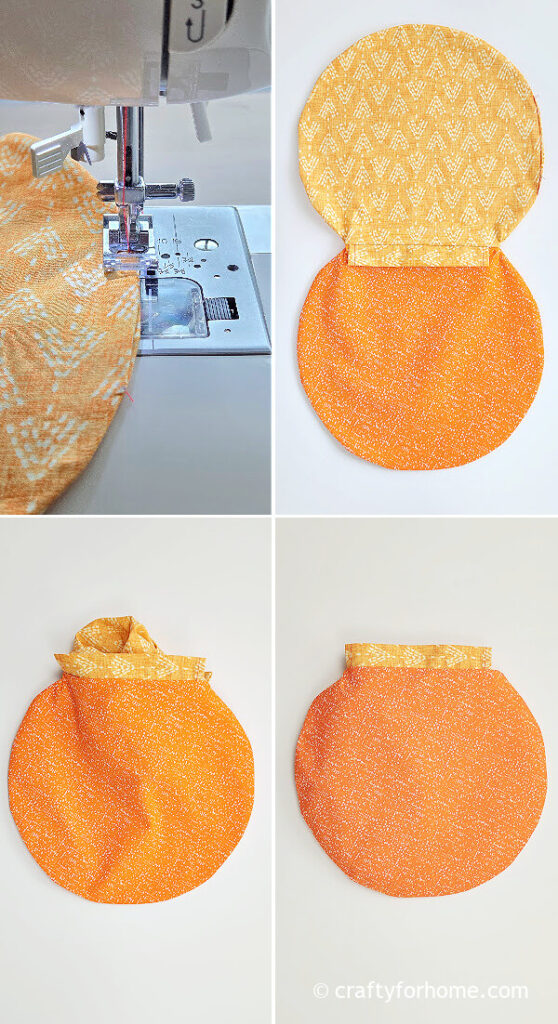
Topstitch the opening closed.
Push the lining inside the pouch.
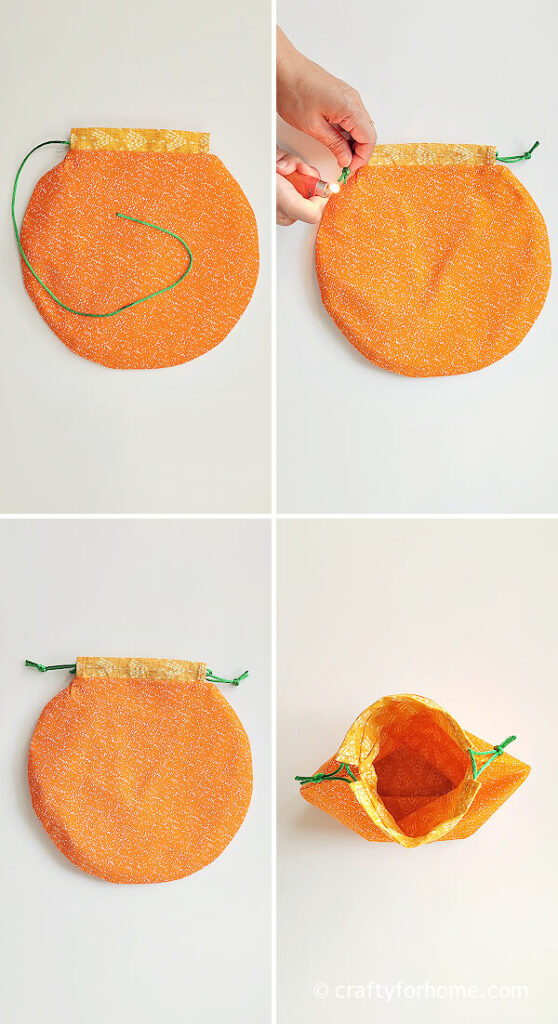
Thread the decorative string through the casing by alternating the left and right entrances.
Make a knot on both strings, then seal the string edge with a lighter if needed.
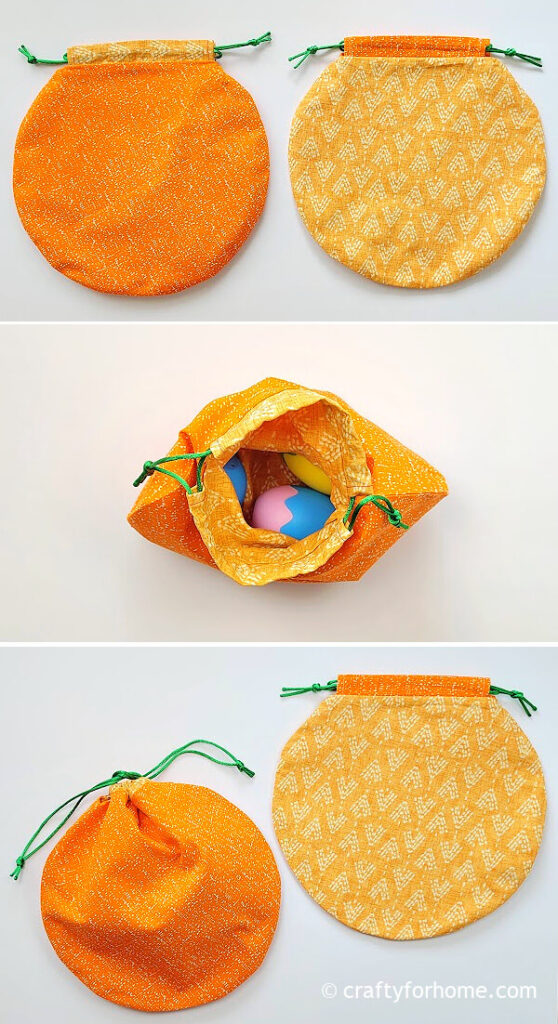
The DIY candy bag for Halloween is now ready to use.
Put some candy treats inside the bag, pull both strings and make a knot.
Size Of Pumpkin Treat Bag
Because this pouch is made of orange fabric, it resembles a pumpkin treat bag. Feel free to draw any spooky face on the bag using a black fabric marker, or create a pumpkin grin out of black fabric and attach it to the bag using Steam-a-Seam Double Fusible Web or fabric glue.

The size of the pumpkin drawstring treat bag is 9.5″ in diameter, and it has enough space for several candy treats.
When you are not using this bag for Halloween, the round drawstring bag is also great for packing small items you need for travel.
Create this reusable pumpkin drawstring bag for trick-or-treating. #Halloweentreatbag #drawstringbag Share on XMore Easy Treat Bags To Make
- Watermelon Treat Bag
- Candy Cane Felt Treat Bag
- Teal Halloween Felt Treat Bag
- Easter Bunny Treat Bag
- Easter Egg Treat Pouch
- Mini Fabric Basket Tutorial
DIY Treat Bag for Halloween From Orange Fabric To Resemble A Pumpkin


Leave a Reply