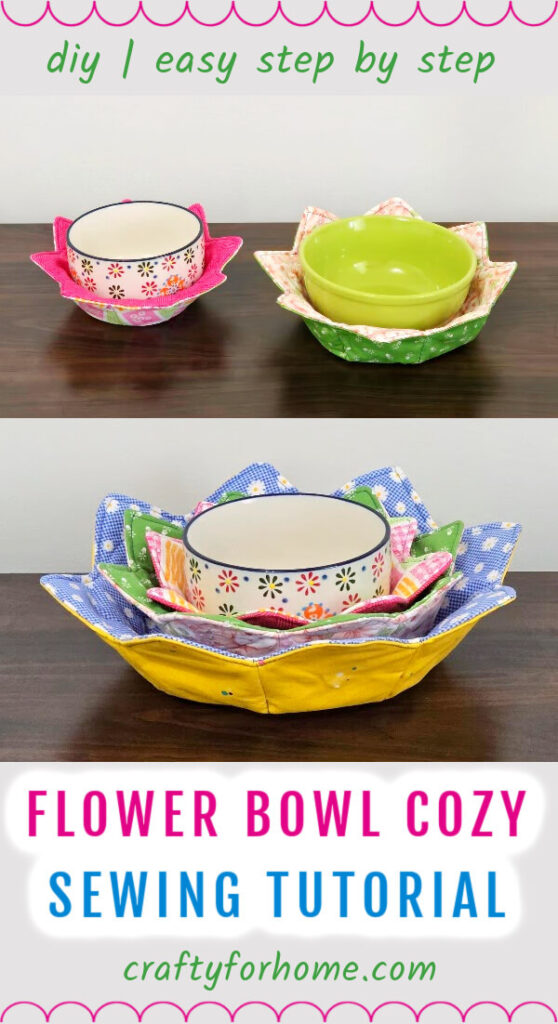
Make a DIY flower bowl cozy, fabric bowl holder, or bowl hot pad that you can use to microwave a bowl of food and protect your hand when holding a bowl of hot meals.
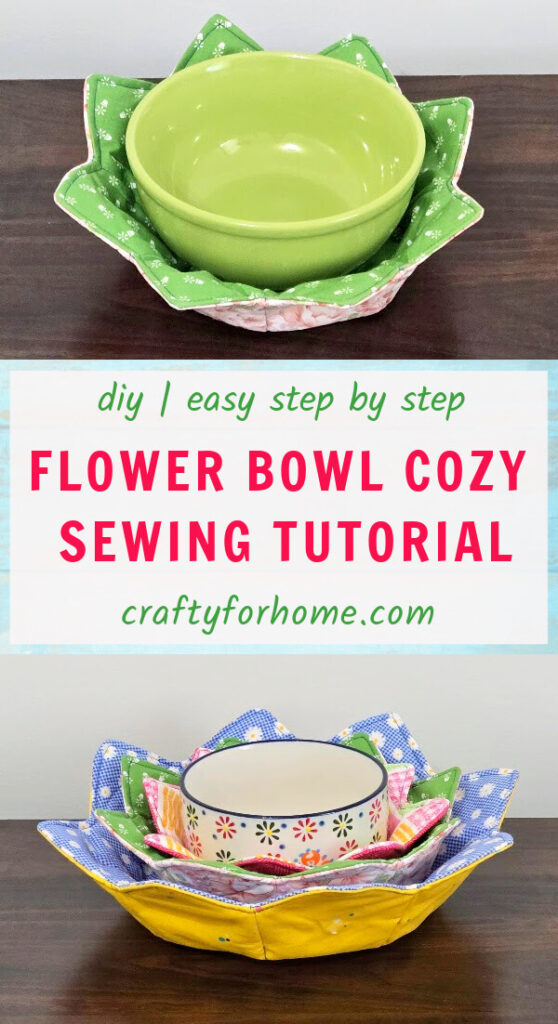
Fabric Flower Bowl Cozy Pattern
One more easy sewing project for the kitchen is to make this fabric flower bowl. The fabric bowl is great for daily mealtime or gift-giving ideas.
As an Amazon Associate I earn from qualifying purchases. This post may contain affiliate links. Please see the Disclosure Policy for details.
It is not only for a bowl hot pad. You can also use it for hair accessories storage display or for keeping sewing supplies that you often use for easy access, like thread, pins, clips, seam rippers, and small scissors. You can also use it as a pad for stacking bowls in the cabinet.
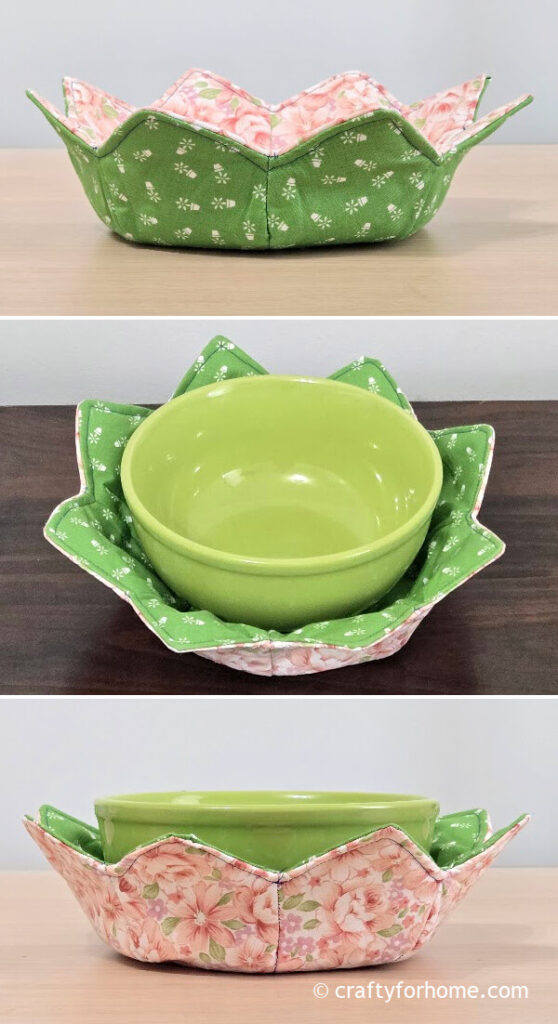
This bowl holder has a flower petal edge shape. It is a modified version of this soup bowl pad tutorial.
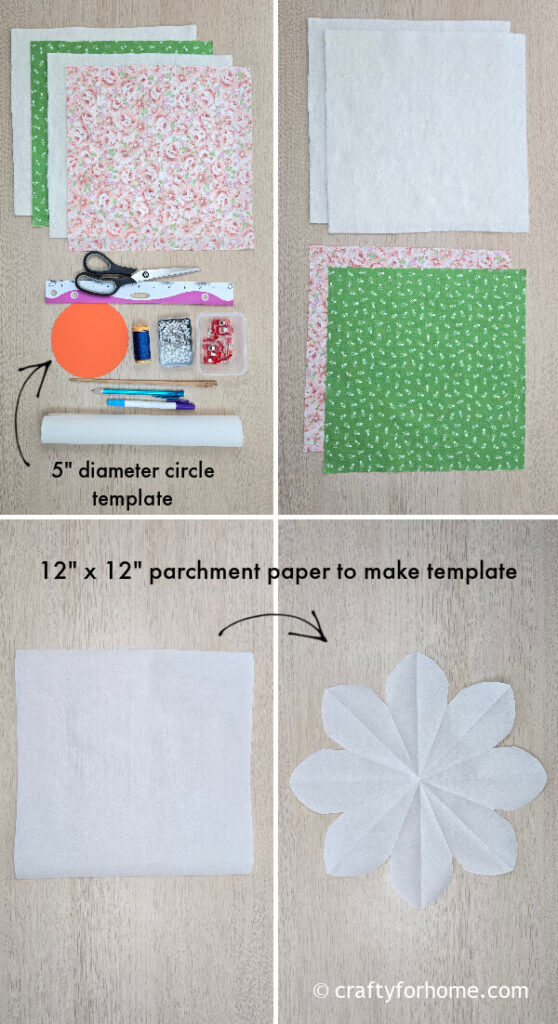
Supply To Make Flower Edge Bowl Cozy
The tutorial below is for making a medium-sized bowl holder that fits a 6″ to 8″ bowl size. The measurements to make the smaller and larger bowl holders are provided below.
To make your own flower template, use parchment paper, brown craft paper, gift wrap paper, or any paper that is large enough. You will use the origami similar to make a paper snowflake.
If you prefer the ready-to-print flower template, click on this link to get the cozy flower bowl template in the PDF version.
Use a half-yard fabric and batting to get two pieces of 12″ square fabric and battings. If you want to use it for microwaving a bowl of food, use 100% cotton fabric, batting, and thread.
Use one layer of batting if you use a thicker cotton batting like this Wrap N Zap from Pellon. While it is based on preference, I prefer two layers of cotton battings, one for each side. Also, you might want to prewash the fabric first to reduce the shrinkage.
Disclaimer: Even though this item is 100% cotton, and it can be use in the microwave, Crafty For Home and I are not responsible for any issue that may arise from microwaving food using a bowl cozy you made from this tutorial. Please follow the instructions on your appliance manual or the food packages for warming up food in a microwave. Any appliance may have different capabilities.
- 2 pieces of 12″ x 12″ cotton fabric
- 2 pieces of 12″ x 12″ cotton batting, the Wrap N Zap is a 100% cotton batting.
- 5″ diameter circle paper template, use a pen compass on paper or any small object like a small plate to make a 5″ diameter circle
- 1 piece of 12″ x 12″ parchment paper or brown Kraft paper, gift wrapping paper, or origami paper to make a paper flower template, or get the PDF on this link to print the flower bowl cozy pattern.
- Disappeared ink fabric marker. I use this dual-purpose fabric marker
- Pins or quilting clips
- 100% cotton thread
- Chopstick
- Ruler
- Scissors
- Clothes iron. I use one similar to this cute mini craft steam iron
- Sewing machine
For a small flower bowl holder, use 2 pieces of 10″ x 10″ fabric, 2 pieces of 10″ x 10″ cotton batting, 1 piece of 10″ x 10″ parchment paper, and 4″ diameter circle template.
For the larger flower holder, use 2 pieces of 14″ x 14″ fabric, 2 pieces of 14″ x 14″ cotton batting, 1 piece of 14″ x 14″ parchment paper, and 6″ diameter circle template.
Flower Bowl Cozy Tutorial
The video tutorial is also available. Click on this link to watch the Flower Bowl Cozy Video Tutorial on my YouTube channel, and subscribe for more videos.
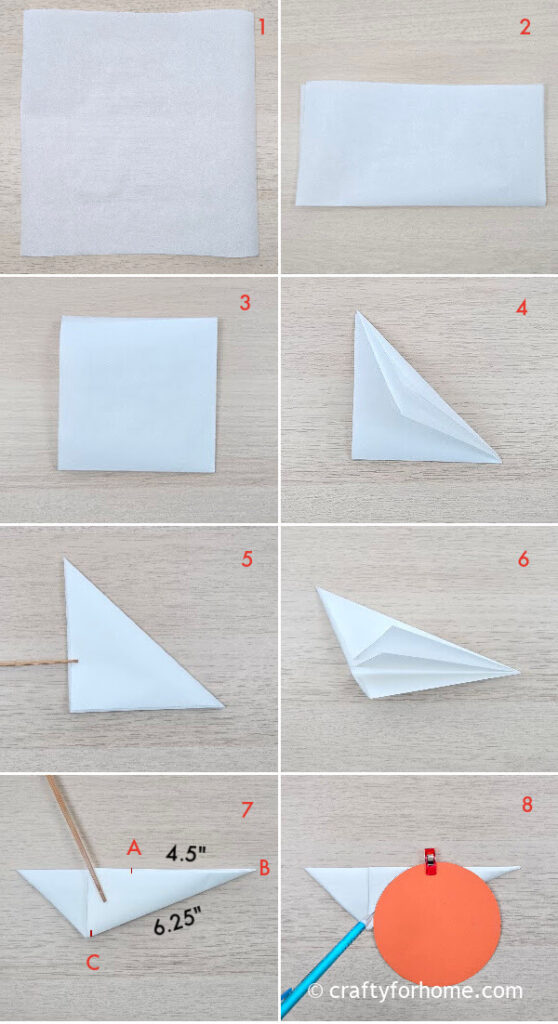
To make the flower template, fold the parchment paper in half, then fold it again in half, so now you have a quarter size of the parchment paper square (image no. 1, 2, 3).
Then, fold the paper in half into a triangle shape and fold the middle corner up. The paper would look like a triangle with the shortest, medium, and longest edges (image no. 4, 5, 6)
Mark the longest edge A to B: 4.5″ and the medium length edge C to B: 6.25″. Then, draw a curve line by tracing the edge of the 5″ diameter circle curve from point A to C, as shown in the image above (image no. 7, 8).
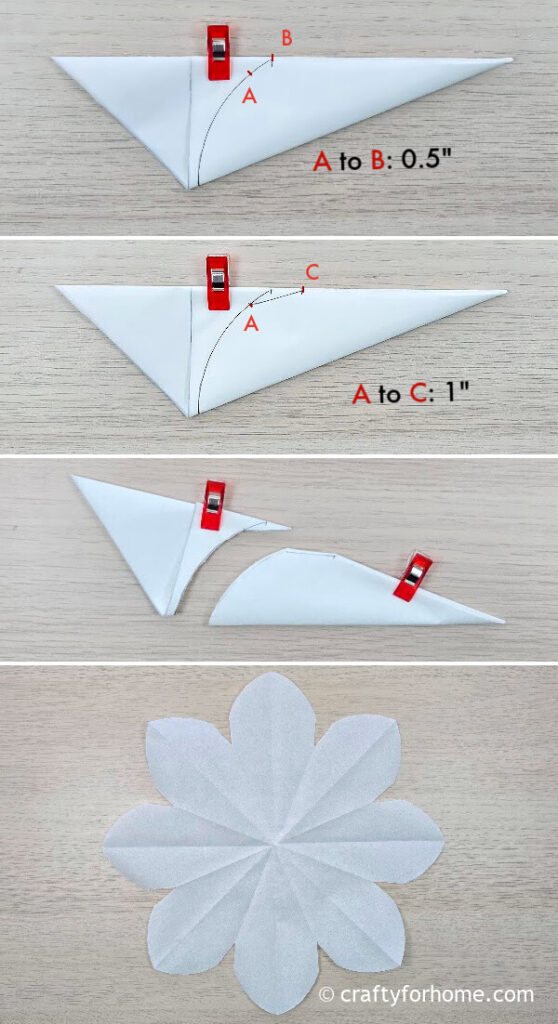
Mark the curve from point A to B: 0.5″, then draw a line for the dart from point A to C: 1″, as shown in the image above. Cut the paper along the curve line to the dart C.
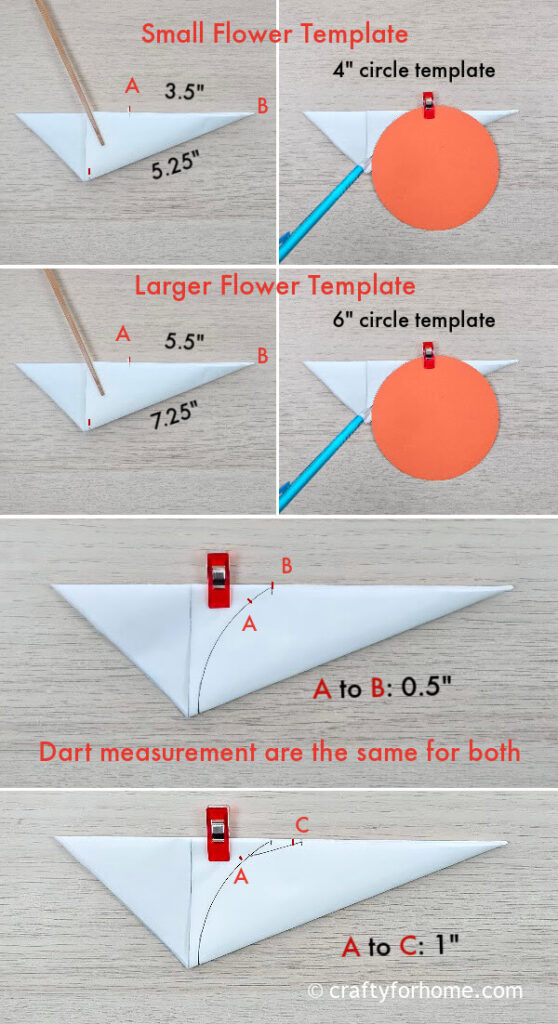
Measure the parchment paper triangle of the small and larger bowl holder sizes, as shown in the image above. The dart measurements are the same for all sizes.
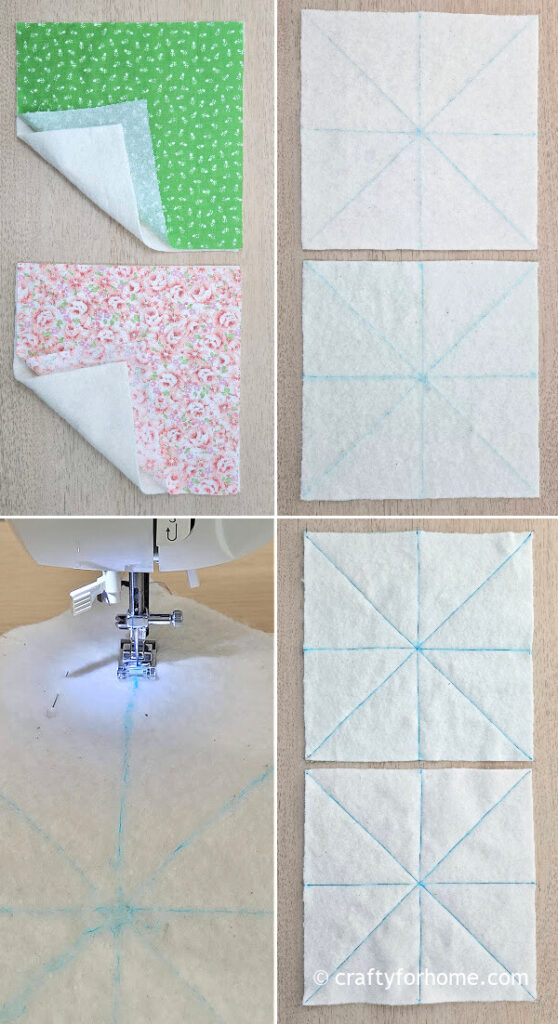
Put the batting on the wrong side of each fabric, then draw horizontal, vertical and diagonal lines on the batting. Sew along all marked lines.
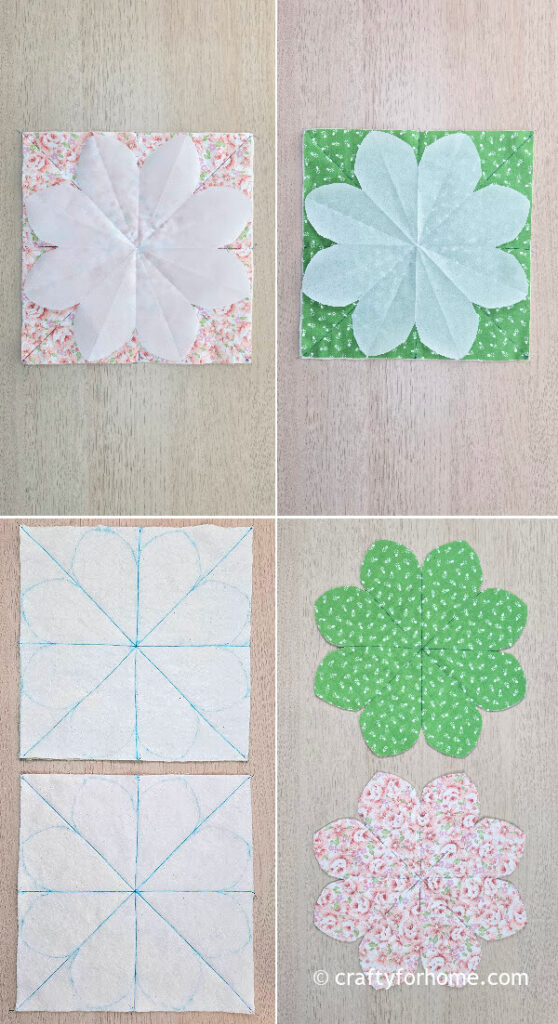
Trace the flower template on all fabric layers. Cut the fabric along the traced flower petal edge.
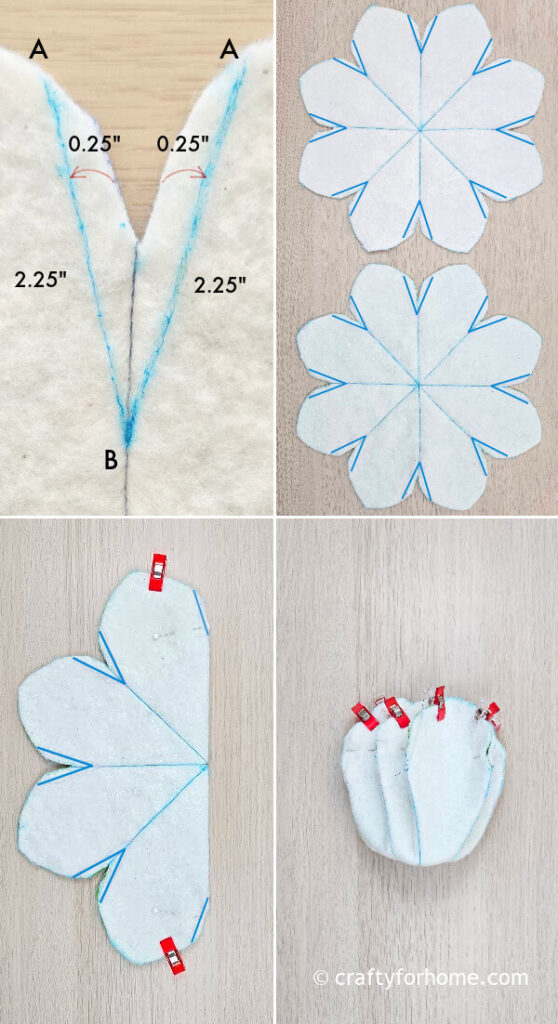
Mark on all dart areas, 0.25″ from the edge and A to B: 2.25″ to form a V line. Fold and pin the dart on each side.
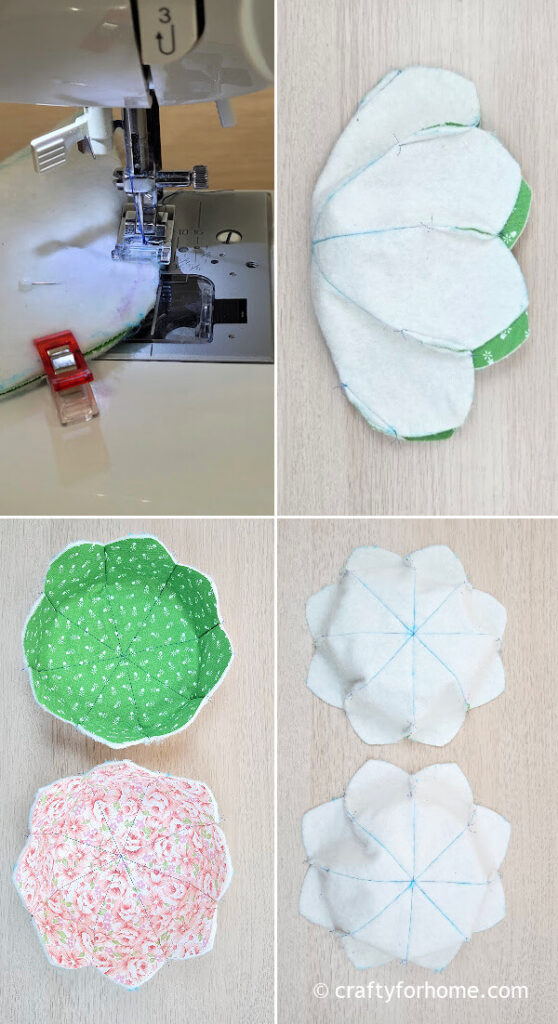
Sew all the dart lines. Pin both fabric bowl layers together, with the right side facing each other.
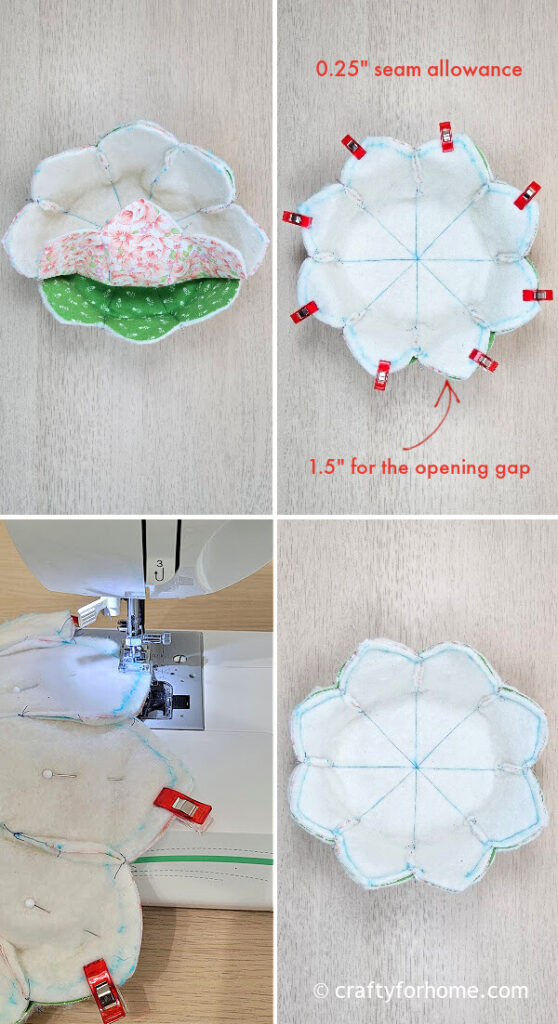
Align each petal of both fabric layers. Sew the fabric bowl along the edge with a 0.25″ seam allowance. Skip 1.5″ or 2″ for the opening gap.
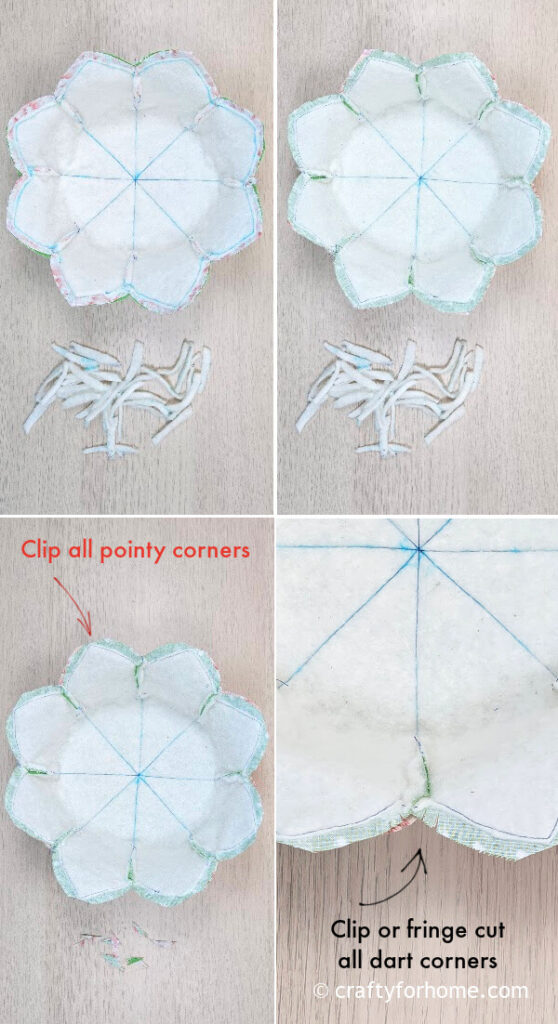
Trim the extra batting from the seam on both sides. Clip all pointy corners. Clip or fringe cut on all dart corners.
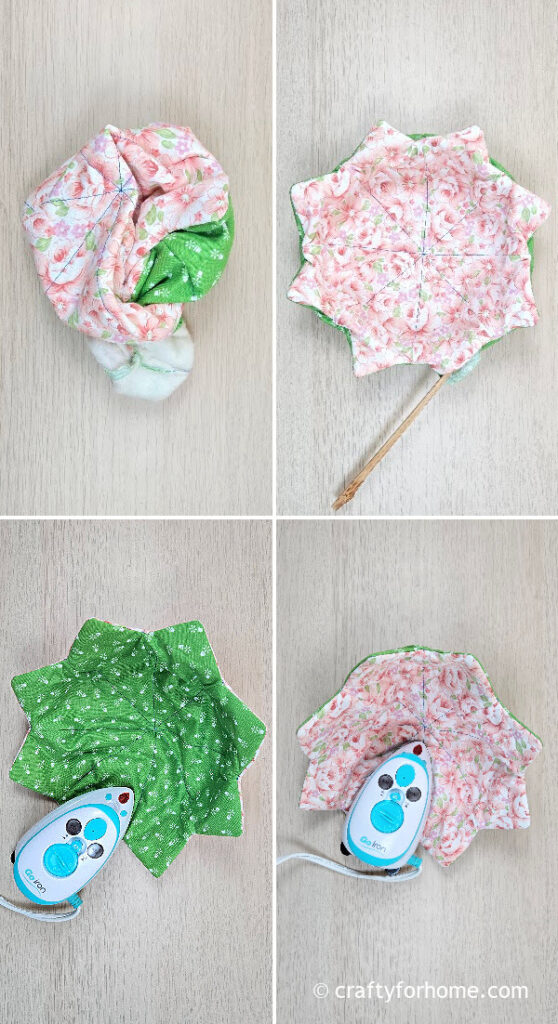
Turn the flower bowl on the right side out through the opening. Push each corner with a chopstick. Press the fabric bowl with the clothes iron.
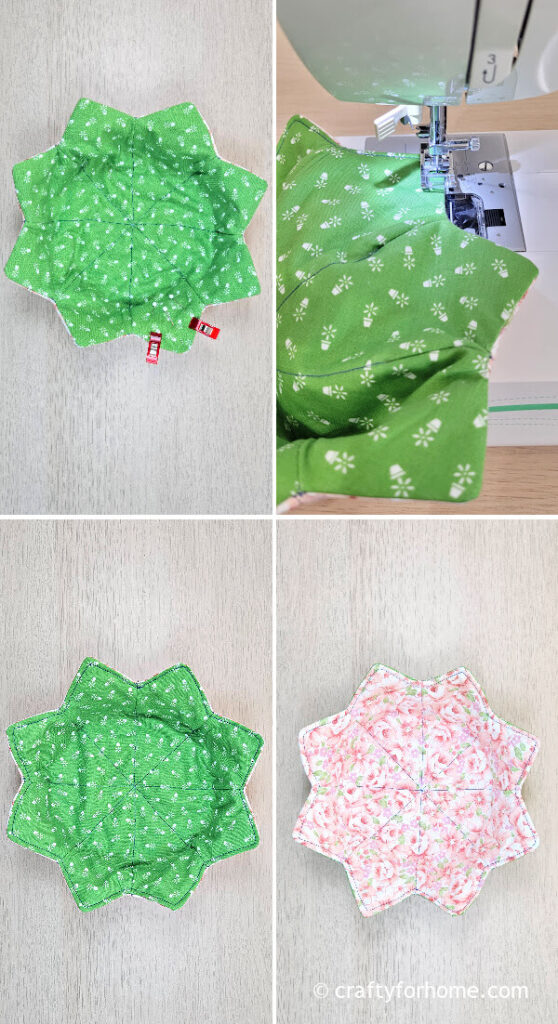
Fold the opening gap edge inward, pin it, then topstitch along the edge and close the opening at the same time. The fabric flower bowl cozy is ready to use now.
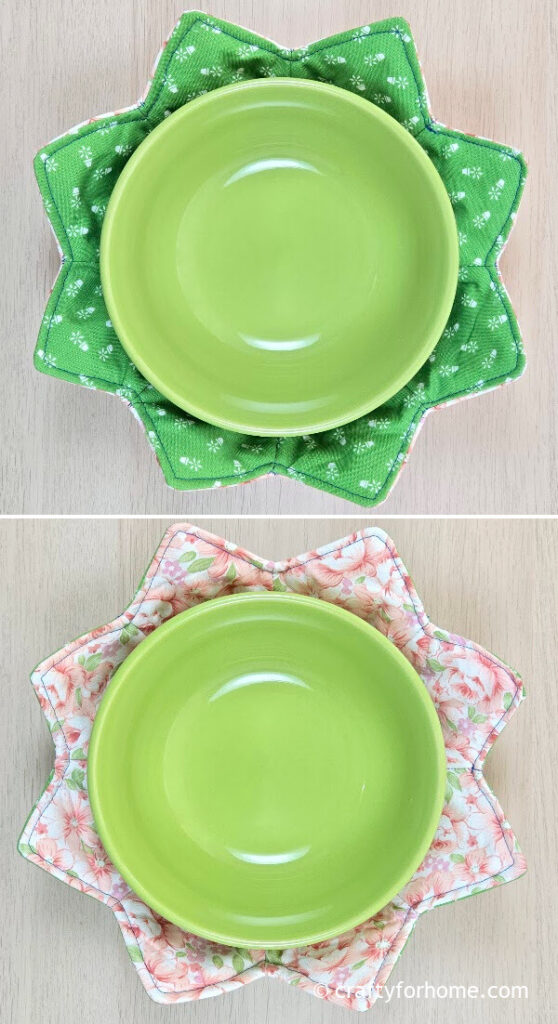
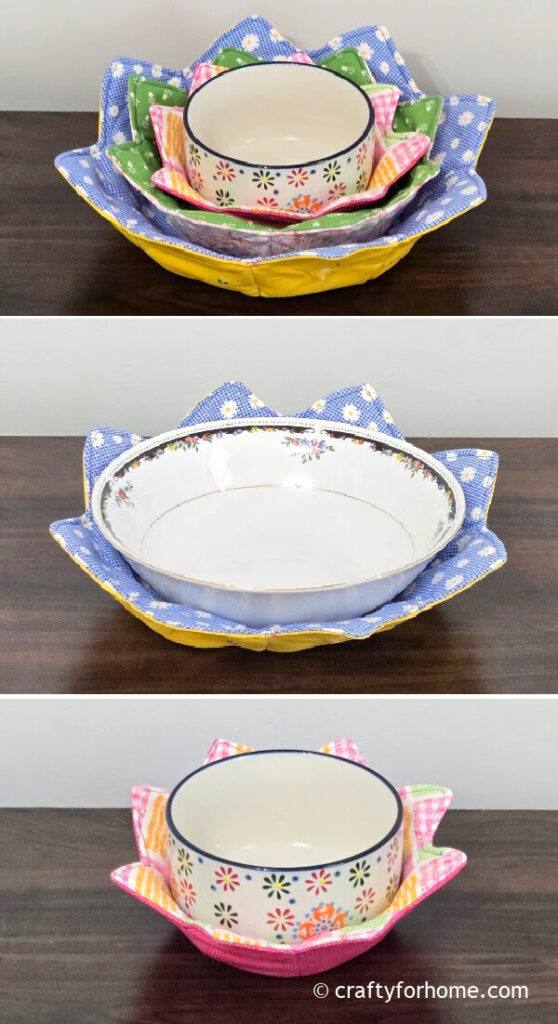
The Size Of The Flower Bowl Holder
The small flower bowl cozy fits a 4″ to 6″ bowl size, a medium one fits a 6″ or 8″ bowl size, and the large one fits an 8″ to 9″ salad bowl.
Add simple quilting by topstitching along each stitched line to keep the fabric bowl shape during washing. Another way is to stitch an X mark in the center using a straight or zigzag stitch.
To keep the fabric bowl shape after washing, let it air dry upside down on top of a bowl, then press it with a cloth iron once it is dry.
Get The PDF

If it is more convenient to have the printable version of this tutorial for the project, you can purchase the Printable PDF Format of Flower Bowl Cozy Template And Sewing Tutorial here. The e-book has the template and complete tutorials with pictures included. There are no ads or video displays on the PDF so that you can print it, and it will be available for you anytime you need the tutorial for your next project. Click on the e-book cover image above to purchase.
Use a flower template to make a flower bowl cozy with this tutorial. #bowlholder #fabricbowl Share on XMore Sewing Projects For The Kitchen
- Casserole Dish Cozy With Extra Fabric For The Handle
- Pie Plate Cozy Sewing Tutorial
- Dinner Plate Cozy To Replace A Placemat
- Tortilla Warmer Tutorial
- Bread Rolls Warmer Tutorial
Easy To Make DIY Petal Bowl Cozy From Two Fabric Squares


Leave a Reply